El Niño’s Historical Impact on the Coming Garden Season.

Preparing for El Niño 2024:

A Comprehensive Guide for Homestead Gardeners in North America

As El Niño fades away in 2024, understanding its impact on specific North American growing regions is worth considering for homestead gardeners. El Niño characterized by the warming of ocean waters in the equatorial Pacific, influences weather patterns globally, especially in North America. This article provides a detailed overview of expected conditions in various regions and offers tailored advice for gardeners.

El Niño’s Post Impact on North American Weather Patterns

El Niño generally results in altered weather patterns across North America in the year following its occurrence :

  • Western Canada and the Pacific Northwest: Typically, these areas experience drier and warmer winters during El Niño. Gardeners should prepare for reduced snowpack and potential drought conditions, impacting water availability for spring and summer.
  • California and the Southwest U.S.: Increased precipitation is a common effect, which could lead to early spring planting opportunities but also raises concerns about flooding and soil erosion.
  • Midwest and Central U.S.: The region may see a mix of impacts, from warmer temperatures to increased moisture. This variability requires gardeners to be flexible in planting dates and crop choices.
  • Northeastern U.S. and Eastern Canada: These areas might experience milder winters, potentially extending the growing season but also increasing the likelihood of pests and diseases due to warmer temperatures.
  • Southeastern U.S.: Expect cooler and wetter conditions, which could benefit spring crops but also challenge pest management and disease control.

Regional Gardening Predictions for 2024 

For each region, specific gardening strategies can optimize productivity during El Niño:

  • Western Canada and the Pacific Northwest:
    • Invest in water conservation measures such as rainwater harvesting and drip irrigation.
    • Consider drought-resistant plant varieties and adjust planting schedules to capitalize on warmer winter temperatures.
  • California and the Southwest U.S.:
    • Prepare for excessive rainfall with proper soil drainage strategies to prevent erosion.
    • Start seedlings indoors to avoid external weather impacts before transplanting.
  • Midwest and Central U.S.:
    • Utilize cover crops to manage increased soil moisture and prevent nutrient leaching.
    • Be ready to adjust planting times based on the onset of warmer spring temperatures.
  • Northeastern U.S. and Eastern Canada:
    • Extend the growing season by using cold frames and hoop houses to protect against unexpected late cold snaps.
    • Increase monitoring and control measures for pests that thrive in milder winters.
  • Southeastern U.S.:
    • Focus on crops that benefit from cooler, wetter conditions, such as leafy greens and brassicas.
    • Employ raised beds and row covers to manage excessive moisture and protect against cooler snaps.

Historical Patterns of First and Last Frost for Post El Niño Years

Incorporating detailed information on the impact of El Niño on last and first frost dates across various North American regions will help gardeners in planning and protecting their crops more effectively. Here’s how El Niño could influence these important gardening dates:

Western Canada and the Pacific Northwest

Historically, El Niño brings milder winters to this region. Gardeners can expect a later first frost in the fall and an earlier last frost in the spring, extending the growing season. However, the reduced precipitation might require adjustments in water management strategies.

California and the Southwest U.S.

El Niño typically results in wetter conditions for these areas, which might lead to delayed last frost dates in the spring. The increase in cloud cover and precipitation could keep temperatures moderate longer, affecting when the first frost occurs in the fall.

Midwest and Central U.S.

In the Midwest, El Niño is associated with warmer winter temperatures, potentially leading to an earlier end to frost periods in the spring. This could allow for earlier planting and extended growing seasons. However, variability is a key factor, and specific local conditions can differ.

Northeastern U.S. and Eastern Canada

This region might experience milder winters during an El Niño year, leading to an earlier spring thaw and later onset of frost in the fall. This could benefit gardeners by providing a longer period for planting and harvesting.

Southeastern U.S.

The Southeastern U.S. tends to see cooler and wetter conditions, which might delay the warming of soil in spring, potentially extending the frost dates later than usual. Gardeners should be prepared for a shorter growing season in spring but might enjoy an extended fall growing season if the first frost is delayed.

Understanding What Causes El Niño

El Niño is a complex weather phenomenon that arises from interactions between the ocean and the atmosphere in the tropical Pacific. It involves several key components:

1. Ocean Temperature Changes

El Niño is primarily characterized by unusually warm ocean temperatures in the central and eastern equatorial Pacific Ocean. Normally, trade winds blow from east to west across the tropical Pacific, pushing warm surface water toward Asia. During El Niño, these winds weaken, and sometimes reverse, allowing warm water to flow back toward the east, toward the coast of South America.

2. Atmospheric Changes

As the warm water shifts eastward, it affects atmospheric pressures. The typical high pressure over the eastern Pacific and low pressure over the western Pacific weaken or reverse. This shift disrupts the normal patterns of tropical precipitation and atmospheric circulation, causing weather changes not only in the Pacific region but globally. This is part of a larger oscillation known as the Southern Oscillation.

3. Thermocline Variations

The thermocline, which is the layer of water in the ocean that separates warmer surface water from cooler deep water, also plays a role. During El Niño, the thermocline in the eastern Pacific becomes shallower than normal, contributing to the warming of surface waters because less cool, deep water rises to the surface.

4. Feedback Loops

El Niño involves feedback loops between the ocean and atmosphere. For example, as the ocean warms, it can cause the air above it to warm as well; warm air holds more moisture, which can alter atmospheric pressures and wind patterns further, enhancing the initial warming.

5. Global Impact

The redistribution of warm water and changes in the atmosphere affect global climate patterns. These can include increased rainfall in parts of the Americas, drought in the western Pacific, and varied impacts such as storms and temperature anomalies in other parts of the world.

Triggering Factors

The exact triggers of El Niño are still a subject of research. It’s believed to start from small temperature fluctuations in the Pacific Ocean, which are amplified by the interactions between the ocean and the atmosphere. Changes in wind patterns might also initiate the onset of an El Niño event.

El Niño events typically occur every 2 to 7 years and can vary in intensity. The complex interplay of these factors makes predicting the onset and impacts of El Niño events challenging but crucial for preparing for its wide-ranging effects on weather, agriculture, and ecosystems worldwide.

For more detailed information, the National Oceanic and Atmospheric Administration (NOAA) provides extensive resources and updates on El Niño and its impacts. You can visit their website to learn more about current conditions and research.

Historical El Niño Occurrences

El Niño events have been observed and recorded over many years, showing a pattern of occurrence roughly every two to seven years. These events can last from nine months up to two years.

Year Intensity Status
1900 Weak Ended
1902 Weak Ended
1905 Weak Ended
1908 Moderate Ended
1911 Weak Ended
1914 Weak Ended
1918 Strong Ended
1923 Weak Ended
1925 Strong Ended
1929 Weak Ended
1932 Moderate Ended
1939 Moderate Ended
1941 Strong Ended
1946 Moderate Ended
1951 Moderate Ended
1953 Weak Ended
1957 Strong Ended
1965 Moderate Ended
1969 Weak Ended
1972 Strong Ended
1976 Weak Ended
1982 Very Strong Ended
1986 Moderate Ended
1991 Strong Ended
1994 Weak Ended
1997 Very Strong Ended
2002 Moderate Ended
2004 Weak Ended
2006 Weak Ended
2009 Weak Ended
2014 Strong Ended
2016 Moderate Ended
2023 Strong Peaked, Weakening

This table captures each El Niño event by year, intensity, and its current status, with the latest event in 2023 described as having peaked and now weakening.

Additionally, historical records from sources like Golden Gate Weather Services offer a detailed listing of El Niño and La Niña years based on the Oceanic Niño Index, which is widely used by NOAA for classifying these events. This list is regularly updated and includes detailed annotations about the intensity of each event.

For those interested in a more visual representation, NOAA’s PMEL website provides graphics showing the sea surface temperature along the equator in the Pacific Ocean, indicating the deviations from normal temperatures that characterize El Niño and La Niña events.

To explore these resources further, you can visit the following links:

These sources will give you a comprehensive view of the historical patterns of El Niño and La Niña, enhancing your understanding of these significant climatic events.

Current El Niño Status 

The latest data indicates that the El Niño event that started in 2023 peaked during November 2023 to January 2024 and is currently in the process of weakening. Although it was expected to persist at least until April 2024, the probability of El Niño conditions continuing is now diminishing. By mid-April 2024, there’s a high likelihood (65%) that conditions will transition to ENSO-neutral, and this is expected to persist into mid-2024. Furthermore, there is a forecast indicating a potential shift towards La Niña conditions starting around June to August 2024, with increasing probabilities later in the year​ (iri.columbia)​​ (World Meteorological Organization)​​ (World Meteorological Organization)​.


The Ultimate Guide to Potato Varieties

From Kennebec to Burbank Russet, a look at 10 types of potatoes, their characteristics and how they fit into your planting strategy for your homestead.

The Ultimate Guide to Selecting and Growing Potato Varieties

Potatoes are more than just a staple food; they are a culinary delight that varies significantly in flavor, texture, and color. This guide to ten popular potato varieties will  help you choose the right type for your cooking needs but also provide essential tips for growing them in your garden.

Whether you’re a seasoned gardener looking to expand your crop diversity or a home chef eager to explore different flavors, this article offers valuable insights into each variety’s characteristics, culinary uses, and optimal growing conditions. Explore the versatile Kennebec, the creamy Yukon Gold, and the striking Purple Peruvian, among others, and learn how to nurture and harvest these beloved tubers to perfection.

1. Kennebec: A Versatile Favorite

Description and Best Use

Kennebec potatoes are celebrated for their smooth skin and creamy texture, making them versatile for frying, baking, and mashing.

Origin & Trivia

Originating from Maine, named after the Kennebec River, this variety was introduced in the 1940s and is loved for its adaptability to various climates and soil types.

Kennebec Potato Growing Tips

Plant in well-drained soil and water regularly, especially during tuber formation, to ensure optimal growth.

Harvesting and Storage

Kennebec potatoes mature in about 80-100 days and store excellently through winter if kept in cool, dry conditions.

Planting and Growing Zones

Ideal for USDA zones 3-9, plant these in early spring once the frost has passed.

2. Yukon Gold: The Golden Standard

Description and Best Use

With its fine-grained, buttery yellow flesh, Yukon Gold is great for boiling, baking, and making creamy mashed potatoes.

Origin & Trivia

Developed in Canada in the 1960s, these potatoes are named for their golden color and the Yukon River.

Yukon Gold Potato Growing Tips

These prefer slightly acidic, well-drained soil. Keep the soil consistently moist with regular watering.

Harvesting and Storage

They are ready for harvest in about 90-100 days and have a moderate storage life.

Planting and Growing Zones

Thrives in zones 1-9, plant in early spring for a full growing season.

3. Russian Banana Fingerling: Perfect for Gourmet Dishes

Description and Best Use

Known for its waxy, yellow flesh, this banana-shaped potato is excellent for boiling and roasting.

Origin & Trivia

This variety comes from the Baltic region of Northeast Europe and is named for its elongated shape.

Banana Russian Fingerling Growing Tips

It thrives in sandy loam soils and requires consistent moisture without overwatering.

Harvesting and Storage

Ready to harvest in about 90 days, it stores well under proper conditions.

Planting and Growing Zones

Plant these after the last frost in zones 3-8.

4. Magic Molly: Visually Stunning

Description and Best Use

Magic Molly potatoes retain their deep purple color when cooked, making them ideal for vibrant dishes.

Origin & Trivia

Originated in Alaska and named after the breeder’s daughter, Molly.

Magic Molly Potato Growing Tips

Requires fertile, well-drained soil rich in organic matter.

Harvesting and Storage

Takes about 100 days to mature, with fair storage durability.

Planting and Growing Zones

Plant in spring when the soil temperature reaches at least 45°F, suitable for zones 3-9.

5. German Butterball: A Flavorful Heirloom

Description and Best Use

This potato has rich, golden, buttery flesh, making it superb for roasting and mashing.

Origin & Trivia

An old-world variety likely from Germany, prized for its flavor.

Growing Tips

Plant in deep, loose soil and hill as plants grow to ensure healthy tubers.

Harvesting and Storage

Matures in 90-120 days, known for its excellent storage life.

Planting and Growing Zones

Ideal for early spring planting in zones 3-9.

6. Red Pontiac: The Versatile Choice

Description and Best Use

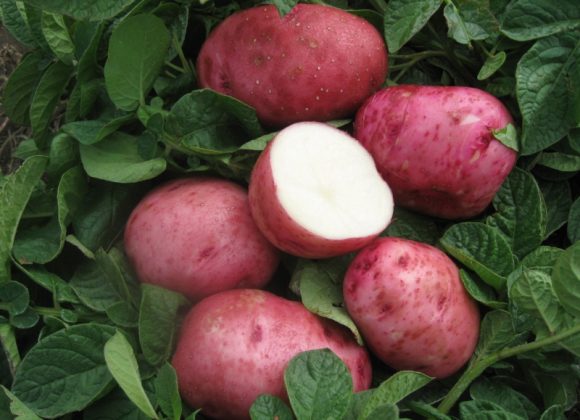
Red Pontiacs have red skin and waxy white flesh, perfect for boiling and baking.

Origin & Trivia

Developed in Florida in the 1940s and named after the Pontiac tribe.

Growing Tips

Best grown in full sun and well-drained soil with moderate watering.

Harvesting and Storage

Ready in about 80-90 days, suitable for medium-term storage.

Planting and Growing Zones

Plant in spring to maximize growth, suitable for zones 3-10.

7. Purple Peruvian: The Nutty Heirloom

Description and Best Use

With deep purple skin and flesh, it adds a unique twist to traditional dishes.

Origin & Trivia

Direct descendant of Andean potatoes cultivated by the Incas.

Growing Tips

Prefers cooler climates and well-drained, fertile soil.

Harvesting and Storage

Usually matures in 70-90 days, best used soon after harvest.

Planting and Growing Zones

Best in zones 3-8, plant after frost risk has passed.

8. Elba: The Disease-Resistant Stalwart

Description and Best Use

Known for its disease resistance and excellent storage qualities, great for boiling and mashing.

Origin & Trivia

Named after Elba, New York, where it was developed.

Growing Tips

Requires rich, well-drained soil and frequent watering during dry spells.

Harvesting and Storage

Matures in about 80-100 days, one of the best for long-term storage.

Planting and Growing Zones

Plant early in spring as soon as the soil is workable, suitable for zones 3-9.

9. Lehigh: The High-Yield Variety

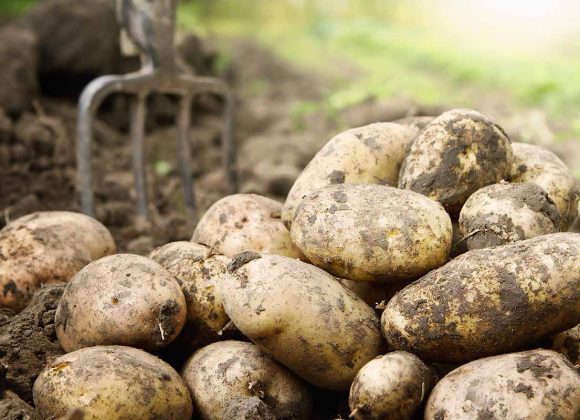
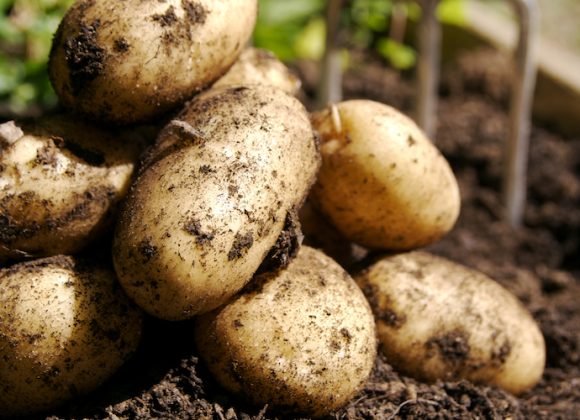
A small pile of potatoes freshly dug from the ground.

Description and Best Use

Offers high yields and storability, with light yellow flesh suitable for mashing and general cooking.

Origin & Trivia

Developed at Penn State University, named after Lehigh County in Pennsylvania.

Growing Tips

Requires full sun and moist, well-drained soil.

Harvesting and Storage

Ready in about 90 days, maintains quality for several months.

Planting and Growing Zones

Plant in early spring, zones 3-9.

10. Burbank Russet: The Fast Food Favorite

Description and Best Use

A classic choice for fluffy mashed potatoes and French fries due to its fluffy texture.

Origin & Trivia

Developed by Luther Burbank in the early 20th century, it’s a staple in the fast-food industry.

Growing Tips

Needs loose, well-aerated soil and regular feeding to prevent waterlogging.

Harvesting and Storage

About 90-100 days to harvest with excellent long-term storage capabilities.

Planting and Growing Zones

Best planted in early spring, thrives in zones 4-9.


Understanding Coyote Behavior Patterns

Coyotes, renowned for their adaptability, have intrigued and challenged homesteaders and wildlife enthusiasts alike. Their complex behaviors, including hunting techniques, social structures, and migration patterns, offer valuable insights for developing coexistence strategies. This expanded exploration into coyote behavior aims to equip homesteaders with the knowledge to implement more nuanced and effective management practices.

Understanding Coyote Social Structure

Coyotes exhibit a flexible social structure that varies greatly depending on their habitat, food availability, and human activity. Typically, they live in family units or packs, which consist of a breeding pair and their offspring, though they can also be found alone or in loose associations. This social adaptability affects their hunting strategies, territoriality, and interaction with the environment, including human-occupied areas.

Hunting Techniques and Coyote Behavior

Coyotes (Canis latrans) are highly adaptable creatures that have expanded their range across North America. Typically, they are opportunistic feeders that adjust their diets based on available resources, which can unfortunately include livestock, poultry, and even household pets when natural prey is scarce. Understanding coyote behavior is key to implementing effective deterrent strategies. Coyotes are known for their cunning and their ability to learn and adapt to avoid threats, making a one-size-fits-all solution ineffective.

Coyotes are opportunistic predators with a diet that can include small mammals, insects, fruit, and occasionally livestock or poultry. Their hunting techniques are as versatile as their diet, including:

  • Stalking Prey: Coyotes are skilled stalkers, using cover to approach their prey stealthily before launching a quick attack.
  • Pouncing: In snow or tall grass, coyotes use a distinctive pounce to catch small rodents concealed below.
  • Cooperative Hunting: While often hunting alone, coyotes can hunt in pairs or small groups to take down larger prey such as deer, especially in winter.
  • Scavenging: Coyotes are not above scavenging, taking advantage of carrion and human waste, which can unfortunately include unsecured garbage or compost on homesteads.

Migration and Territorial Behavior

Coyotes are territorial animals, with territories ranging from 2 to 30 square miles, influenced by the availability of food and the density of the coyote population. They typically do not migrate but may expand their range in response to environmental pressures such as food scarcity, habitat destruction, or competition. Human development and the fragmentation of natural habitats have forced coyotes into closer proximity with human environments, altering their natural movement patterns and sometimes leading to increased interactions with humans and livestock.

Reproduction and Population Dynamics

Coyotes mate for life and breed once a year, with litters averaging four to six pups. The high survival rate of pups and the absence of large predators in many areas have contributed to their population growth and expansion across North America. Interestingly, coyote populations can self-regulate based on available resources and social structure; however, in areas where they are heavily persecuted, they can increase their reproductive rate, leading to a paradoxical increase in their numbers.

Navigating Human-Coyote Interactions

Coyotes’ adaptability to diverse environments includes an increasing comfort with human-dominated landscapes, where they find ample food sources and fewer predators. While coyotes naturally avoid humans, the availability of food can lead to habituation, reducing their natural wariness and potentially leading to problematic interactions.

Navigating the Challenge: Advanced Strategies for Managing Coyote Intrusions on Your Homestead

Coyotes, with their adaptability and increasing comfort in both rural and urban settings, pose a unique set of challenges for the modern homesteader. Managing these intelligent and often elusive creatures requires a blend of traditional wisdom, innovative strategies, and a deep understanding of wildlife behavior. This article delves into comprehensive and humane approaches to protect your homestead from coyote intrusions without resorting to harmful or ineffective methods.

Livestock and Poultry Protection Strategies

Coyotes often target smaller livestock and poultry due to their size and perceived vulnerability. Employing guardian animals such as dogs (specific breeds accustomed to living with livestock), llamas, or donkeys can provide a significant deterrent to coyotes. These animals naturally protect their territory and can scare away coyotes with their size, noise, and aggression. Additionally, securing livestock and poultry in predator-proof enclosures at night can significantly reduce the risk of attacks.

Understanding Coyote Population Dynamics

Before implementing control measures, it’s essential to understand that coyote populations are highly adaptable. They respond to decreases in their numbers through increased litter sizes, making eradication efforts counterproductive in the long term. Effective management, therefore, focuses on coexistence and minimizing conflict.

Non-lethal Management Techniques

Habitat Modification

Limiting food availability and access to shelter can naturally reduce coyote presence. This includes securing trash, removing fallen fruit, and clearing brush piles that may serve as den sites.

Frightening Devices

Deploying motion-activated lights, sirens, or sprinkler systems can deter coyotes from entering a property. These methods are most effective when used unpredictably, to prevent coyotes from becoming habituated.

Repellents

Chemical repellents can discourage coyotes from specific areas, though their effectiveness varies and they require regular reapplication.

Exclusion

Fencing, as previously mentioned, is one of the most effective strategies. Incorporating coyote-proof barriers around vulnerable areas like livestock pens can significantly reduce the risk of predation.

Lethal Management Techniques

It’s important to consider lethal methods as a last resort, focusing on specific problem animals rather than general population control. Regulations vary by location, so it’s crucial to consult with local wildlife authorities before proceeding.

Targeted Removal

In cases where specific coyotes pose a direct threat to livestock, pets, or human safety, targeted removal may be necessary. This should be done in consultation with wildlife professionals to ensure it’s carried out humanely and legally.

Hunting and Trapping

Where legal, regulated hunting and trapping can play a role in managing coyote populations. These methods require skill and understanding of coyote behavior to be effective and humane.

Community-Based Management Approaches

Managing coyote populations is most effective when approached collaboratively. Community-wide efforts can include:

  • Sharing strategies and successes in non-lethal deterrence.
  • Coordinating habitat modification efforts to reduce attractants across a larger area.
  • Developing a rapid response team for addressing immediate threats or sightings.

Monitoring and Adaptation

Ongoing monitoring of coyote activity and the effectiveness of management strategies is crucial. Adaptation may be necessary as coyotes respond to changes in their environment and as new research and techniques become available.

Ethical Considerations

Respect for wildlife and consideration of the ecological role of coyotes should guide management efforts. Non-lethal methods should always be prioritized, with lethal options considered carefully for their impact on local ecosystems and coyote social structures.


50 Medicinal Herbs for Your Healing Garden

As we dive into the practical aspects of botany, specifically focusing on the cultivation of medicinal herbs and plants, it’s essential to understand the significance of each species and its contribution to both traditional and modern medicine. Our continued exploration will not only cover the botanical characteristics and environmental needs of these plants but also their historical uses and the scientific basis behind their medicinal properties.

I’ll begin by posting this curated list of 50 medicinal herbs and plants that are suitable for growing in North American climates. This selection includes a diverse range of species, from common herbs like Mint and Basil, known for their culinary and therapeutic benefits, to lesser-known plants such as Yarrow and Skullcap, which have been used for centuries in herbal medicine.

My goal is to provide you with a foundational understanding of how to successfully cultivate these plants, whether in a garden setting or a controlled environment like a greenhouse. We’ll discuss each plant’s specific growing requirements, including soil pH, sunlight exposure, and watering needs, alongside their health benefits and traditional applications.

Medicinal Herbs and Plants

Herb/Plant Uses and Properties Difficulty Level
Mugwort Promotes menstrual cycles, calms nerves, eases digestive issues Intermediate
Mullein Reduces coughing/congestion, treats ear infections Easy
Stinging Nettle Antioxidant, antimicrobial, anti-inflammatory properties Intermediate
Oregano Antibiotic and antifungal agent Easy
Echinacea Boosts immune system against viruses and bacteria Easy
Chamomile Sedative, aids digestion, muscle relaxation Easy
Yarrow Stanches blood flow, reduces inflammation/spasms Easy
Cilantro Fungal infections, inflammation, skin health Easy
Fennel Digestion aid, combats bloating and gas Easy
Ginseng Immune system, mental health improvement Advanced
Goldenseal Antibiotic for colds, sore throats, digestive issues Intermediate
Holy Basil Improves cholesterol/blood sugar, lowers inflammation Intermediate
Lavender Anxiety/stress relief, stomach issues Easy
Licorice Treats coughs, asthma, heartburn Intermediate
Mint Indigestion, nausea, headaches, asthma Easy
Oregon Grape Antibiotic, treats UTIs and skin conditions Intermediate
Rosemary Boosts memory, fights infection Easy
Lousewort Swellings, sore muscles, varicose veins Advanced
Lyre Leaf Sage Similar to sage, but weaker Intermediate
Mallows Traditional remedies, source for Marshmallow Easy
May-apple Herbal jelly from ripe fruit Intermediate
Motherwort Woman’s herb for various life stages Intermediate
Mountain Mint Refreshing mint-like herbal tea Easy
Passionflower Herbal sedative, common in Southern U.S. Intermediate
Perilla Used in sushi, seeds as a spice Easy
Pinkroot Mainly in homeopathic preparations today Advanced
Plantain Treats various conditions, common yard plant Easy
Pokeweed Early shoots eaten, controversial medicinal claims Advanced
Rabbit Tobacco Balances life and death, used in dying Advanced
Red Clover Edible, used in salads/soups Easy
Sassafras Herbal root beer, made into tea Intermediate
Skullcap Calming, used for rabies remedy Intermediate
Soapwort Can be made into soap Intermediate
Solomon’s Seal Poultice for bruises, sore muscles/joints Intermediate
Calendula Soothes skin, heals cuts Easy
Dandelion Supports liver health, improves digestion Easy
Elderberry Immune system booster, treats respiratory infections Intermediate
Garlic Natural antibiotic, lowers blood pressure Easy
Horsetail Strengthens hair, nails, bones Intermediate
Lemon Balm Reduces stress and anxiety, improves sleep Easy
Marshmallow Soothes mucous membranes, coughs, and colds Intermediate
Peppermint Digestive aid, headache relief Easy
Raspberry Leaf Women’s reproductive health support Easy
Sage Antiseptic, digestive aid, memory enhancer Easy
Thyme Antibacterial, cough and bronchitis aid Easy
Valerian Sleep aid, reduces anxiety Intermediate
Vervain Stress relief, supports kidney health Intermediate
Witch Hazel Astringent for skin care Intermediate
Aloe Vera Heals burns and cuts, moisturizes skin Easy
Basil Anti-inflammatory, stress reducer, supports liver health Easy

This table serves as a guiding compass for beginners and seasoned gardeners alike, offering insights into the medicinal benefits and cultivation complexity of each plant. Whether you’re looking to soothe common ailments or bolster your home’s natural health arsenal, this guide empowers you to cultivate a thriving medicinal garden tailored to your wellness needs.

In preparing for a variety of scenarios, including those where traditional medical resources might not be readily available, the strategic selection of medicinal plants for your garden becomes crucial. This approach not only supports everyday health and wellness but also ensures a level of preparedness for “SHTF” (Sh*t Hits The Fan) situations. The key lies in prioritizing plants based on their medicinal properties, ease of cultivation, and their potential to address a broad spectrum of health issues.

Predicting Needs for Natural Healing

When considering what types of plants to grow for natural healing, focus on those with wide-ranging benefits and those known to treat common ailments. For instance, herbs like Garlic and Echinacea are invaluable for their immune-boosting properties, while Calendula and Aloe Vera are essential for skin healing and care. Additionally, incorporating plants like Peppermint and Ginger can aid in digestive health, a common concern in any scenario.

It’s also wise to consider the specific health needs of your household. If someone suffers from chronic conditions such as arthritis, herbs like Stinging Nettle and Turmeric could offer natural relief. This personalized approach ensures that your garden is not just a source of medicine, but one that’s tailored to the unique health profiles within your home.

Essential Plants for SHTF Situations

In a SHTF scenario, the accessibility to conventional medical treatments might be limited. Thus, your medicinal garden should include plants known for their potency in treating serious conditions and their versatility in use.

  1. Yarrow is indispensable for its wound-healing capabilities.
  2. Willow Bark contains salicin, a precursor to aspirin, making it vital for pain relief.
  3. Mullein could be critical for respiratory health, especially in environments where air quality might be compromised.
  4. Broad-spectrum antimicrobial herbs like Oregano and Thyme are essential for treating infections.

Furthermore, in these situations, the ability to grow and propagate plants quickly and with minimal resources becomes a priority. Thus, selecting hardy plants that can adapt to various climates and soils, such as Lavender and Sage, and those that can be easily propagated, like Mint and Lemon Balm, will ensure your garden remains robust and diverse.


Planning Your Bugout Emergency Shelter for Your Homestead

For most of us, living on our homestead provides a level of peace of mind while allowing us to move to a more independent and self sufficient lifestyle and we might not give that much thought to an emergency shelter.

But all of that can change for a variety of reasons and in a serious breakdown of society or a true SHFT situation occurs – people from the city will instinctively swarm to the country in seek of safety from the urban areas as well as in search of food, supplies and shelter.   This then represents a true threat to anyone living in the country on a homestead or farm – and protecting your supplies and family should be a paramount cornerstone consideration for you.

In the pursuit of homestead security and preparedness, constructing a hidden bug-out or emergency shelter offers an unparalleled peace of mind. This saferoom serves as a last resort—a place of safety away from the main dwelling, completely concealed to avoid detection by invaders or looters.    In this article, I aim to outline the important elements of your shelters design while addressing important considerations including defensive protection, sustainability, efficiency, and ultimate concealment.

The Importance of a Bug Out Emergency Shelter on Your Homestead. 

I am a realist when it comes to a SHTF situation and the measures that desperate people will go to when starving or in need of supplies – whether that be medicine, warmth, water or even drugs and alcohol.  With no Sherriff in town to keep the bad guys in check – it will be open season for anyone with either the will or the desperation to murder for a pack of cigarettes.     Defending your homestead against waive after waive of armed desperate assailants will over time as sure as the sun will rise in the morning, deplete your ammunition, wound or kill your occupants and ultimately end with your homestead being overrun.

This is why I am a proponent of seek shelter and ride things out approach more aligned with gorilla warfare than defensive positioning.   A breakdown in society can come in many forms including that of our own government or an invading force that will highly advanced in their technology and remaining hidden and safe is going to take some real planning.   With that said, the essence of a homestead bug-out shelter lies not just in its function but in its strategic invisibility.

The goal is to create a safe, sustainable refuge that blends seamlessly with its surroundings, ensuring privacy and security without drawing attention. This space is more than a simple hideaway; it’s a meticulously planned, self-sufficient stronghold designed to protect you and your loved ones in times of utmost need where if not already in place come a serious situation, will be far too late to make happen.

The Planning Phase

The foundation of a successful hidden emergency shelter begins with meticulous planning. Choosing a location involves considering accessibility, environmental hazards, and the likelihood of remaining undetected and I am a fan of creating a decoy shelter that is easily overrun to convince invaders that they have found the nest egg while not bothering to look for the real main shelter.  With that said, I am also fond of the idea of keeping supplies in two separate hidden locations so that if one is found and looted, you are not without a back up after they move on.

The design phase should focus on minimizing the shelter’s environmental footprint while maximizing its defensive capabilities and you need to take into account its ability if assaulted to withstand an assault.   It also must be able to hold a minimum of 72 hours, preferably longer if required of supplies while remaining completely hidden with no signs of it’s existence.  This is more than just the naked eye from onsite intruders, but from aerial observation including infrared heat detection from aircraft or satellite monitoring.   I will cover all of these topics in this article in overview and will expand on them through future posts.

Designing Your Hidden Bugout or Emergency Shelter

Your emergency shelter’s design is pivotal. Utilizing durable, yet inconspicuous materials can provide both the strength and stealth needed. Innovations in camouflage, such as earth-covered roofs or naturalistic exteriors, help integrate your shelter into the landscape, while sustainable features ensure long-term viability without outside resources.  Your safest design is that which is below the surface as deep in the ground as possible.  A subterranean shelter has many advantages and makes it far less likely to be found by anyone looking for it.   

My recommendation is that the roof of the shelter is covered with a minimum of 24 inches of soil and preferably 48 inches plus.    Keep in mind though in your design that this amount of soil on top of your shelter has considerable weight.  If our plan is to build a 12×16 foot shelter with 48 inches of soil on top of it, we need to get our calculator out.

To calculate the weight of soil in an area measuring 12×16 feet and four feet deep, we’ll need to know the density of the soil, as this can vary significantly depending on the soil type. For example, the weight of sandy soil will differ from that of clay soil. A common average density for soil is approximately 100 pounds per cubic foot, but this is a very rough average and can vary.

Let’s calculate the volume of the soil first and then use the average density to estimate the weight.

The formula to calculate volume is: Volume = Length × Width × Height

Where:

  • Length = 16 feet
  • Width = 12 feet
  • Height (Depth) = 4 feet

After calculating the volume in cubic feet, we’ll multiply by the average density of soil (100 pounds per cubic foot) to estimate the weight. This then means that the volume of soil in the specified area is 768 cubic feet. Given an average soil density of 100 pounds per cubic foot, the soil would weigh approximately 76,800 pounds of weight on top of the structure.  If you go with 24 inches, then you would need to design a structure that would require support of around 38,ooo pounds.  This weight requirement will play a role in how you create your layout in the shelter to support the bearing weight what is above.

48 Inches Provides Adequate Protection Against Artillery Shells

The protection offered by 48 inches (4 feet) of soil and a 10-inch concrete ceiling against a military strike depends on several factors, including the type of munition used in the strike, the angle of impact, and the specific properties of the concrete and soil. Generally, both soil and concrete are effective at absorbing and dissipating energy from blasts, with their protective capabilities varying based on composition and depth.

Soil can provide significant protection against blasts due to its ability to absorb shock waves. The effectiveness of soil as a protective barrier increases with depth. Four feet of soil can offer substantial protection against shrapnel and light blast effects from conventional munitions. However, its effectiveness against direct hits from large, penetrating munitions (such as bunker busters) or precision-guided munitions designed to penetrate deep before detonating would be limited.

Concrete is a standard material for protective structures due to its high compressive strength and ability to withstand significant blast pressures. A 10-inch-thick reinforced concrete ceiling can offer substantial protection against direct hits from smaller munitions and provide a good level of blast resistance. The effectiveness of concrete against military strikes also depends on the quality of the concrete, the presence and quality of reinforcement (rebar), and the construction methods used.

Together, 48 inches of soil topped with a 10-inch concrete ceiling could provide a high level of protection against small to medium conventional munitions, indirect fire (artillery shells), and shrapnel. They would also significantly reduce the blast effects of larger explosives detonating nearby. However, this combination might not guarantee safety against direct hits from large, heavy-penetrating munitions specifically designed to destroy reinforced underground facilities but certainly gives you a much greater level of protection than a simple concealed  emergency shelter.

I would also recommend that you plan your walls to be rebar reinforced 10 inch thick cement along with a 5 inch slab set on 8 inches of wash rock for drainage.  For safety against leaking, I’d also waterproof the exterior with a quality membrane at least 3 mm thick up to the frost line.

Ventilation

With an underground shelter have to plan your ventilation system that should be three stages – one to allow outside are into the shelter with no additional assistance or filtration.   I would then suggest a second stage system that provides for filtered or treated air coming from a second intake source in the case your basic ventilation fails or is plugged.   Finally, and some might consider this overkill, but a self contained oxygen system that can produce enough air for your occupants in a serious lock down situation – while keeping in mind the need to have a method to clear the carbon dioxide created by human breathing.  It is outside the scope of this article to provide full details and documentation of your advanced oxygen system but is worth of your continued research.

Heating Your Emergency Shelter

With the structure being underground, the internal temperature of the unit will be relatively steady but on the cool side for comfortable human occupancy.   Having a heating system capable of at least taking the chill of the air may be desirable in the case of having children or older individuals with you in the bunker.  Having a wood burning system is illogical as the smoke from the fire would be a sure giveaway to those near by or any type of heat seeking monitoring.   With proper ventilation, a temporary method for heating can be done by candle and a terra cotta clay pot that can produce a significant amount of heat from a small candle.  You will need to come up with your own system for heating though based on your shelter size and needs.

Entrance and Escape

The entrance to your shelter must be as hidden and camouflaged as possible while not drawing attention to its location in anyway.  ( For example a camo net over the entrance is a sure notification to someone there is something there worth investigating ).  The entrance should be large enough for a full size adult male to get into reasonably easy as well as to move supplies freely into the space.   For larger items such as furniture, you will need to plan in advance the possibility of putting them in place before the ceiling is put on and covered.  The best method if on your homestead is to put the entrance in the floor of a shed or garage / barn and cover it appropriately.    If out in the bush, a lean-too hinged platform with leaves and brush will make an acceptable concealment.

If possible, a secondary access that can serve as an escape hatch or tunnel provides for added safety in the case of the shelter being compromised.

Emergency Shelter Water Requirements

Water is life—especially in a survival situation. Ensuring an adequate and safe water supply within your hidden bug-out shelter is not just important; it’s essential. For a period of 96 hours, which extends beyond the initial critical 72 hours post-disaster, meticulous planning is required to guarantee that you and your loved ones have enough water to stay hydrated and maintain hygiene.

How Much Water Do You Need?

For each person, the general recommendation is to have at least one gallon of water per day. This quantity covers drinking and minimal hygiene needs. Therefore, for a 96-hour (four-day) period, you would need a minimum of four gallons of water per person. However, considering the variables such as climate, physical exertion, and individual health conditions, it’s wise to plan for more. A safer estimate would be approximately five to six gallons per person for this duration, ensuring a buffer for unforeseen needs or emergencies.

Wastewater and Sewage Management

Here’s a concise approach to handling waste over four days should be your minimal goal for your shelter taking into account the following.

1. Greywater Management: For a 96-hour period, limit greywater production by using water sparingly. Collect greywater from sinks and showers in sealed containers. If feasible, repurpose this for flushing toilets or watering non-edible plants outside the shelter.

2. Blackwater (Sewage) Handling: Employ portable composting toilets designed for short-term use. These units can safely manage human waste without water, minimizing odor and reducing the risk of contamination. Ensure adequate supplies of composting medium, like sawdust or coconut coir, to cover waste after each use.

3. Solid Waste Disposal: Minimize solid waste generation by using reusable items. Segregate any generated waste into biodegradable and non-biodegradable. Store securely to avoid attracting wildlife or creating health hazards.

4. Sanitation Supplies: Stockpile essential sanitation supplies, including biodegradable soap, hand sanitizer, and disinfectants. These are critical for maintaining hygiene and preventing the spread of disease within the confined space of the shelter.

5. Emergency Plan for Waste Disposal: Have a clear, practical plan for disposing of collected greywater and waste post-96 hours or in case of an extended stay. This might involve burying biodegradable waste away from water sources or planning for safe removal from the site.

Food and Supplies for a 96 Hour Shelter

Although your shelter should be used for a secure primary storage facility for long term supplies, you will also want to take into account the needs for your family to survive underground in the shelter for 96 hours.   This also means you will need to take into account means and method to prepare food if required keeping in mind that may be a requirement that no sign of exhaust from a combustible fire can be present particularly in the case of an advanced enemy using heat detection as part of their search methods.     Electri

1. Caloric Intake: An average adult requires about 2,000 to 2,500 calories per day. For 96 hours, this translates to approximately 8,000 to 10,000 calories per person. It’s vital to select foods that are energy-dense and nutrient-rich to meet these caloric needs.

2. Non-Perishable Foods: Opt for non-perishable items that require minimal preparation. Canned goods, dried fruits, nuts, energy bars, and ready-to-eat meals are ideal. These foods are not only long-lasting but also easy to store and consume without cooking, reducing the shelter’s detectability.

3. Water for Preparation: Some non-perishable foods, like dehydrated meals, require water for preparation. Account for this in your water storage plans, ensuring you have enough to both hydrate and cook without compromising your water supply needs for drinking and hygiene.

4. Special Dietary Needs: Consider any dietary restrictions or allergies among shelter occupants. Stocking gluten-free, dairy-free, or nut-free options, for example, ensures everyone’s health and comfort during the stay.

5. Efficient Packaging: Choose foods with compact and lightweight packaging to maximize storage space and minimize waste. Vacuum-sealed meals and foods in zip-lock bags are preferable for keeping a low profile and ensuring easy disposal.

6. Cooking and Eating Utensils: Include a set of reusable utensils, a portable stove (if cooking is necessary and safe to perform), and a small pot. Remember, the goal is to minimize activity that could reveal your shelter’s location, so opt for cold meals or those requiring minimal heating.

7. Rotation and Check-Up: Regularly check and rotate your food supply to ensure nothing is expired or compromised. This is crucial for maintaining a ready-to-use stockpile that can support you for 96 hours at any given time.


The Self-Sufficient Homestead: How Much to Plant for Every Age Group

Calculating how much to grow is as important as what to grow when planning for your homestead this year.  With skyrocketing super market prices as well as questionable growing techniques by large food producers – most homesteaders look towards the ultimate goal of being able to grow as close to 100% of their required produce as possible.   With modern growing strategies such a container growing, vertical farming and making smart use of your available space, with some ingenuity and planning, reaching a status of self sufficiency is within reach.

Planning your yields for your planting efforts this coming year involves taking the time to sit down and calculate first what your family likes to eat, and then how much you need to grow.  Every family is different in their needs and that is also impacted by individual tastes of those you plan to be feeding.  If your family loves carrots, then you will want to plan enough to provide 12 months worth of them.   If your family hates zucchini, then it doesn’t make logical sense to grow the vegetable as it just takes up valuable growing space.

The other important consideration when planning to grow a year round supply of produce is what you strategy is going to be for having enough produce on hand during the winter months.   If you have no year round green house or growing facility, then having fresh lettuce in January in zone 4 won’t be feasible while vegetables like potatoes, carrots, onions and so forth ( typically root vegetables ) have a long storage time when kept in a cold room covered in loose sand.

This then also opens the discussion of a staggered or succession planting schedule which allows you to create a flow of harvestable fresh produce rather then it call coming ready to harvest at once.   In future articles I will dwell much deeper into these discussions but for today, let’s discuss the growing yield charts below which I broke down into age groups to further help in creating an accurate growing plan.

One last thing before we continue – these yield suggestions are based on what would best be interpreted as reasonable estimates for each vegetable.   This does not mean that a person should look at this chart and assume it is saying you should plant this much food for each category.

Homestead Garden Yield Calculator

Adult Requirements – Ages 14:55

For adults aged 14 to 55, there are numerous variables you will have to consider such as vegetable preference as well as appetite.  For example a 18 year old teenaged male with a large appetite will consumer far more than a petite 18 year female who happily lives on a small diet.    Subsequently, the following table for adults is the mean average for an annual target harvest of that specific vegetable.   For example, for carrots, a family with a mother, father, 17 year old son and 15 year old daughter, would be from 40 to 55 pounds.  If you family eats a lot of carrots, or you use them a lot in stews and soups, then you may want to increase that yield but you a least have a starting point to modify from.

I’ve also endeavored to create a realistic yield amount for each plant.  For example, corn calls for 25 to 50 ears per person per year.   This is shown per ear, but keep in mind your corn will be consumed as corn on the cob, or in nibblet / kernel form.    Based on a 2 month consumption period from day of harvest, as well as freezing the kernels for use over the winter, this yield chart essentially is saying 4 ears per month annually which is likely pretty accurate based on the North American diet.

Vegetable/Fruit 14-19 years 20-55 years
Apples 10-20 lbs 12.5-25 lbs
Beets 4-7 lbs 5-10 lbs
Berries 4-8 lbs 5-10 lbs
Broccoli 5-12.5 lbs 6.25-15 lbs
Cabbage 4-7 heads 5-9 heads
Carrots 5-10 lbs 6-12 lbs
Cauliflower 5-12.5 lbs 6.25-15 lbs
Corn 20-40 ears 25-50 ears
Cucumbers 3.75-7.5 lbs 4.5-9 lbs
Garlic 35-60 cloves 45-75 cloves
Green Beans 5-10 lbs 6-12 lbs
Green Leaf Lettuce 4-8 lbs 5-10 lbs
Green Onions 4.5-6 bunches 6-7.5 bunches
Leeks 3-5 lbs 4-6 lbs
Onions 3.75-7.5 lbs 4.5-9 lbs
Peas 4-8 lbs 5-10 lbs
Peppers 4-8 lbs 5-10 lbs
Potatoes 35-70 lbs 42-84 lbs
Pumpkins 3-4 pumpkins 4-5 pumpkins
Radishes 0.8-1.6 lbs 0.8-2 lbs
Romaine 4-8 lbs 5-10 lbs
Spinach 4-8 lbs 5-10 lbs
Sweet Potatoes 25-45 lbs 30-55 lbs
Tomatoes 10-20 lbs 12.25-25 lbs
Yams 25-45 lbs 30-55 lbs
Zucchini 3.5-7 lbs 4.2-8.4 lbs

Children (1-7 Years and 8-13 Years)

Vegetable/Fruit 1-7 years 8-13 years
Apples 5-10 lbs 7.5-15 lbs
Beets 2-4 lbs 3-5 lbs
Berries 2-4 lbs 3-6 lbs
Broccoli 2.5-5 lbs 3.75-8.75 lbs
Cabbage 2-4 heads 3-5 heads
Carrots 3-5 lbs 4-7 lbs
Cauliflower 2.5-5 lbs 3.75-8.75 lbs
Corn 10-20 ears 15-30 ears
Cucumbers 2.25-3.75 lbs 3-5.25 lbs
Garlic 15-25 cloves 25-40 cloves
Green Beans 3-5 lbs 4-7 lbs
Green Leaf Lettuce 2-4 lbs 3-6 lbs
Green Onions 1.5-3 bunches 3-4.5 bunches
Leeks 1-3 lbs 2-4 lbs
Onions 2.25-3.75 lbs 3-5.25 lbs
Peas 2-4 lbs 3-6 lbs
Peppers 2-4 lbs 3-6 lbs
Potatoes 21-35 lbs 28-56 lbs
Pumpkins 1-2 pumpkins 2-3 pumpkins
Radishes 0.4-0.8 lbs 0.6-1.2 lbs
Romaine 2-4 lbs 3-6 lbs
Spinach 2-4 lbs 3-6 lbs
Sweet Potatoes 15-25 lbs 20-35 lbs
Tomatoes 5-10 lbs 7-15 lbs
Yams 15-25 lbs 20-35 lbs
Zucchini 2.1-3.5 lbs 2.8-4.9 lbs

Adults (14-19 Years and 20-55 Years)

Seniors (55+ Years)

Vegetable/Fruit 55+ years
Apples 7.5-15 lbs
Beets 4-7 lbs
Berries 4-7 lbs
Broccoli 5-8.75 lbs
Cabbage 4-6 heads
Carrots 5-8 lbs
Cauliflower 5-8.75 lbs
Corn 15-30 ears
Cucumbers 3.75-6 lbs
Garlic 35-50 cloves
Green Beans 5-8 lbs
Green Leaf Lettuce 4-7 lbs
Green Onions 4.5-6 bunches
Leeks 3-4 lbs
Onions 3.75-6 lbs
Peas 4-7 lbs
Peppers 4-7 lbs
Potatoes 28-56 lbs
Pumpkins 3-4 pumpkins
Radishes 0.8-1.6 lbs
Romaine 4-7 lbs
Spinach 4-7 lbs
Sweet Potatoes 20-35 lbs
Tomatoes 10-18 lbs
Yams 20-35 lbs
Zucchini 3.5-5.6 lbs


The Logic of Planting

One of the key principles and is really a true form of art is planting at a staggered pace so that the crop that grows provides as consistent of continual supply as possible for your homestead.  So many homesteaders and gardeners head out to their gardens / plots in early May and plant everything at once which results in everything being ready at once.  It becomes a feast to famine situation and typically results in a large amount of produce going to waste.   Root vegetables such as carrots and potatoes are far more forgiving – but items such as lettuce and peppers have a much shorter shelf life as well as time frame that requires them to be harvested.

Called succession planting – this technique requires you to take into consideration the time from the expected first early harvest to the last harvest of the season.  You can further fine tune this strategy by taking into account the listed maturity times for each of the seeds in a specific vegetable you plant – as well as using a mix of early, mid and late season varieties.  I plan on writing far more extensively on this topic in the coming weeks.

The easiest way to approach this is to work on one vegetable crop at a time – looking at your seeds maturation rate and then on a sheet of paper map out a time line of when each will be ready which will give you your base plan for how and when to start planting what.

Storing Your Harvest

The other important consideration for your homestead food plan is to take into consideration your storage and preserving strategy – but ideally a strategy of providing as much of a flow of fresh consumable produce for as many months of the year is the goal, and then using preserving techniques to stretch through the winter months where no new flow of produce is coming in ( assuming you don’t have a year round greenhouse.  )

A root cellar is a must for any serious homesteader and like its name implies, is used to store root vegetables like potatoes, carrots, beets and onions.  Any produce where the consumable part of the plant grows below the surface is at home in your root cellar so other vegetables like sweet potatoes, turnips, parsnips etc and all be stored for extended periods of time in a properly set up cellar.

There a variety of techniques that you can use in your root cellar to keep your stored roots for months on end.  For those of us old enough, most can remember grandparents having a large bin of sand in their root room that the produced was kept covered in.   More modern techniques include storing your potatoes and such in straw in breathable bins such as wood crates.   The key take away on this subject at a basic level is to only store non-blemished roots and do your best to not let them touch each other in storage.

In a future section and contained articles I’ll be going far more in depth on this subject including an entire extensive guide to canning and preserving.

Until then, the game is a foot with the new growing season just around the corner and time to start planning your strategy for how much you need to grow this year to feed your family.