El Niño’s Historical Impact on the Coming Garden Season.

Preparing for El Niño 2024:

A Comprehensive Guide for Homestead Gardeners in North America

As El Niño fades away in 2024, understanding its impact on specific North American growing regions is worth considering for homestead gardeners. El Niño characterized by the warming of ocean waters in the equatorial Pacific, influences weather patterns globally, especially in North America. This article provides a detailed overview of expected conditions in various regions and offers tailored advice for gardeners.

El Niño’s Post Impact on North American Weather Patterns

El Niño generally results in altered weather patterns across North America in the year following its occurrence :

  • Western Canada and the Pacific Northwest: Typically, these areas experience drier and warmer winters during El Niño. Gardeners should prepare for reduced snowpack and potential drought conditions, impacting water availability for spring and summer.
  • California and the Southwest U.S.: Increased precipitation is a common effect, which could lead to early spring planting opportunities but also raises concerns about flooding and soil erosion.
  • Midwest and Central U.S.: The region may see a mix of impacts, from warmer temperatures to increased moisture. This variability requires gardeners to be flexible in planting dates and crop choices.
  • Northeastern U.S. and Eastern Canada: These areas might experience milder winters, potentially extending the growing season but also increasing the likelihood of pests and diseases due to warmer temperatures.
  • Southeastern U.S.: Expect cooler and wetter conditions, which could benefit spring crops but also challenge pest management and disease control.

Regional Gardening Predictions for 2024 

For each region, specific gardening strategies can optimize productivity during El Niño:

  • Western Canada and the Pacific Northwest:
    • Invest in water conservation measures such as rainwater harvesting and drip irrigation.
    • Consider drought-resistant plant varieties and adjust planting schedules to capitalize on warmer winter temperatures.
  • California and the Southwest U.S.:
    • Prepare for excessive rainfall with proper soil drainage strategies to prevent erosion.
    • Start seedlings indoors to avoid external weather impacts before transplanting.
  • Midwest and Central U.S.:
    • Utilize cover crops to manage increased soil moisture and prevent nutrient leaching.
    • Be ready to adjust planting times based on the onset of warmer spring temperatures.
  • Northeastern U.S. and Eastern Canada:
    • Extend the growing season by using cold frames and hoop houses to protect against unexpected late cold snaps.
    • Increase monitoring and control measures for pests that thrive in milder winters.
  • Southeastern U.S.:
    • Focus on crops that benefit from cooler, wetter conditions, such as leafy greens and brassicas.
    • Employ raised beds and row covers to manage excessive moisture and protect against cooler snaps.

Historical Patterns of First and Last Frost for Post El Niño Years

Incorporating detailed information on the impact of El Niño on last and first frost dates across various North American regions will help gardeners in planning and protecting their crops more effectively. Here’s how El Niño could influence these important gardening dates:

Western Canada and the Pacific Northwest

Historically, El Niño brings milder winters to this region. Gardeners can expect a later first frost in the fall and an earlier last frost in the spring, extending the growing season. However, the reduced precipitation might require adjustments in water management strategies.

California and the Southwest U.S.

El Niño typically results in wetter conditions for these areas, which might lead to delayed last frost dates in the spring. The increase in cloud cover and precipitation could keep temperatures moderate longer, affecting when the first frost occurs in the fall.

Midwest and Central U.S.

In the Midwest, El Niño is associated with warmer winter temperatures, potentially leading to an earlier end to frost periods in the spring. This could allow for earlier planting and extended growing seasons. However, variability is a key factor, and specific local conditions can differ.

Northeastern U.S. and Eastern Canada

This region might experience milder winters during an El Niño year, leading to an earlier spring thaw and later onset of frost in the fall. This could benefit gardeners by providing a longer period for planting and harvesting.

Southeastern U.S.

The Southeastern U.S. tends to see cooler and wetter conditions, which might delay the warming of soil in spring, potentially extending the frost dates later than usual. Gardeners should be prepared for a shorter growing season in spring but might enjoy an extended fall growing season if the first frost is delayed.

Understanding What Causes El Niño

El Niño is a complex weather phenomenon that arises from interactions between the ocean and the atmosphere in the tropical Pacific. It involves several key components:

1. Ocean Temperature Changes

El Niño is primarily characterized by unusually warm ocean temperatures in the central and eastern equatorial Pacific Ocean. Normally, trade winds blow from east to west across the tropical Pacific, pushing warm surface water toward Asia. During El Niño, these winds weaken, and sometimes reverse, allowing warm water to flow back toward the east, toward the coast of South America.

2. Atmospheric Changes

As the warm water shifts eastward, it affects atmospheric pressures. The typical high pressure over the eastern Pacific and low pressure over the western Pacific weaken or reverse. This shift disrupts the normal patterns of tropical precipitation and atmospheric circulation, causing weather changes not only in the Pacific region but globally. This is part of a larger oscillation known as the Southern Oscillation.

3. Thermocline Variations

The thermocline, which is the layer of water in the ocean that separates warmer surface water from cooler deep water, also plays a role. During El Niño, the thermocline in the eastern Pacific becomes shallower than normal, contributing to the warming of surface waters because less cool, deep water rises to the surface.

4. Feedback Loops

El Niño involves feedback loops between the ocean and atmosphere. For example, as the ocean warms, it can cause the air above it to warm as well; warm air holds more moisture, which can alter atmospheric pressures and wind patterns further, enhancing the initial warming.

5. Global Impact

The redistribution of warm water and changes in the atmosphere affect global climate patterns. These can include increased rainfall in parts of the Americas, drought in the western Pacific, and varied impacts such as storms and temperature anomalies in other parts of the world.

Triggering Factors

The exact triggers of El Niño are still a subject of research. It’s believed to start from small temperature fluctuations in the Pacific Ocean, which are amplified by the interactions between the ocean and the atmosphere. Changes in wind patterns might also initiate the onset of an El Niño event.

El Niño events typically occur every 2 to 7 years and can vary in intensity. The complex interplay of these factors makes predicting the onset and impacts of El Niño events challenging but crucial for preparing for its wide-ranging effects on weather, agriculture, and ecosystems worldwide.

For more detailed information, the National Oceanic and Atmospheric Administration (NOAA) provides extensive resources and updates on El Niño and its impacts. You can visit their website to learn more about current conditions and research.

Historical El Niño Occurrences

El Niño events have been observed and recorded over many years, showing a pattern of occurrence roughly every two to seven years. These events can last from nine months up to two years.

Year Intensity Status
1900 Weak Ended
1902 Weak Ended
1905 Weak Ended
1908 Moderate Ended
1911 Weak Ended
1914 Weak Ended
1918 Strong Ended
1923 Weak Ended
1925 Strong Ended
1929 Weak Ended
1932 Moderate Ended
1939 Moderate Ended
1941 Strong Ended
1946 Moderate Ended
1951 Moderate Ended
1953 Weak Ended
1957 Strong Ended
1965 Moderate Ended
1969 Weak Ended
1972 Strong Ended
1976 Weak Ended
1982 Very Strong Ended
1986 Moderate Ended
1991 Strong Ended
1994 Weak Ended
1997 Very Strong Ended
2002 Moderate Ended
2004 Weak Ended
2006 Weak Ended
2009 Weak Ended
2014 Strong Ended
2016 Moderate Ended
2023 Strong Peaked, Weakening

This table captures each El Niño event by year, intensity, and its current status, with the latest event in 2023 described as having peaked and now weakening.

Additionally, historical records from sources like Golden Gate Weather Services offer a detailed listing of El Niño and La Niña years based on the Oceanic Niño Index, which is widely used by NOAA for classifying these events. This list is regularly updated and includes detailed annotations about the intensity of each event.

For those interested in a more visual representation, NOAA’s PMEL website provides graphics showing the sea surface temperature along the equator in the Pacific Ocean, indicating the deviations from normal temperatures that characterize El Niño and La Niña events.

To explore these resources further, you can visit the following links:

These sources will give you a comprehensive view of the historical patterns of El Niño and La Niña, enhancing your understanding of these significant climatic events.

Current El Niño Status 

The latest data indicates that the El Niño event that started in 2023 peaked during November 2023 to January 2024 and is currently in the process of weakening. Although it was expected to persist at least until April 2024, the probability of El Niño conditions continuing is now diminishing. By mid-April 2024, there’s a high likelihood (65%) that conditions will transition to ENSO-neutral, and this is expected to persist into mid-2024. Furthermore, there is a forecast indicating a potential shift towards La Niña conditions starting around June to August 2024, with increasing probabilities later in the year​ (iri.columbia)​​ (World Meteorological Organization)​​ (World Meteorological Organization)​.


Optimizing Your Soil for this Years Beet Harvest

To maximize the yield and quality of your beet harvest, paying close attention to the scientific aspects of soil conditions is essential. Here’s a deeper dive into the factors that influence optimal soil conditions for growing beets:

Soil Texture and Structure

Beets prefer loamy soil, which is a balanced mixture of sand, silt, and clay. This type of soil supports healthy root development due to its ability to retain moisture and nutrients while still providing adequate drainage. Heavy clay soils can be amended with organic matter such as compost or rotted leaves to improve drainage and aeration. If the soil is too sandy, adding organic material can help increase its water-holding capacity and nutrient retention.

pH Level and Nutrient Availability

The ideal soil pH for beets ranges from 6.0 to 7.5. A pH within this range ensures that nutrients are readily available for uptake by the plants. Beets are particularly sensitive to boron deficiency, which is common in alkaline soils. Symptoms of boron deficiency include blackened heart tissue and stunted root growth. Soil testing is recommended to accurately assess the pH and nutrient levels, including boron, before planting. If necessary, pH can be adjusted using lime (to raise pH) or sulfur (to lower pH)​ (You Should Grow)​.

Organic Matter and Fertility

Incorporating organic matter into the soil not only improves its texture and fertility but also enhances its microbial activity, which is beneficial for beet growth. Organic matter, such as compost, provides a slow-release source of nutrients, which is ideal for beets that prefer not to be over-fertilized with nitrogen. Excessive nitrogen can lead to lush foliage at the expense of root development. Additionally, organic matter increases the soil’s cation exchange capacity (CEC), which improves its ability to hold onto essential nutrients like potassium and magnesium, crucial for the healthy development of beet roots​ (How To Grow Everything)​​ (The Garden Magazine)​.

Moisture Management

Beets require consistently moist soil to develop well-formed roots. The soil should be moist but not waterlogged, as excessive water can lead to root rot. The use of organic mulches can help maintain soil moisture and regulate soil temperature, reducing the stress on beet plants during hot weather. Mulching also helps prevent the crusting of the soil surface, which can hinder the emergence of young beet seedlings​ (The Garden Magazine)​.


The Ultimate Guide to Potato Varieties

From Kennebec to Burbank Russet, a look at 10 types of potatoes, their characteristics and how they fit into your planting strategy for your homestead.

The Ultimate Guide to Selecting and Growing Potato Varieties

Potatoes are more than just a staple food; they are a culinary delight that varies significantly in flavor, texture, and color. This guide to ten popular potato varieties will  help you choose the right type for your cooking needs but also provide essential tips for growing them in your garden.

Whether you’re a seasoned gardener looking to expand your crop diversity or a home chef eager to explore different flavors, this article offers valuable insights into each variety’s characteristics, culinary uses, and optimal growing conditions. Explore the versatile Kennebec, the creamy Yukon Gold, and the striking Purple Peruvian, among others, and learn how to nurture and harvest these beloved tubers to perfection.

1. Kennebec: A Versatile Favorite

Description and Best Use

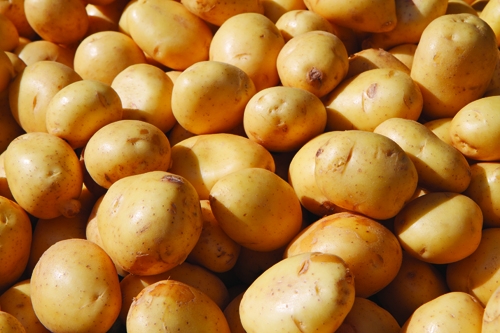
Kennebec potatoes are celebrated for their smooth skin and creamy texture, making them versatile for frying, baking, and mashing.

Origin & Trivia

Originating from Maine, named after the Kennebec River, this variety was introduced in the 1940s and is loved for its adaptability to various climates and soil types.

Kennebec Potato Growing Tips

Plant in well-drained soil and water regularly, especially during tuber formation, to ensure optimal growth.

Harvesting and Storage

Kennebec potatoes mature in about 80-100 days and store excellently through winter if kept in cool, dry conditions.

Planting and Growing Zones

Ideal for USDA zones 3-9, plant these in early spring once the frost has passed.

2. Yukon Gold: The Golden Standard

Description and Best Use

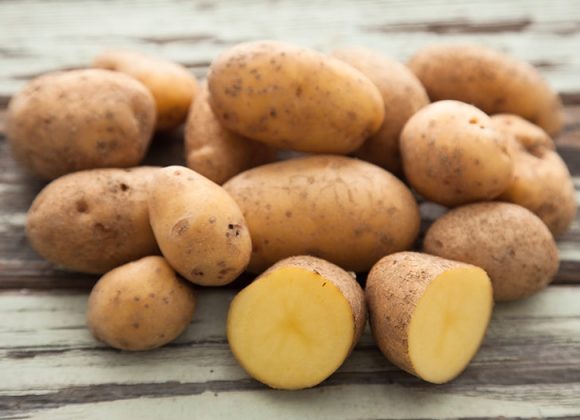
With its fine-grained, buttery yellow flesh, Yukon Gold is great for boiling, baking, and making creamy mashed potatoes.

Origin & Trivia

Developed in Canada in the 1960s, these potatoes are named for their golden color and the Yukon River.

Yukon Gold Potato Growing Tips

These prefer slightly acidic, well-drained soil. Keep the soil consistently moist with regular watering.

Harvesting and Storage

They are ready for harvest in about 90-100 days and have a moderate storage life.

Planting and Growing Zones

Thrives in zones 1-9, plant in early spring for a full growing season.

3. Russian Banana Fingerling: Perfect for Gourmet Dishes

Description and Best Use

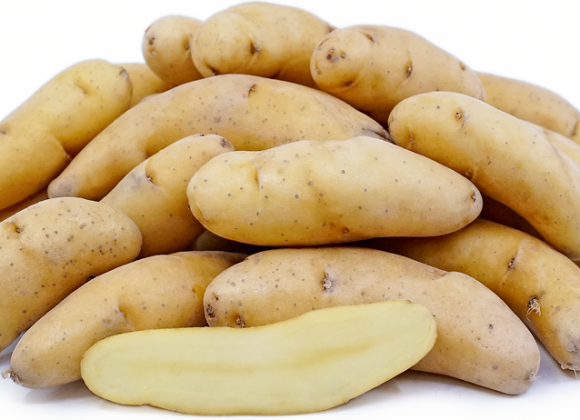
Known for its waxy, yellow flesh, this banana-shaped potato is excellent for boiling and roasting.

Origin & Trivia

This variety comes from the Baltic region of Northeast Europe and is named for its elongated shape.

Banana Russian Fingerling Growing Tips

It thrives in sandy loam soils and requires consistent moisture without overwatering.

Harvesting and Storage

Ready to harvest in about 90 days, it stores well under proper conditions.

Planting and Growing Zones

Plant these after the last frost in zones 3-8.

4. Magic Molly: Visually Stunning

Description and Best Use

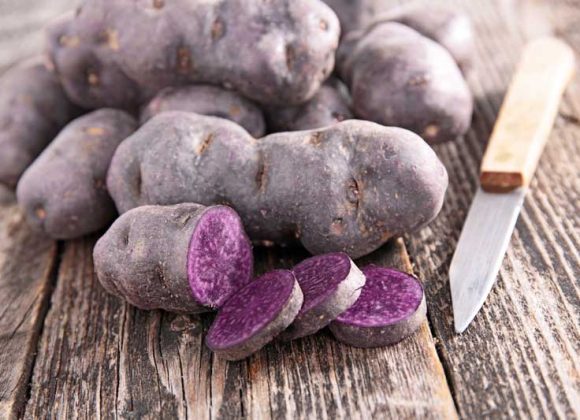
Magic Molly potatoes retain their deep purple color when cooked, making them ideal for vibrant dishes.

Origin & Trivia

Originated in Alaska and named after the breeder’s daughter, Molly.

Magic Molly Potato Growing Tips

Requires fertile, well-drained soil rich in organic matter.

Harvesting and Storage

Takes about 100 days to mature, with fair storage durability.

Planting and Growing Zones

Plant in spring when the soil temperature reaches at least 45°F, suitable for zones 3-9.

5. German Butterball: A Flavorful Heirloom

Description and Best Use

This potato has rich, golden, buttery flesh, making it superb for roasting and mashing.

Origin & Trivia

An old-world variety likely from Germany, prized for its flavor.

Growing Tips

Plant in deep, loose soil and hill as plants grow to ensure healthy tubers.

Harvesting and Storage

Matures in 90-120 days, known for its excellent storage life.

Planting and Growing Zones

Ideal for early spring planting in zones 3-9.

6. Red Pontiac: The Versatile Choice

Description and Best Use

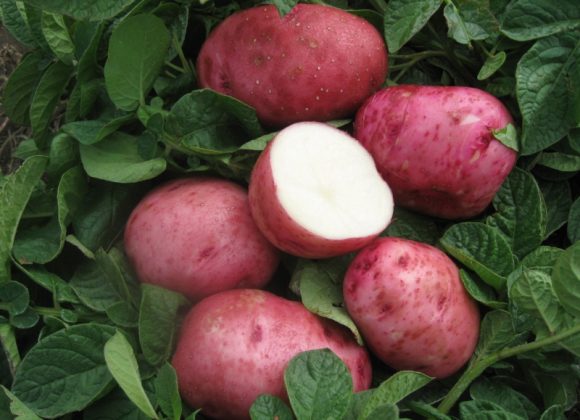
Red Pontiacs have red skin and waxy white flesh, perfect for boiling and baking.

Origin & Trivia

Developed in Florida in the 1940s and named after the Pontiac tribe.

Growing Tips

Best grown in full sun and well-drained soil with moderate watering.

Harvesting and Storage

Ready in about 80-90 days, suitable for medium-term storage.

Planting and Growing Zones

Plant in spring to maximize growth, suitable for zones 3-10.

7. Purple Peruvian: The Nutty Heirloom

Description and Best Use

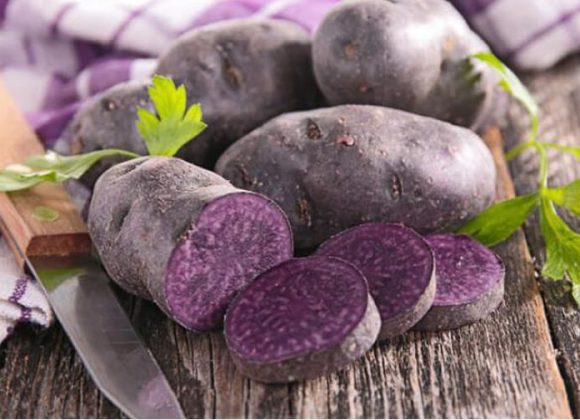
With deep purple skin and flesh, it adds a unique twist to traditional dishes.

Origin & Trivia

Direct descendant of Andean potatoes cultivated by the Incas.

Growing Tips

Prefers cooler climates and well-drained, fertile soil.

Harvesting and Storage

Usually matures in 70-90 days, best used soon after harvest.

Planting and Growing Zones

Best in zones 3-8, plant after frost risk has passed.

8. Elba: The Disease-Resistant Stalwart

Description and Best Use

Known for its disease resistance and excellent storage qualities, great for boiling and mashing.

Origin & Trivia

Named after Elba, New York, where it was developed.

Growing Tips

Requires rich, well-drained soil and frequent watering during dry spells.

Harvesting and Storage

Matures in about 80-100 days, one of the best for long-term storage.

Planting and Growing Zones

Plant early in spring as soon as the soil is workable, suitable for zones 3-9.

9. Lehigh: The High-Yield Variety

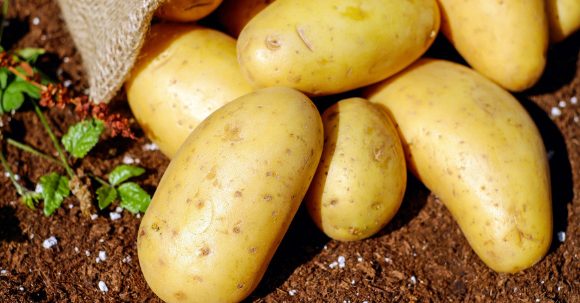
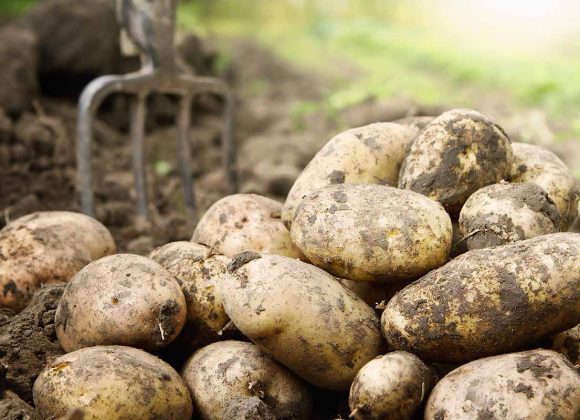
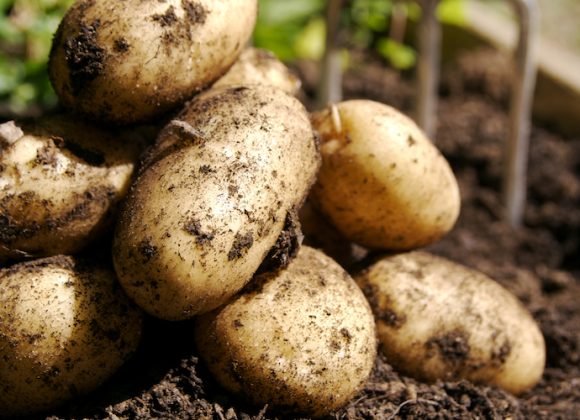
A small pile of potatoes freshly dug from the ground.

Description and Best Use

Offers high yields and storability, with light yellow flesh suitable for mashing and general cooking.

Origin & Trivia

Developed at Penn State University, named after Lehigh County in Pennsylvania.

Growing Tips

Requires full sun and moist, well-drained soil.

Harvesting and Storage

Ready in about 90 days, maintains quality for several months.

Planting and Growing Zones

Plant in early spring, zones 3-9.

10. Burbank Russet: The Fast Food Favorite

Description and Best Use

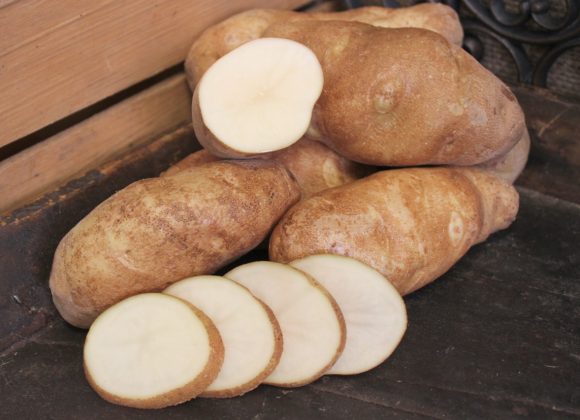
A classic choice for fluffy mashed potatoes and French fries due to its fluffy texture.

Origin & Trivia

Developed by Luther Burbank in the early 20th century, it’s a staple in the fast-food industry.

Growing Tips

Needs loose, well-aerated soil and regular feeding to prevent waterlogging.

Harvesting and Storage

About 90-100 days to harvest with excellent long-term storage capabilities.

Planting and Growing Zones

Best planted in early spring, thrives in zones 4-9.


25 Plants and Shrubs for Defensive Landscaping

When it comes to securing a homestead, most people think about high fences, security cameras, or alarm systems. However, an often overlooked but highly effective method is the use of plants and shrubs to create a defensive barrier. This natural approach not only enhances the beauty and biodiversity of your property but also offers a sustainable and eco-friendly way to protect your space. In this article, we will explore various types of plants and shrubs that make for an effective defensive barrier on a homestead.

Types of Plants and Shrubs for Defensive Landscaping 

Thorny Plants for Perimeter Protection

Thorny plants are the first line of defense in any plant-based security system. They deter intruders by making it difficult and painful to cross the boundary. Examples of Thorny Plants include the classic rose bush, blackberry bushes, and hawthorn trees. These plants are not only defensive but also offer aesthetic and practical benefits, such as producing fruits or flowers. When planting and maintaining, it’s important to ensure they are placed strategically along borders and entry points, and regularly pruned to maximize density and thorniness.

Defensive Landscaping using Dense Shrubs for Privacy and Security

Dense shrubs can create a visual and physical barrier, enhancing privacy and security. Examples of Dense Shrubs like boxwood, yew, and privet are excellent for forming thick hedges that are difficult to penetrate. Proper planting and maintenance involve regular trimming to maintain the desired height and density, ensuring that these living walls remain impenetrable.

Climbing Plants for Enhanced Security

Climbing plants can be used to reinforce fences or walls, making them more difficult for intruders to climb. Examples of Climbing Plants include ivy, climbing roses, and honeysuckle. These plants can also add beauty and fragrance to your defenses. When planting and maintaining, attach the plants to structures securely and prune regularly to prevent overgrowth and maintain strength.

Poisonous Plants as a Natural Deterrent

Although they should be used with caution, especially in households with children and pets, poisonous plants can serve as a strong deterrent. Examples of Poisonous Plants include oleander, foxglove, and castor bean plant. The precautions and maintenance for these plants involve clearly marking the plants and educating family members about the dangers, as well as wearing gloves during handling.

25 Plants and Shrubs for Defensive Landscaping20 Essential Medicinal Plants for Your Healing Garden

No. Plant Name Defensive Feature Description
1 Pyracantha Thorny Dense, evergreen shrub with sharp thorns and bright berries.
2 Berberis (Barberry) Thorny Deciduous/evegreen shrub with sharp thorns and often colorful foliage.
3 Rosa Rugosa Thorny Dense, thorny rose species with large, fragrant flowers and hips.
4 Hawthorn Thorny Hardy tree or shrub with sharp thorns and clusters of white flowers followed by red berries.
5 Blackthorn Thorny Dense shrub or small tree with dark bark, small white flowers, and sloe berries.
6 Bougainvillea Thorny Tropical vine with sharp thorns and vibrant bracts surrounding small flowers.
7 Firethorn (Pyracantha) Thorny Evergreen shrub with fiery berries and sharp thorns.
8 Osage Orange Thorny Dense tree with thorny branches and distinctive green fruit.
9 Prickly Pear Cactus Spiny Succulent with pads covered in spines and colorful flowers.
10 Crown of Thorns Spiny Succulent with densely spiny stems and small, colorful flowers.
11 Agave Spiny Rosette-forming succulents with sharp terminal spines on each leaf.
12 Yucca Sharp Leaves Evergreen shrubs with stiff, pointed leaves.
13 Holly Spiny Leaves Evergreen tree or shrub with glossy, spiny leaves and red berries.
14 Boxwood Dense Growth Evergreen shrub used for dense, sculptable hedges.
15 Privet Dense Growth Fast-growing, dense shrub commonly used for privacy hedges.
16 Leyland Cypress Dense Growth Fast-growing conifer used for tall, dense screens.
17 Bamboo Dense Growth Fast-growing grass that forms dense clumps or screens.
18 English Ivy Climbing Evergreen vine that climbs structures and can create a dense cover.
19 Poison Ivy Irritant Climbing or trailing vine known for its irritating, oily sap.
20 Stinging Nettle Irritant Herbaceous perennial with hairs that can inject irritants causing pain.
21 Giant Hogweed Irritant Large, phototoxic plant that can cause burns and blistering on contact with sunlight.
22 Castor Bean Plant Toxic Fast-growing plant with attractive foliage and seeds that contain ricin, a potent toxin.
23 Oleander Toxic Evergreen shrub with beautiful, but highly toxic flowers and leaves.
24 Datura (Trumpet Flower) Toxic Ornamental plant with large, trumpet-shaped flowers; all parts are toxic.
25 Brugmansia (Angel’s Trumpet) Toxic Large, pendulous flowers and is toxic if ingested.

This selection includes plants that can serve as visual deterrents, physical barriers, or have irritant or toxic properties to discourage trespassing. When choosing plants for a defensive perimeter, consider the specific needs of your property, as well as the local climate and soil conditions, to ensure they thrive and provide the desired level of protection.

Strategic Planting for Optimal Defense

Design Principles for Defensive Planting

Defensive planting doesn’t mean simply filling your garden with thorny or dense plants. It requires strategic planning and design. Layering techniques, combining different types of defensive plants at varying heights and depths, can create an almost impenetrable barrier. Visual guides and maps can help in planning the layout, considering the aesthetics as well as the security aspects.

Planting Zones and Climate Considerations

Choosing plants that are well-suited to your local climate and soil conditions is crucial. This ensures that your defensive barrier is not only effective but also sustainable and low maintenance.

Benefits of Using Plants for Home Defense

The benefits extend beyond security. Plants offer natural barrier vs. artificial barriers, providing habitat for wildlife, improving air quality, and enhancing the overall aesthetics of your property. The ecological and aesthetic benefits are significant, making defensive planting a holistic approach to homestead security.

Maintenance and Upkeep

Like any garden, a defensive barrier requires ongoing pruning and trimming to maintain its effectiveness. Seasonal care ensures that plants are healthy and robust, capable of withstanding intruders as well as environmental challenges. Pest and disease management is also critical to prevent any weak points in your living barrier.

“Plants and Shrubs as Defensive Barriers”

Incorporating defensive plants and shrubs into your homestead’s landscape is not only a smart security strategy but also an investment in the beauty and biodiversity of your property. With the right selection and care, these natural defenders can provide a reliable and aesthetic barrier for years to come.


50 Medicinal Herbs for Your Healing Garden

As we dive into the practical aspects of botany, specifically focusing on the cultivation of medicinal herbs and plants, it’s essential to understand the significance of each species and its contribution to both traditional and modern medicine. Our continued exploration will not only cover the botanical characteristics and environmental needs of these plants but also their historical uses and the scientific basis behind their medicinal properties.

I’ll begin by posting this curated list of 50 medicinal herbs and plants that are suitable for growing in North American climates. This selection includes a diverse range of species, from common herbs like Mint and Basil, known for their culinary and therapeutic benefits, to lesser-known plants such as Yarrow and Skullcap, which have been used for centuries in herbal medicine.

My goal is to provide you with a foundational understanding of how to successfully cultivate these plants, whether in a garden setting or a controlled environment like a greenhouse. We’ll discuss each plant’s specific growing requirements, including soil pH, sunlight exposure, and watering needs, alongside their health benefits and traditional applications.

Medicinal Herbs and Plants

Herb/Plant Uses and Properties Difficulty Level
Mugwort Promotes menstrual cycles, calms nerves, eases digestive issues Intermediate
Mullein Reduces coughing/congestion, treats ear infections Easy
Stinging Nettle Antioxidant, antimicrobial, anti-inflammatory properties Intermediate
Oregano Antibiotic and antifungal agent Easy
Echinacea Boosts immune system against viruses and bacteria Easy
Chamomile Sedative, aids digestion, muscle relaxation Easy
Yarrow Stanches blood flow, reduces inflammation/spasms Easy
Cilantro Fungal infections, inflammation, skin health Easy
Fennel Digestion aid, combats bloating and gas Easy
Ginseng Immune system, mental health improvement Advanced
Goldenseal Antibiotic for colds, sore throats, digestive issues Intermediate
Holy Basil Improves cholesterol/blood sugar, lowers inflammation Intermediate
Lavender Anxiety/stress relief, stomach issues Easy
Licorice Treats coughs, asthma, heartburn Intermediate
Mint Indigestion, nausea, headaches, asthma Easy
Oregon Grape Antibiotic, treats UTIs and skin conditions Intermediate
Rosemary Boosts memory, fights infection Easy
Lousewort Swellings, sore muscles, varicose veins Advanced
Lyre Leaf Sage Similar to sage, but weaker Intermediate
Mallows Traditional remedies, source for Marshmallow Easy
May-apple Herbal jelly from ripe fruit Intermediate
Motherwort Woman’s herb for various life stages Intermediate
Mountain Mint Refreshing mint-like herbal tea Easy
Passionflower Herbal sedative, common in Southern U.S. Intermediate
Perilla Used in sushi, seeds as a spice Easy
Pinkroot Mainly in homeopathic preparations today Advanced
Plantain Treats various conditions, common yard plant Easy
Pokeweed Early shoots eaten, controversial medicinal claims Advanced
Rabbit Tobacco Balances life and death, used in dying Advanced
Red Clover Edible, used in salads/soups Easy
Sassafras Herbal root beer, made into tea Intermediate
Skullcap Calming, used for rabies remedy Intermediate
Soapwort Can be made into soap Intermediate
Solomon’s Seal Poultice for bruises, sore muscles/joints Intermediate
Calendula Soothes skin, heals cuts Easy
Dandelion Supports liver health, improves digestion Easy
Elderberry Immune system booster, treats respiratory infections Intermediate
Garlic Natural antibiotic, lowers blood pressure Easy
Horsetail Strengthens hair, nails, bones Intermediate
Lemon Balm Reduces stress and anxiety, improves sleep Easy
Marshmallow Soothes mucous membranes, coughs, and colds Intermediate
Peppermint Digestive aid, headache relief Easy
Raspberry Leaf Women’s reproductive health support Easy
Sage Antiseptic, digestive aid, memory enhancer Easy
Thyme Antibacterial, cough and bronchitis aid Easy
Valerian Sleep aid, reduces anxiety Intermediate
Vervain Stress relief, supports kidney health Intermediate
Witch Hazel Astringent for skin care Intermediate
Aloe Vera Heals burns and cuts, moisturizes skin Easy
Basil Anti-inflammatory, stress reducer, supports liver health Easy

This table serves as a guiding compass for beginners and seasoned gardeners alike, offering insights into the medicinal benefits and cultivation complexity of each plant. Whether you’re looking to soothe common ailments or bolster your home’s natural health arsenal, this guide empowers you to cultivate a thriving medicinal garden tailored to your wellness needs.

In preparing for a variety of scenarios, including those where traditional medical resources might not be readily available, the strategic selection of medicinal plants for your garden becomes crucial. This approach not only supports everyday health and wellness but also ensures a level of preparedness for “SHTF” (Sh*t Hits The Fan) situations. The key lies in prioritizing plants based on their medicinal properties, ease of cultivation, and their potential to address a broad spectrum of health issues.

Predicting Needs for Natural Healing

When considering what types of plants to grow for natural healing, focus on those with wide-ranging benefits and those known to treat common ailments. For instance, herbs like Garlic and Echinacea are invaluable for their immune-boosting properties, while Calendula and Aloe Vera are essential for skin healing and care. Additionally, incorporating plants like Peppermint and Ginger can aid in digestive health, a common concern in any scenario.

It’s also wise to consider the specific health needs of your household. If someone suffers from chronic conditions such as arthritis, herbs like Stinging Nettle and Turmeric could offer natural relief. This personalized approach ensures that your garden is not just a source of medicine, but one that’s tailored to the unique health profiles within your home.

Essential Plants for SHTF Situations

In a SHTF scenario, the accessibility to conventional medical treatments might be limited. Thus, your medicinal garden should include plants known for their potency in treating serious conditions and their versatility in use.

  1. Yarrow is indispensable for its wound-healing capabilities.
  2. Willow Bark contains salicin, a precursor to aspirin, making it vital for pain relief.
  3. Mullein could be critical for respiratory health, especially in environments where air quality might be compromised.
  4. Broad-spectrum antimicrobial herbs like Oregano and Thyme are essential for treating infections.

Furthermore, in these situations, the ability to grow and propagate plants quickly and with minimal resources becomes a priority. Thus, selecting hardy plants that can adapt to various climates and soils, such as Lavender and Sage, and those that can be easily propagated, like Mint and Lemon Balm, will ensure your garden remains robust and diverse.


20 Essential Medicinal Plants for Your Healing Garden

Creating a healing garden – or medicinal garden in more practical terms,  offers significant health benefits, a fact well understood by homesteaders and natural health advocates. Growing a garden of medicinal plants is not merely a hobby but a practical approach to accessing natural remedies and embracing self-reliance in health care right in your own backyard. This guide is dedicated to highlighting the 20 most essential medicinal plants that every homesteader should consider for their healing garden. From the healing properties of Aloe Vera to the detox benefits of Dandelion, each plant is chosen for its proven ability to support health in ways that complement traditional medicine.

This journey into gardening with a focus on medicinal herbs is more than an enhancement of your outdoor space; it’s an educational venture that equips you with the necessary knowledge to utilize the therapeutic benefits of plants. Whether you are an experienced gardener or new to the concept of medicinal herbs, this article aims to provide you with the foundational information needed to build a productive, health-enhancing garden. Let’s delve into the specifics of these 20 crucial plants, each offering unique healing properties, to transform your garden into a practical resource for wellness and tranquility.

Essential Medicinal Plants

Aloe Vera – The Burn Healer

Aloe Vera is famously known for its soothing and healing properties, particularly for burns and skin irritations. Its thick, gel-filled leaves are a natural first aid remedy. Applying the gel directly onto burns not only reduces pain but also accelerates healing and minimizes scarring. Beyond its external uses, Aloe Vera juice is consumed for its digestive benefits, helping soothe stomach lining and aid in digestive health. Its ease of growing and low maintenance makes it a perfect start for any medicinal garden.

Lavender – The Calming Herb

Lavender is cherished for its delightful aroma and versatile therapeutic properties. It’s a powerhouse for relieving stress and anxiety, promoting relaxation and sleep. A few lavender sprigs in your bedroom or a lavender oil-infused bath can work wonders for a restful night. Additionally, lavender has antiseptic and anti-inflammatory properties, making it an excellent remedy for minor burns, insect bites, and acne. This herb thrives in sunny spots and well-drained soil, offering both visual beauty and health benefits.

Chamomile – The Sleep Promoter

Renowned for its gentle, soothing effect, Chamomile is most commonly used in teas to promote sleep and reduce anxiety. Its mild sedative effects help calm nerves and alleviate insomnia. Chamomile also possesses anti-inflammatory properties, making it beneficial for soothing stomach ailments and menstrual cramps. The small, daisy-like flowers of chamomile are easy to grow and make a delightful addition to any garden, preferring sunny locations and well-drained soil.

Echinacea – The Immunity Booster

Echinacea is widely recognized for its immune-boosting effects. Consuming Echinacea at the onset of a cold can reduce the severity and duration of symptoms. It’s also used to combat various infections, thanks to its antiviral and antibacterial properties. Echinacea thrives in full sun and well-drained soils, and its purple flowers add a splash of color to your garden while bolstering your home’s natural medicine cabinet.

Peppermint – The Digestive Aid

Peppermint is more than just a fresh aroma; it’s a digestive aid that soothes stomach issues, relieves indigestion, and reduces nausea. Peppermint tea is a popular remedy for digestive discomfort, while inhaling peppermint oil can alleviate headaches and mental fatigue. This plant prefers a cool, moist spot in the garden and can be invasive, so consider planting it in pots to keep it contained.

Calendula – The Skin Protector

Calendula, with its bright orange flowers, is not only a visual delight but also a skin care miracle. It promotes skin healing, soothes eczema, and reduces inflammation, making it a key ingredient in homemade salves and lotions. Calendula’s antifungal and antimicrobial properties also make it beneficial for healing wounds and minor cuts. It’s easy to grow and does well in full sun and moderate conditions.

Garlic – The Natural Antibiotic

Garlic‘s reputation as a natural antibiotic is well-deserved. It boosts the immune system, fights infections, and has been shown to have a broad spectrum of antimicrobial activity. Incorporating garlic into your diet can also lower blood pressure and cholesterol levels, contributing to heart health. Garlic is straightforward to grow, requiring only well-drained soil and plenty of suns.

Ginger – The Nausea Reliever

Ginger is a potent root with remarkable anti-inflammatory and antioxidative properties. It’s especially effective in relieving nausea, motion sickness, and morning sickness. Ginger tea can soothe sore throats and assist with flu symptoms, while its anti-inflammatory effects help with pain relief in conditions like arthritis. Ginger requires warm, humid conditions to thrive, making it suitable for indoor gardening in cooler climates.

Basil – The Anti-inflammatory

Basil is not just a culinary herb but also a medicinal plant with powerful anti-inflammatory properties. It’s beneficial for digestive health, reducing bloating and water retention. Basil also has adaptogenic properties, helping the body to adapt to stress and to balance mood. This herb loves warm weather and plenty of sunlight, making it a perfect addition to any kitchen garden.

Lemon Balm – The Stress Reducer

Lemon Balm is celebrated for its calming effects on the nervous system, effectively reducing anxiety and promoting sleep. Its mild sedative properties make lemon balm tea a great choice for those looking to relax after a stressful day. Lemon balm can also enhance cognitive function and is used to soothe digestive issues. It grows best in full sun to partial shade and is easy to care for.

Sage – The Throat Soother

Sage has a long history of use as a medicinal plant, particularly for sore throats, dental abscesses, and gingivitis, thanks to its antibacterial properties. Sage tea can be a soothing gargle for throat pain and inflammation. This herb also supports brain health and memory, making it a beneficial addition to your diet. Sage prefers sandy, well-drained soil and lots of suns.

Thyme – The Cough Suppressant

Thyme is packed with antimicrobial properties, making it an excellent remedy for coughs, bronchitis, and throat infections. Thyme tea helps relieve coughing and soothes the respiratory system. This herb is also a powerful antioxidant, supporting the immune system and overall health. Thyme thrives in sunny, well-drained environments and is drought tolerant, making it a low-maintenance choice for any garden.

Rosemary – The Memory Enhancer

Rosemary is not only known for its aromatic flavor in cooking but also for its ability to enhance memory and concentration. The herb has antioxidant and anti-inflammatory compounds that can improve blood flow to the brain, boosting cognitive function. Rosemary is drought-resistant and thrives in well-drained soils, preferring full sun.

Feverfew – The Migraine Mitigator

Feverfew has been traditionally used to prevent and treat migraines. Compounds in feverfew help in reducing the frequency of migraine headaches and alleviate symptoms like nausea and sensitivity to light. This plant prefers well-drained soil and full sun to partial shade, making it an easy addition to a medicinal garden.

St. John’s Wort – The Mood Stabilizer

St. John’s Wort is well-known medicinal plant for its antidepressant effects, helping to alleviate symptoms of mild to moderate depression. It also has antiviral properties and can help soothe skin when applied topically. St. John’s Wort requires full sun and well-drained soil, flourishing in many garden settings.

Valerian – The Anxiety Alleviator

Valerian root is widely used for its sedative and calming effects, particularly in treating insomnia and anxiety. Valerian tea or tincture can provide relief from stress and promote restful sleep. This plant enjoys full sun to partial shade and moist, well-drained soils.

Turmeric – The Wound Healer

Turmeric contains curcumin, a compound with powerful anti-inflammatory and antioxidant properties. It’s used to accelerate wound healing, reduce inflammation, and support joint and cardiovascular health. Turmeric requires warm, humid conditions to thrive, making it suitable for indoor gardening in cooler climates.

Dandelion – The Liver Cleanser

Dandelion is much more than a common weed; it’s a powerful liver cleanser and detoxifier. Both the leaves and roots support liver function, aid digestion, and are rich in vitamins and minerals. Dandelion grows easily in most soils and conditions, making it a prolific and beneficial addition to your medicinal garden.

Milk Thistle – The Liver Protector

Milk Thistle is renowned for its liver-protecting effects. It’s used to treat liver diseases and protect the liver from damage due to toxins. Milk thistle can help regenerate liver cells and has antioxidant and anti-inflammatory properties. This plant prefers full sun and well-drained soils.

Nettle – The Allergy Reliever

Nettle is a natural antihistamine, making it effective in relieving symptoms of seasonal allergies such as sneezing, itching, and congestion. Nettle tea is a nutrient-rich tonic that also supports joint health and urinary function. This plant thrives in rich soil with plenty of moisture and can grow in partial shade, making it versatile for different garden spaces.

Cultivating these medicinal plants offers a way to blend the joys of gardening with the practical benefits of natural health remedies. Each plant brings its unique set of benefits, ensuring that your garden not only looks beautiful but also serves as a cornerstone of health and well-being for your homestead.


Devil’s Claw in Your Medicinal Garden

For most, there only knowledge of Devil’s Claw is what they see in the supplement section of their local pharmacy or health food store,  but can be grown in your medicinal garden with a bit of effort and be far more effective then in a processed pill form.     Scientifically known as Harpagophytum procumbens, is a marvel of nature hailing from the arid landscapes of southern Africa. Its distinctive hook-shaped fruit not only captures the eye but also hints at the plant’s profound healing abilities. Traditionally embraced for its anti-inflammatory and analgesic properties, Devil’s Claw stands out as a beacon of relief for those battling joint pain, arthritis, and back pain. The essence of its therapeutic prowess lies in harpagoside, an active ingredient that spearheads its medicinal benefits. Beyond its primary uses, ongoing research sheds light on its potential to foster digestion and appetite control, making Devil’s Claw a pivotal addition to any medicinal garden.

Harpagoside Health Benefits

Pain Relief and Mobility Enhancement: At the heart of Devil’s Claw’s appeal is harpagoside, celebrated for its effectiveness in diminishing the discomfort of arthritis and the inflammation accompanying it. This compound offers a glimpse into the future of pain management, providing a natural alternative to traditional painkillers. Notable studies corroborate its capacity to ease chronic back pain and enhance mobility, positioning it as a favorable option with minimal adverse effects.

Aiding in Weight Management: The intrigue of harpagoside extends into the realm of weight management, where it’s seen to curb the production of ghrelin, commonly referred to as the “hunger hormone.” This action suggests a promising avenue for appetite suppression and, consequently, weight loss support, presenting an exciting prospect for those on a journey to a healthier self.

Digestive Health Support: Historically, Devil’s Claw has been utilized to invigorate appetite and bolster digestive health. Its application ranges from alleviating indigestion to easing heartburn, highlighting its versatility in promoting gastrointestinal well-being.

Potential in Skin Care: Though scientific validation is pending, topical application of Devil’s Claw has been traditionally employed to soothe minor wounds, bruises, and skin inflammations, suggesting a supplementary role in skin care regimens.

Exploring Anti-Cancer Possibilities: Preliminary research introduces the concept of harpagoside possessing antimutagenic properties, potentially mitigating chromosomal damage. This opens a speculative dialogue on its role in cancer care, particularly in lymphoma, where positive patient outcomes have been documented.

The Anti-Inflammatory and Antioxidant Duo: Devil’s Claw’s acclaim is further bolstered by its anti-inflammatory capabilities, which may offer therapeutic benefits for conditions like ulcerative colitis and type 1 diabetes. This is largely attributed to its antioxidant richness, underscoring its holistic health contributions.

Constituents and Recommended Dosing

Valued for its complex blend of iridoid glycosides, including harpagoside, procumbide, and harpagide, Devil’s Claw is often standardized to ensure a harpagoside content of 1-5%. The suggested dosage varies, encompassing 3-6 grams of the whole herb, 6-12ml of a 1:2 tincture, or 600-1200mg of powdered extract daily, offering flexibility in its incorporation into health routines.  Despite its generally safe profile, Devil’s Claw warrants caution for individuals with gastric or duodenal ulcers. Its traditional use during pregnancy in South Africa for pain relief does not fully establish its safety for pregnant and lactating women. Furthermore, no significant drug interactions have been noted, enhancing its appeal as a complementary health option.


Growing Devils Claw in Your Garden

Cultivating Devil’s Claw: A Guide to Growing Your Own Medicinal Plant

Growing Devil’s Claw (Harpagophytum procumbens) at home can be a rewarding endeavor, not only for the medicinal benefits it brings but also for the unique aesthetic appeal of its hook-shaped fruit. Originating from the arid landscapes of southern Africa, this plant requires specific conditions to thrive but is surprisingly resilient once established. Here’s how to cultivate your own Devil’s Claw, turning your garden into a haven of healing and natural beauty.

Choosing the Right Location and Soil

Devil’s Claw prefers a sunny spot with well-draining soil, mimicking its native desert environment. It thrives in sandy or loamy soil with a neutral to slightly acidic pH. Ensure adequate space as the plant can spread out with its sprawling vines.

Sowing Seeds

The best time to sow Devil’s Claw seeds is in early spring, after the danger of frost has passed. Soak the seeds overnight to soften the hard outer shell, enhancing germination rates. Plant the seeds at a depth of about 1 cm (0.4 inches) in prepared soil, spacing them approximately 60 cm (24 inches) apart to accommodate their growth.

Watering and Care

Initially, keep the soil consistently moist but not waterlogged until germination occurs, which can take anywhere from 14 to 28 days. Once the plants are established, reduce watering, as Devil’s Claw is drought tolerant. However, during very dry spells, occasional watering will support its growth.

Fertilization

Devil’s Claw benefits from a light application of a balanced, organic fertilizer at the start of its growing season. Avoid over-fertilizing, as this can lead to more foliage at the expense of the root, which contains the valuable medicinal properties.

Harvesting

The roots of Devil’s Claw are harvested in the second year after planting, in late fall when the plant’s aerial parts begin to die back. Carefully dig around the plant to lift the tuberous roots, which will be large and forked. Wash them gently and dry thoroughly before storage or use.

Pests and Diseases

Devil’s Claw is relatively free from major pests and diseases, especially when grown under optimal conditions. However, keep an eye out for common garden pests and fungal diseases, addressing any issues promptly to ensure the health of your plants.Given Devil’s Claw’s status as a plant of medicinal importance, sustainable harvesting practices are essential to preserve this valuable resource. If you’re growing it primarily for personal use, ensure to harvest responsibly, leaving enough of the plant to regenerate for the following year.


The Ideal Temperature for Your Root Cellar

Optimizing Storage Efficiency: The Ideal Temperature for Your Root Cellar

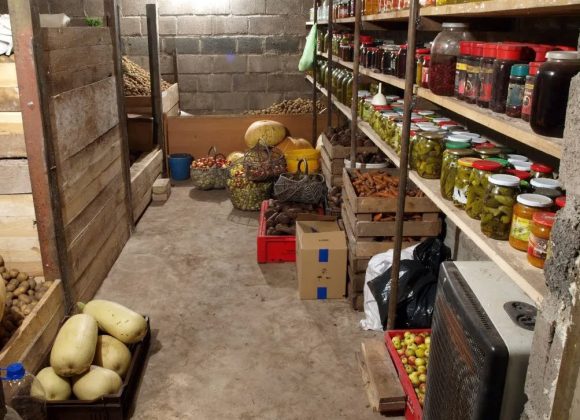
Root cellars are important cornerstone of the homesteading journey, but for many homesteaders, too much is left too chance and based on passed down practices or lack of understanding of how root cellars work to keep your food supplies in optimum conditions for maximizing their lifespan.   In this article, I wanted to dig into the principles of how root cellars work and how to either upgrade your current homestead cellar, or create a new one from scratch for this falls harvest.

The Role of Temperature in Root Cellar Storage

In the realm of homesteading and self-sufficiency, root cellars are invaluable for storing homegrown produce. However, the key to harnessing their full potential lies in maintaining the right temperature. This article delves into why keeping your root cellar within the ideal temperature range is crucial for maximizing storage efficiency and extending the shelf life of your fruits and vegetables.

Understanding the Ideal Temperature Range

The Magic Numbers: 32-40°F (0-4°C)

The ideal temperature range for a root cellar is between 32°F and 40°F (0°C to 4°C). This temperature range is cold enough to keep the produce dormant and slow down the decomposition process but not so cold as to freeze and damage the produce. Maintaining this temperature range helps to ensure that vegetables and fruits stored in a root cellar remain fresh for a longer period. Additionally, the humidity level in a root cellar should be kept high, around 85% to 95%, to prevent the produce from drying out and to maintain its freshness. Proper ventilation is also essential to regulate temperature and humidity levels and to remove any gases emitted by the stored produce.

How Temperature Affects Different Types of Produce

Temperature plays a crucial role in the storage and shelf life of various types of produce, affecting them differently based on their unique characteristics and storage needs. Here’s how temperature impacts different categories of fruits and vegetables:

  1. Cool-Temperature Produce: This category includes fruits and vegetables like apples, pears, potatoes, and carrots, which prefer cool but not cold storage conditions, typically between 32°F and 40°F (0°C to 4°C). At these temperatures, metabolic processes slow down, reducing the rate of ripening and spoilage.
  2. Tropical Fruits and Warm-Temperature Vegetables: Produce such as bananas, tomatoes, cucumbers, and peppers, which originate from warmer climates, are sensitive to cold temperatures. Storing them below 50°F (10°C) can lead to cold damage, manifesting as dark spots, accelerated decay, and loss of flavor. These items are best kept at room temperature until ripe.
  3. Leafy Greens and Cruciferous Vegetables: Greens like lettuce, spinach, and kale, along with broccoli and Brussels sprouts, require cold, humid conditions to maintain their crispness and nutritional value. Temperatures just above freezing, around 32°F to 36°F (0°C to 2°C), are ideal, with high humidity to prevent wilting.
  4. Root Vegetables: Root crops such as beets, radishes, and turnips benefit from cold, moist storage similar to leafy greens. These conditions mimic the underground environment where they naturally thrive, slowing down respiration and moisture loss.
  5. Ethylene-Producers and Ethylene-Sensitive Produce: Some fruits, like apples, avocados, and bananas, produce ethylene gas, which can accelerate ripening and spoilage. Ethylene-sensitive produce, such as potatoes and leafy greens, should be stored separately to avoid premature spoilage.
  6. Stone Fruits: Peaches, plums, and cherries are best stored at temperatures between 32°F and 40°F (0°C to 4°C) to slow down ripening. However, they should be allowed to ripen at room temperature before eating for the best flavor and texture.

Temperature affects produce by influencing their metabolic and respiratory rates, with different types requiring specific conditions for optimal storage. Understanding these needs helps in reducing food waste and preserving the quality and nutritional value of fruits and vegetables.

The Science of Cold Storage

Temperature vs. Produce Lifespan

The relationship between temperature and the lifespan of produce is rooted in the basic principles of biology and chemistry, with temperature being a key factor in regulating the metabolic processes that occur within fruits and vegetables after harvest. Here’s an overview of how temperature affects produce lifespan:

1. Metabolic Rate

  • Lower Temperatures: Generally, lower temperatures reduce the metabolic rate of produce. This means that the chemical reactions responsible for ripening, respiration, and eventually decay occur more slowly. By slowing these processes, cold storage can significantly extend the lifespan of many types of fruits and vegetables.
  • Optimal Temperature Range: Each type of produce has an optimal temperature range for storage that maximizes its shelf life. Storing produce at its ideal temperature minimizes the metabolic activity to an optimal level, prolonging freshness and nutritional quality.

2. Ripening Process

  • Ethylene Production: Many fruits produce ethylene gas, a natural ripening agent. Temperature management is crucial in controlling ethylene production and sensitivity. Cooler temperatures can slow down the production and effects of ethylene, delaying ripening and extending the storage life of ethylene-sensitive produce.
  • Tropical Fruits and Warm-Temperature Produce: These types of produce, such as bananas, avocados, and tomatoes, may suffer from cold-induced damage if stored at temperatures too low, accelerating spoilage rather than preventing it.

3. Respiration Rate

  • Lowering Respiration: Lower temperatures reduce the respiration rate of produce, the process by which oxygen is consumed and carbon dioxide is produced. By slowing respiration, the depletion of stored sugars and nutrients within the produce is reduced, extending its edible life.
  • Avoiding Freezing: It’s important to avoid temperatures that are too low, as freezing can cause cellular damage to many types of fruits and vegetables, leading to mushiness, flavor loss, and increased susceptibility to decay after thawing.

4. Moisture Loss

  • Humidity and Temperature: Proper humidity levels are essential in conjunction with temperature management. Cold air can hold less moisture than warm air, so without proper humidity control, cold storage can lead to dehydration and shrinkage of produce. This emphasizes the need for a balance between temperature and humidity to maximize lifespan.

5. Specific Temperature Needs

  • Diverse Needs: Different types of produce have varied temperature and humidity requirements for optimal storage. For example, leafy greens prefer very cold, moist conditions to stay crisp, while onions and garlic need cool, dry conditions to prevent mold and sprouting.

The Importance of Consistency

Temperature consistency is critical for a root cellar’s effectiveness in preserving the quality and extending the shelf life of stored fruits, vegetables, and other perishable goods. The importance of maintaining a stable temperature in a root cellar can be attributed to several key factors:
  1. Slows Down Spoilage: A consistent temperature slows the biochemical processes that lead to spoilage and decay. Most root cellar-stored produce benefits from a cool environment that minimizes the activity of enzymes and microorganisms responsible for rotting. Fluctuating temperatures can accelerate these processes, reducing the lifespan of the stored produce.
  2. Prevents Freezing: Consistent temperatures ensure that the cellar remains above the freezing point. Freezing can cause damage to the cellular structure of many fruits and vegetables, leading to mushiness, loss of flavor, and increased susceptibility to decay once thawed. A stable temperature helps avoid the risk of freezing and its associated damage.
  3. Controls Humidity Levels: Temperature consistency also aids in maintaining appropriate humidity levels. High humidity is necessary in a root cellar to prevent dehydration and shrinkage of produce. However, temperature fluctuations can lead to condensation and excess moisture, promoting mold growth and spoilage. A stable temperature helps keep humidity levels in the desired range, ensuring produce remains fresh for longer.
  4. Ethylene Gas Management: Some fruits emit ethylene gas, which can accelerate ripening and spoilage of sensitive vegetables and fruits. A consistent temperature helps to manage the effects of ethylene gas by slowing down its production and the ripening process, thereby extending the storage life of various produce.
  5. Prevents Sprouting: For root vegetables like potatoes, onions, and garlic, a consistent, cool temperature inhibits sprouting. Sprouting can deplete the nutrients in these vegetables, reducing their quality and shelf life. By maintaining a stable temperature, root cellars can effectively reduce the risk of premature sprouting.
  6. Energy Efficiency: For modern root cellars that use climate control systems, maintaining a consistent temperature is more energy-efficient than allowing wide temperature fluctuations that require frequent adjustments. This efficiency is not only cost-effective but also better for the environment.

Managing Root Cellar Temperature Fluctuations

Natural Insulation Methods

Natural insulation methods for a root cellar leverage the surrounding environment and sustainable materials to maintain the ideal temperature and humidity levels required for storing produce. These methods are cost-effective and environmentally friendly, making them popular choices for those looking to store their harvest without relying heavily on artificial cooling or heating systems. Here are some of the most effective natural insulation methods:

  1. Earth Insulation: Utilizing the natural insulating properties of the earth is the most traditional and effective method for a root cellar. By burying the cellar underground or building it into a hillside, the earth itself acts as a natural barrier against temperature fluctuations. The soil provides excellent insulation because of its thermal mass, keeping the interior of the cellar cool in the summer and preventing it from freezing in the winter.
  2. Straw Bales: Straw bale construction can be used for above-ground cellars or to insulate the exterior walls of an underground cellar. Straw has a high insulation value and is a renewable resource, making it an environmentally friendly option. The bales are stacked around the exterior walls, and then plastered to protect against moisture and pests.
  3. Wood Chips or Sawdust: A thick layer of wood chips or sawdust can be used to insulate the roof and walls of a root cellar. These materials are often readily available from local sawmills or woodworking shops and provide good insulation. They should be packed tightly to reduce air movement and improve their insulating properties.
  4. Living Roofs: A living roof, or green roof, involves planting vegetation on the roof of the cellar. This layer of soil and plants provides excellent insulation, helps manage rainwater runoff, and further integrates the structure with its natural surroundings. The plants and soil shield the cellar from direct sunlight, reducing heat gain in the summer.
  5. Stone or Clay: Thick stone or clay walls have been traditionally used in some regions for their thermal mass, which helps to stabilize interior temperatures. Though not as insulating as modern materials, when used in combination with earth berms or other insulating materials, they can effectively maintain a consistent temperature within the cellar.
  6. Perimeter Insulation: Placing insulating materials around the perimeter of the cellar, especially if it’s partially above ground, can help maintain its internal temperature. Materials like rigid foam insulation boards or packed earth bags can be used for this purpose, offering a barrier against heat transfer.
  7. Water Barrels: Large barrels of water placed inside the cellar can serve as a thermal mass, absorbing heat during the day and releasing it slowly at night. This helps to moderate temperature fluctuations, keeping the cellar cooler in the day and warmer at night.

Technological Solutions for Modern Homesteaders

Technological solutions for modern root cellars blend traditional preservation methods with contemporary innovations, enhancing efficiency, temperature stability, and the overall storage quality of produce. Modern homesteaders can adopt various technologies to create or improve root cellars, making them more effective and easier to manage. Here are some technological solutions tailored for modern root cellars:

1. Temperature and Humidity Control Systems

  • Thermostatically Controlled Ventilation: Systems that automatically open and close vents based on the temperature inside the root cellar ensure optimal conditions are maintained year-round.
  • Electronic Humidifiers/Dehumidifiers: Maintaining the correct humidity level is crucial for preserving the quality of stored produce. Modern root cellars can be equipped with devices to adjust humidity levels automatically.

2. Insulation and Construction Materials

  • Eco-Friendly Insulation: Using sustainable, high-performance insulation materials such as sheep’s wool, cork, or recycled polystyrene can help maintain stable temperatures.
  • Green Roofing: Planting a green roof over the root cellar can provide additional insulation and help regulate the temperature by absorbing heat during the day and releasing it at night.

3. Energy Management

  • Solar Power: Solar panels can provide the energy needed to run ventilation, lighting, and humidity control systems, making the root cellar more sustainable.
  • Earth Tubes: These underground tubes leverage the constant temperature of the earth to pre-condition the air entering the root cellar, cooling it in the summer and warming it in the winter.

4. Monitoring and Automation

  • Wireless Temperature and Humidity Sensors: These sensors can monitor conditions inside the root cellar and send alerts or automatically adjust the environment via connected systems.
  • Smart Controllers: Integrating a smart home system allows for remote monitoring and control of the root cellar’s environment, ensuring optimal conditions are maintained without needing to physically check the space.

5. Design and Layout Innovations

  • Modular Shelving Systems: Adjustable shelving can accommodate different sizes and types of produce, improving organization and accessibility.
  • LED Grow Lights: For cellars used for growing sprouts or overwintering plants, energy-efficient LED grow lights can provide the necessary light spectrum with minimal heat output.

6. Sealing and Waterproofing

  • Advanced Waterproofing Materials: Modern sealants and waterproofing membranes prevent moisture ingress, which is essential for underground or partially buried root cellars.

7. Door and Ventilation Technology

  • Insulated Doors: High-quality insulated doors minimize heat exchange.
  • Automated Ventilation: Electric fans and vents can be used to manually or automatically adjust airflow based on the internal conditions of the root cellar.

By integrating these technological solutions, modern homesteaders can significantly enhance the functionality and efficiency of their root cellars. These innovations not only improve the storage conditions for produce, extending its shelf life and quality, but also contribute to a more sustainable and self-sufficient lifestyle.

Tips for Monitoring and Adjusting Temperature

Tools and Techniques

Monitoring and adjusting the temperature in a root cellar is crucial to maintain the ideal storage conditions for preserving fruits, vegetables, and other perishables. Here are several techniques and technologies that modern homesteaders and enthusiasts can use to effectively manage root cellar temperatures:

1. Temperature Monitoring

  • Digital Thermometers and Hygrometers: These devices provide accurate and immediate readings of both temperature and humidity levels inside the root cellar. Many digital models can store data over time, allowing you to track trends and make adjustments as needed.
  • Wireless Sensor Networks: Wireless sensors can be placed throughout the root cellar to monitor conditions in real-time. These sensors can often be connected to a smartphone or computer, enabling remote monitoring.
  • Smart Home Systems: Integrating the root cellar into a smart home system allows for sophisticated monitoring and alerts. These systems can notify you when temperatures fall outside of the desired range, ensuring timely adjustments.

2. Temperature Adjustment Techniques

  • Ventilation: Strategically placed vents can be opened or closed to regulate the temperature inside the root cellar. Cooler night air can be let in to lower temperatures, while vents can be closed during the day to keep warm air out.
    • Automatic Ventilation: Automated systems can open and close vents based on the internal temperature, removing the need for manual adjustments.
  • Insulation: Proper insulation helps maintain a constant temperature within the root cellar. Insulating the walls, ceiling, and door of the root cellar can prevent external temperature fluctuations from impacting the inside environment.
    • Reflective Insulation: This can be particularly effective in hotter climates, reflecting heat away from the cellar to keep it cool.
  • Thermal Mass: Water barrels or stone walls inside the root cellar can act as a thermal mass, absorbing and releasing heat slowly, which helps stabilize temperature fluctuations.
  • Earth Contact: The natural insulation provided by the earth is one of the most effective ways to regulate temperature. Building the root cellar partially or fully underground takes advantage of the earth’s constant temperature, which can help keep the cellar cool in summer and prevent freezing in winter.
  • Cooling Systems: In climates where it’s challenging to maintain cool temperatures naturally, small cooling units similar to air conditioners can be used. These should be used sparingly, as they increase energy consumption.
  • Earth Tubes: This passive geothermal technique involves burying PVC pipes underground and allowing air to circulate through them. As the air travels through the tubes, it cools to the earth’s temperature before entering the cellar, reducing the interior temperature naturally.

3. Ensuring Adequate Airflow

  • Strategic Placement of Vents: To ensure effective airflow, place intake vents at a lower point to bring cool air in and an exhaust vent at a higher point to let warm air escape.
  • Fans: Small, energy-efficient fans can help circulate air within the root cellar, preventing cold spots and ensuring a uniform temperature throughout.

4. Seasonal Adjustments

  • Seasonal Reorganization: Adjust the positioning of vents with the changing seasons. For example, during the winter, you might reduce ventilation to maintain a warmer interior temperature, while in summer, increasing ventilation can help keep the cellar cool.
  • Adapting Insulation: Removable insulation panels can be added or removed based on seasonal needs, allowing for greater temperature control throughout the year.

When and How to Make Adjustments

Adjusting root cellar temperatures is key to preserving the quality and longevity of stored produce. Knowing when to make these adjustments is crucial for maintaining the optimal environment. Here are some guidelines on when it might be necessary to adjust root cellar temperatures:

1. Seasonal Changes

  • Spring and Fall: These transitional seasons often see significant fluctuations in outside temperature, which can affect the root cellar. Monitor external temperatures and make adjustments to ventilation to maintain a stable internal temperature.
  • Summer: As external temperatures rise, it may be necessary to increase ventilation during cooler nighttime hours to bring down the cellar’s temperature. Consider using thermal mass, like water barrels, to help stabilize temperatures.
  • Winter: In colder climates, ensure that the cellar is adequately insulated to prevent freezing. Adjust or minimize ventilation to maintain the desired temperature range.

2. External Temperature Extremes

  • Heatwaves: During unusually hot periods, it’s critical to monitor the cellar’s temperature more frequently and use all available means to keep it cool, such as enhanced insulation or additional thermal mass.
  • Cold Snaps: Protect the cellar from freezing during extreme cold by reducing ventilation and ensuring that doors and vents are well-insulated.

3. Upon Noticing Changes in Stored Produce

  • Signs of Spoilage: If you observe increased spoilage, such as mold growth or softening of produce, it might indicate that temperatures are too high or humidity levels are improper.
  • Freezing or Frost Damage: If produce shows signs of freezing or frost damage, it indicates that the cellar’s temperature has dropped too low.

4. Regular Scheduled Checks

  • Weekly Checks: At a minimum, temperature and humidity levels should be checked weekly to ensure they remain within the desired range. This routine can be adjusted based on the findings and external conditions.

5. After Adjusting Ventilation or Insulation

  • Monitoring After Changes: Whenever you make adjustments to the cellar’s ventilation or insulation, closely monitor the temperature and humidity over the following days to assess the impact of those changes.

6. Before and After Storing Produce

  • Pre-Storage Check: Before placing new produce in the cellar, check the temperature and humidity to ensure they are optimal for the type of produce being stored.
  • Post-Storage Adjustment: Adding a large quantity of produce, especially if it’s at a different temperature than the cellar, can alter the internal environment. Monitor and adjust as necessary.

7. Using Technological Solutions

  • Smart Monitoring: Utilize smart sensors and home automation systems to provide alerts when temperatures deviate from the set range, allowing for timely adjustments without constant manual checks.

Common Root Cellar Challenges and Solutions

Dealing with Rapid External Temperature Changes

Dealing with rapid external temperature changes is a challenge for maintaining the ideal conditions in a root cellar. Effective strategies can help mitigate these effects, ensuring that the temperature and humidity levels inside the cellar remain stable, preserving the quality and longevity of stored produce. Here are several approaches to manage rapid external temperature fluctuations:

1. Enhance Insulation

  • Upgrade Insulation: Improve the insulation on the walls, ceiling, and door of the root cellar to reduce the impact of external temperature changes. Materials with high R-values, such as rigid foam or spray foam insulation, are effective.
  • Weather Stripping: Apply weather stripping around the door and any other openings to prevent drafts and heat exchange.

2. Utilize Thermal Mass

  • Water Barrels: Place large barrels filled with water inside the root cellar. Water has a high specific heat capacity, meaning it can absorb and release heat without significant changes in temperature, acting as a buffer against temperature fluctuations.
  • Stone or Concrete: Walls made of stone or concrete can also serve as significant thermal mass, helping to stabilize the temperature inside the cellar.

3. Strategic Ventilation

  • Adjustable Vents: Install vents that can be easily opened or closed. Open vents at night to allow cooler air in during hot spells, and close them during the day to keep heat out. Conversely, during sudden cold snaps, minimize ventilation to retain warmth.
  • Automated Ventilation Systems: Consider installing an automated system that can open and close vents based on the temperature inside and outside the root cellar, reducing the need for manual adjustments.

4. Monitoring and Alerts

  • Temperature and Humidity Sensors: Install sensors to continuously monitor the conditions inside the root cellar. Opt for systems that can send alerts to your smartphone or computer when temperatures exceed or fall below your set thresholds, allowing for timely interventions.

5. Earth Sheltering

  • Maximize Earth Contact: The deeper the root cellar is buried or the more it is covered by earth, the more it is protected from external temperature changes. Earth has a relatively constant temperature, acting as a natural insulator.

6. Reflective Coatings and Shading

  • External Shading: Use natural or artificial shading to protect the root cellar’s entrance and any exposed parts from direct sunlight, reducing heat absorption.
  • Reflective Paints: Applying reflective paint or materials to the exterior of the root cellar can help deflect heat away, keeping the cellar cooler during hot periods.

7. Adaptable Insulation Solutions

  • Removable Insulation Panels: For areas with significant temperature swings, using removable insulation panels on the outside of the root cellar can offer flexibility. Add extra insulation during hot weather to keep the heat out and remove it to capture ambient warmth during sudden cold spells.

8. Passive Cooling Techniques

  • Earth Tubes: Utilize earth tubes (underground pipes that pre-cool or pre-heat incoming air to the temperature of the ground) to moderate the air entering the root cellar, leveraging the constant temperature of the earth.

Preventing Overcooling and Freezing

Preventing freezing and overcooling in a root cellar is crucial to ensure the longevity and quality of stored produce. Here are strategies to help maintain optimal temperatures and avoid the negative effects of too-cold conditions:

1. Insulate Properly

  • Walls and Ceiling: Ensure the root cellar is well-insulated, especially in regions prone to cold winters. Insulation helps to keep the internal temperature stable, even when external temperatures drop significantly.
  • Door Insulation: Don’t overlook the door; it should be well-insulated and sealed to prevent cold air infiltration.

2. Use Thermal Mass

  • Water Barrels: Placing barrels of water inside the cellar can help absorb and store heat during the day, then release it slowly overnight, helping to moderate the temperature swing and prevent freezing.
  • Concrete or Stone: These materials can also act as thermal mass, absorbing heat and releasing it slowly, thus maintaining a more constant temperature.

3. Ventilation Control

  • Adjustable Vents: Install vents that can be manually or automatically adjusted. Close vents to reduce the amount of cold air entering the cellar during extremely cold weather.
  • Automated Systems: Consider an automated ventilation system that can open and close based on the internal temperature, ensuring that the cellar does not become too cold.

4. Earth’s Natural Insulation

  • Take Advantage of Earth Sheltering: The deeper the cellar is buried, the more it benefits from the earth’s natural insulation. The ground at a certain depth maintains a constant temperature, acting as a natural barrier against freezing temperatures.

5. Monitoring and Alerts

  • Temperature and Humidity Sensors: Install digital sensors to continuously monitor the cellar’s temperature. Choose models that can send alerts to your phone or computer, enabling you to react quickly if temperatures approach the freezing point.

6. Strategic Heating

  • Small Heat Sources: In extreme conditions, a small, safe heat source such as a light bulb or a specially designed electric heater can be used to raise the temperature just enough to prevent freezing. Use thermostatically controlled devices for safety and efficiency.

7. Door Usage

  • Minimize Opening During Cold Spells: Limit the frequency and duration of door openings during very cold periods to prevent cold air from entering and dropping the temperature too quickly.

8. Passive Solar Heat

  • South-facing Windows or Vents: If feasible, design your root cellar with a south-facing window or vent that can be opened during sunny winter days to allow some natural warmth to enter, then closed at night to retain heat.

9. Reflective Insulation or Panels

  • Outside the Cellar: In particularly cold climates, reflective insulation panels placed outside the cellar can help reflect any available sunlight onto or into the cellar, providing additional warmth.

10. Buffer Spaces

  • Create an Antechamber: If possible, design the entrance to the root cellar to include a small insulated buffer room or vestibule. This space acts as an additional barrier to cold, further protecting the main storage area from temperature fluctuations.


Root Cellar FAQs

What is the ideal temperature for storing root vegetables?

Storing root vegetables properly is crucial for maintaining their freshness and longevity. The ideal temperature for storing most root vegetables, like carrots, beets, turnips, and potatoes, is between 32°F and 40°F (0°C and 4°C). These temperatures are typically achieved in a root cellar or a cool, dark part of a basement. Humidity levels should also be high, around 90-95%, to help prevent the vegetables from drying out. Each type of root vegetable may have its own specific storage preferences, but this temperature range is a good general guideline. It’s also important to store them in a dark place to prevent sprouting and greening, especially for potatoes.

How can I adjust the temperature in my root cellar during a heatwave?

To adjust the temperature in your root cellar during a heatwave, ensure it’s well-insulated to keep heat out and maintain stable temperatures. Improve ventilation by opening vents at night to let in cooler air and closing them during the day to keep heat out. Create shade around the cellar entrance with trees, awnings, or shade cloth to reduce direct sunlight exposure. Utilize evaporative cooling by wetting the cellar floor or hanging damp burlap sacks, which is especially effective in low humidity areas. Increase the cellar’s thermal mass by placing large water containers inside to absorb and slowly release heat. In extreme cases, introducing blocks of ice can help lower temperatures temporarily. If possible, deepen the cellar to reach more stable underground temperatures, and consider applying reflective coatings to its exterior to reflect sunlight and reduce heat absorption. Regularly monitoring temperature and humidity levels will ensure optimal conditions for storing root vegetables.

Can I store fruits and vegetables together in the same root cellar?

Storing fruits and vegetables together in the same root cellar is generally not recommended due to the risk of ethylene gas production. Many fruits, such as apples and bananas, produce ethylene gas, a natural plant hormone that can accelerate ripening and potentially lead to the spoilage of nearby vegetables. This can be particularly problematic for sensitive vegetables like potatoes, which can sprout prematurely, and greens, which may yellow and decay faster in the presence of ethylene.

If you must store fruits and vegetables together, consider the following precautions to minimize negative interactions:

  • Separation: Try to store fruits and vegetables in different areas of the cellar to minimize ethylene exposure. Use separate containers, shelves, or partitions if possible.
  • Ventilation: Good ventilation can help disperse ethylene gas, reducing its concentration and mitigating its effects on sensitive vegetables.
  • Ethylene Producers and Sensitive Varieties: Be aware of which fruits produce ethylene and which vegetables are most sensitive to it. Store high ethylene producers (like apples, pears, and tomatoes) away from sensitive vegetables (like potatoes, carrots, and leafy greens).

What are the signs that my root cellar is too humid or too dry?

Maintaining the right humidity level in your root cellar is crucial for preserving the quality of stored produce. Here are signs to watch out for that indicate your cellar might be too humid or too dry:

Too Humid:

  • Mold and Mildew: The presence of mold or mildew on walls, ceilings, or stored produce is a clear sign of excessive humidity.
  • Condensation: Excessive moisture on walls, ceilings, or around containers.
  • Rotting Produce: Vegetables and fruits begin to rot or decay faster than expected.
  • Musty Odors: A musty or damp smell is often indicative of too much moisture in the air.

Too Dry:

  • Shriveling Produce: Fruits and vegetables start to shrivel or wilt due to a lack of moisture in the air.
  • Hardened or Corky Skins: Root vegetables like potatoes and carrots develop hard, corky skins.
  • Sprouting: In some cases, too dry an environment might encourage premature sprouting in potatoes and onions.
  • Loss of Weight: Produce may lose weight and become lighter due to moisture loss.

To maintain the ideal humidity level, which is typically around 85-95% for most root vegetables and some fruits, use a hygrometer to monitor the humidity in your root cellar. Adjusting ventilation, using a dehumidifier, or introducing moisture sources like damp sand or water containers can help correct the humidity level if it strays too far from the ideal range.

How often should I check the temperature and humidity in my root cellar?

It’s wise to regularly monitor the temperature and humidity in your root cellar to ensure optimal storage conditions for your fruits and vegetables. Ideally, check both temperature and humidity levels at least once a week. This frequency allows you to respond promptly to any significant changes that might affect the stored produce. Additionally, it’s beneficial to check more frequently during periods of extreme weather, such as heatwaves or cold snaps, as these conditions can affect the internal climate of your root cellar more rapidly. Regular monitoring helps you maintain the ideal temperature range of 32°F to 40°F (0°C to 4°C) and a humidity level of 90-95% for most root vegetables, ensuring their longevity and freshness.


Photo Courtesy of Harrow Smith Mag https://www.harrowsmithmag.com/3240/eat-better-less


The Self-Sufficient Homestead: How Much to Plant for Every Age Group

Calculating how much to grow is as important as what to grow when planning for your homestead this year.  With skyrocketing super market prices as well as questionable growing techniques by large food producers – most homesteaders look towards the ultimate goal of being able to grow as close to 100% of their required produce as possible.   With modern growing strategies such a container growing, vertical farming and making smart use of your available space, with some ingenuity and planning, reaching a status of self sufficiency is within reach.

Planning your yields for your planting efforts this coming year involves taking the time to sit down and calculate first what your family likes to eat, and then how much you need to grow.  Every family is different in their needs and that is also impacted by individual tastes of those you plan to be feeding.  If your family loves carrots, then you will want to plan enough to provide 12 months worth of them.   If your family hates zucchini, then it doesn’t make logical sense to grow the vegetable as it just takes up valuable growing space.

The other important consideration when planning to grow a year round supply of produce is what you strategy is going to be for having enough produce on hand during the winter months.   If you have no year round green house or growing facility, then having fresh lettuce in January in zone 4 won’t be feasible while vegetables like potatoes, carrots, onions and so forth ( typically root vegetables ) have a long storage time when kept in a cold room covered in loose sand.

This then also opens the discussion of a staggered or succession planting schedule which allows you to create a flow of harvestable fresh produce rather then it call coming ready to harvest at once.   In future articles I will dwell much deeper into these discussions but for today, let’s discuss the growing yield charts below which I broke down into age groups to further help in creating an accurate growing plan.

One last thing before we continue – these yield suggestions are based on what would best be interpreted as reasonable estimates for each vegetable.   This does not mean that a person should look at this chart and assume it is saying you should plant this much food for each category.

Homestead Garden Yield Calculator

Adult Requirements – Ages 14:55

For adults aged 14 to 55, there are numerous variables you will have to consider such as vegetable preference as well as appetite.  For example a 18 year old teenaged male with a large appetite will consumer far more than a petite 18 year female who happily lives on a small diet.    Subsequently, the following table for adults is the mean average for an annual target harvest of that specific vegetable.   For example, for carrots, a family with a mother, father, 17 year old son and 15 year old daughter, would be from 40 to 55 pounds.  If you family eats a lot of carrots, or you use them a lot in stews and soups, then you may want to increase that yield but you a least have a starting point to modify from.

I’ve also endeavored to create a realistic yield amount for each plant.  For example, corn calls for 25 to 50 ears per person per year.   This is shown per ear, but keep in mind your corn will be consumed as corn on the cob, or in nibblet / kernel form.    Based on a 2 month consumption period from day of harvest, as well as freezing the kernels for use over the winter, this yield chart essentially is saying 4 ears per month annually which is likely pretty accurate based on the North American diet.

Vegetable/Fruit 14-19 years 20-55 years
Apples 10-20 lbs 12.5-25 lbs
Beets 4-7 lbs 5-10 lbs
Berries 4-8 lbs 5-10 lbs
Broccoli 5-12.5 lbs 6.25-15 lbs
Cabbage 4-7 heads 5-9 heads
Carrots 5-10 lbs 6-12 lbs
Cauliflower 5-12.5 lbs 6.25-15 lbs
Corn 20-40 ears 25-50 ears
Cucumbers 3.75-7.5 lbs 4.5-9 lbs
Garlic 35-60 cloves 45-75 cloves
Green Beans 5-10 lbs 6-12 lbs
Green Leaf Lettuce 4-8 lbs 5-10 lbs
Green Onions 4.5-6 bunches 6-7.5 bunches
Leeks 3-5 lbs 4-6 lbs
Onions 3.75-7.5 lbs 4.5-9 lbs
Peas 4-8 lbs 5-10 lbs
Peppers 4-8 lbs 5-10 lbs
Potatoes 35-70 lbs 42-84 lbs
Pumpkins 3-4 pumpkins 4-5 pumpkins
Radishes 0.8-1.6 lbs 0.8-2 lbs
Romaine 4-8 lbs 5-10 lbs
Spinach 4-8 lbs 5-10 lbs
Sweet Potatoes 25-45 lbs 30-55 lbs
Tomatoes 10-20 lbs 12.25-25 lbs
Yams 25-45 lbs 30-55 lbs
Zucchini 3.5-7 lbs 4.2-8.4 lbs

Children (1-7 Years and 8-13 Years)

Vegetable/Fruit 1-7 years 8-13 years
Apples 5-10 lbs 7.5-15 lbs
Beets 2-4 lbs 3-5 lbs
Berries 2-4 lbs 3-6 lbs
Broccoli 2.5-5 lbs 3.75-8.75 lbs
Cabbage 2-4 heads 3-5 heads
Carrots 3-5 lbs 4-7 lbs
Cauliflower 2.5-5 lbs 3.75-8.75 lbs
Corn 10-20 ears 15-30 ears
Cucumbers 2.25-3.75 lbs 3-5.25 lbs
Garlic 15-25 cloves 25-40 cloves
Green Beans 3-5 lbs 4-7 lbs
Green Leaf Lettuce 2-4 lbs 3-6 lbs
Green Onions 1.5-3 bunches 3-4.5 bunches
Leeks 1-3 lbs 2-4 lbs
Onions 2.25-3.75 lbs 3-5.25 lbs
Peas 2-4 lbs 3-6 lbs
Peppers 2-4 lbs 3-6 lbs
Potatoes 21-35 lbs 28-56 lbs
Pumpkins 1-2 pumpkins 2-3 pumpkins
Radishes 0.4-0.8 lbs 0.6-1.2 lbs
Romaine 2-4 lbs 3-6 lbs
Spinach 2-4 lbs 3-6 lbs
Sweet Potatoes 15-25 lbs 20-35 lbs
Tomatoes 5-10 lbs 7-15 lbs
Yams 15-25 lbs 20-35 lbs
Zucchini 2.1-3.5 lbs 2.8-4.9 lbs

Adults (14-19 Years and 20-55 Years)

Seniors (55+ Years)

Vegetable/Fruit 55+ years
Apples 7.5-15 lbs
Beets 4-7 lbs
Berries 4-7 lbs
Broccoli 5-8.75 lbs
Cabbage 4-6 heads
Carrots 5-8 lbs
Cauliflower 5-8.75 lbs
Corn 15-30 ears
Cucumbers 3.75-6 lbs
Garlic 35-50 cloves
Green Beans 5-8 lbs
Green Leaf Lettuce 4-7 lbs
Green Onions 4.5-6 bunches
Leeks 3-4 lbs
Onions 3.75-6 lbs
Peas 4-7 lbs
Peppers 4-7 lbs
Potatoes 28-56 lbs
Pumpkins 3-4 pumpkins
Radishes 0.8-1.6 lbs
Romaine 4-7 lbs
Spinach 4-7 lbs
Sweet Potatoes 20-35 lbs
Tomatoes 10-18 lbs
Yams 20-35 lbs
Zucchini 3.5-5.6 lbs


The Logic of Planting

One of the key principles and is really a true form of art is planting at a staggered pace so that the crop that grows provides as consistent of continual supply as possible for your homestead.  So many homesteaders and gardeners head out to their gardens / plots in early May and plant everything at once which results in everything being ready at once.  It becomes a feast to famine situation and typically results in a large amount of produce going to waste.   Root vegetables such as carrots and potatoes are far more forgiving – but items such as lettuce and peppers have a much shorter shelf life as well as time frame that requires them to be harvested.

Called succession planting – this technique requires you to take into consideration the time from the expected first early harvest to the last harvest of the season.  You can further fine tune this strategy by taking into account the listed maturity times for each of the seeds in a specific vegetable you plant – as well as using a mix of early, mid and late season varieties.  I plan on writing far more extensively on this topic in the coming weeks.

The easiest way to approach this is to work on one vegetable crop at a time – looking at your seeds maturation rate and then on a sheet of paper map out a time line of when each will be ready which will give you your base plan for how and when to start planting what.

Storing Your Harvest

The other important consideration for your homestead food plan is to take into consideration your storage and preserving strategy – but ideally a strategy of providing as much of a flow of fresh consumable produce for as many months of the year is the goal, and then using preserving techniques to stretch through the winter months where no new flow of produce is coming in ( assuming you don’t have a year round greenhouse.  )

A root cellar is a must for any serious homesteader and like its name implies, is used to store root vegetables like potatoes, carrots, beets and onions.  Any produce where the consumable part of the plant grows below the surface is at home in your root cellar so other vegetables like sweet potatoes, turnips, parsnips etc and all be stored for extended periods of time in a properly set up cellar.

There a variety of techniques that you can use in your root cellar to keep your stored roots for months on end.  For those of us old enough, most can remember grandparents having a large bin of sand in their root room that the produced was kept covered in.   More modern techniques include storing your potatoes and such in straw in breathable bins such as wood crates.   The key take away on this subject at a basic level is to only store non-blemished roots and do your best to not let them touch each other in storage.

In a future section and contained articles I’ll be going far more in depth on this subject including an entire extensive guide to canning and preserving.

Until then, the game is a foot with the new growing season just around the corner and time to start planning your strategy for how much you need to grow this year to feed your family.


How to Harvest Carrot Seeds

Carrots have long been a staple of the North American and European diet – revered for its nutritional value and versatility as well as its ability to be stored for extended periods of time.  While most gardeners and farmers focus on cultivating carrots for their edible roots, the process of harvesting seeds from carrots is an equally vital, albeit less understood, aspect of carrot cultivation. I’ll be explaining the little know art of how to harvest carrots seeds in this article which will to create a sustainable seed source from your carrot crop while contributing to sustainable gardening practices.

Carrots, interestingly, are biennial plants which means that they have a two-year life cycle, contrary to the annual harvesting of their roots.   In the first year of a carrots life, they devote their energy to developing a robust, edible root, whereas the second year sees them flowering and producing seeds. Understanding this lifecycle a primary step for anyone looking to harvest carrot seeds, as it requires patience and a different set of cultivation skills compared to growing carrots for annual consumption.

Harvesting carrot seeds extends beyond mere cultivation. It’s a practice steeped in agricultural sustainability, allowing gardeners and homesteaders to maintain and propagate heirloom varieties, contribute to biodiversity, and reduce dependence on commercially available seeds which can be genetically modified. Furthermore, harvesting your own carrot seeds can be a rewarding experience fostering a closer connection to the cycle of growth and the natural world while furthering your independence of your homestead.

The first year of a carrot plant’s life will set the foundation for sustainable and successful seed production. This period focuses on the growth and development of the carrot root, which will sustain the plant in its second year when it turns its energy towards flowering and seed production.

Planting and Germination in Year One

Starting with your selected seeds – this crucial step requires that you not just pick the type of carrot you want to eat for food but also ensuring the quality of the seed.   You will want to use an heirloom seed for any crop you plan on performing sustainable seed harvesting with and I would also recommend doing you due diligence with the brand of seed you choose to go with.  By definition, heirloom seeds have been monitored through their generations to ensure that they are both organic and certified non GMO – after all there is no point in using a seed that is organic now, but in its lineage was a descendant of a genetically modified seed.

Once you have selected your seed, your carrots should be sown directly into the soil. During this seeding phase, be sure to space out the actual carrots you plan on using for seeds so they have ample room to grow.   If you are planning on planting more then one variety of carrots for seed harvesting – you will also want them to be further apart from each other so they do not cross pollinate in the second year when they flower.   Carrots seeds take 1-3 weeks to germinate and during this time, keeping the soil consistently moist is important for successful germination.

Because carrots are a rood vegetable, having soil that is rich in organic material and is loose allows for unimpeded root growth.  Carrots prefer a continual supply of moisture while not being overly saturated.   It is also a good idea to use a layer of mulch over the soil that will help retain soil moisture and regulate soil temperature.  As the carrots come up – you will want to thin them accordingly and pay a particular focus to the carrots that you are growing to be used for seeds.   These will stay in the ground over the winter where in the spring will focus on flowering an seed production and no longer on the growth of their root below the soil.    This means that in regions with cold winters, carrots intended for seed production must be protected as much as possible which involves a heavy layer of mulch in the fall.   Another option is to dig up the entire carrot and store them in a cool, moist place over the winter, then replant them in early spring.  You may want to try both methods to see which works better for you.

Carrot Flowering and Carrot Seed Development in Year Two

As the carrot plants enter their second year, they shift their energy from root development to flowering and seed production.

Initiation of Carrot Flowering:

In the second year, as the days lengthen and temperatures rise, the overwintered carrot plants will begin to produce flowering stalks which is called bolting. These stalks will grow tall, and umbel-shaped flower clusters will form.  These carrot flowers are typically white or pale purple and are arranged in a unique pattern known as an umbel, where several flower stalks emerge from a common point. The primary umbel blooms first, followed by smaller, secondary umbels.  During this phase, let the flowers fully bloom so they can begin their natural pollination process.  Depending on your variety, these blooms can range from wild flower looking in appearance to magnificent blooms.    The popular flower Queen Anne’s Lace is a direct relative to the carrot but is inedible for humans.

When carrots flower in the second year of their life, the seeds begin to develop in their umbellets.

Carrots are predominantly pollinated by insects and in particular bees – but other pollinators will also help in the process.   Having bee attracting flowers near by any vegetable needing polination assistance is a good idea.    Ensuring a diversity of pollinators in your garden can enhance the pollination process.   Sunflowers, wild flowers, and most vibrant colored flowers attract bees – while also remembering that bees and their cousins have different length ” tongues ” so having flowers that are have different shaped and different lengths of pedals will make your growing area even more bee friendly.

Carrot Seed Development

After pollination, the flowers on the carrots gradually transform into seed clusters. Each tiny flower in the umbel has the potential to develop into a carrot seed.  During this period, it’s important to monitor the plants regularly, as seed development varies among umbels.  The carrot seeds are ready for harvest when they turn brown and start to dry out.    This typically occurs several weeks after flowering and you will need to closely monitor this period as if they dry out to long, they will fall off the plant. The primary umbel will mature first, followed by the secondary and tertiary umbels.  In the image below, the flowers have dried out and turned brown – it is this period where the seeds are either ready, or near ready to harvest.