Germination and Sprouting times for 40 Vegetable Types
From seed to harvest, the Growing times for vegetable seeds.
Knowing the length of time it takes for your vegetable seeds to reach the various important stages of their growth goes a long way to successful gardening. A primary benefit is succession planting to ensure a steady flow of fresh ready to harvest vegetables through the growing season rather then everything coming ready to harvest at once. Another important benefit is knowing if your seeds are going to come up after planting if you are getting concerned over too much time passing with no sign of growth.
In this extensive post, I’ve listed the top 40 most common vegetables, as well as their average germination and sprouting times right on through to optimal harvesting times. Keep in mind these are general guidelines and there are numerous variables that will impact your growing times including soil composition, soil temperature, watering and so forth.
Tomatoes
Tomatoes are a staple in many gardens, offering a range of varieties from cherry to beefsteak. Here’s a breakdown of their growth stages:
Stage
Time Range
Germination
5-10 days
Sprouting
10-14 days
Flowering
45-60 days
Fruit Development
60-85 days
Optimal Harvesting
70-90 days
Ideal Planting Time
Late spring after frost
For optimal growth, ensure they receive plenty of sunlight, consistent watering, and regular pruning. Varieties like ‘Early Girl’ can be ready in about 50 days, while larger types like ‘Brandywine’ may take up to 90 days.
Carrots
Carrots are known for their versatility and sweet flavor. Here’s their growth timeline:
Stage
Time Range
Germination
10-20 days
Sprouting
20-30 days
Root Development
50-70 days
Harvest
70-80 days
Optimal Harvesting
70-80 days
Ideal Planting Time
Early spring or late summer
For best results, plant in loose, well-drained soil and ensure consistent moisture. Varieties like ‘Nantes’ are usually ready around 65-70 days, whereas ‘Imperator’ types might take up to 75-80 days.
Lettuce
Lettuce is a quick-growing crop with varieties such as romaine, iceberg, and leaf lettuce. Here’s their growth timeline:
Stage
Time Range
Germination
2-10 days
Sprouting
7-14 days
Leaf Development
20-30 days
Harvest
30-70 days
Optimal Harvesting
30-70 days
Ideal Planting Time
Early spring or late summer
Plant in cool weather and provide consistent moisture to keep the leaves tender and crisp. Succession planting can provide a continuous harvest.
Cucumbers
Cucumbers come in slicing and pickling varieties, each with a unique growth timeline. Here’s their growth breakdown:
Stage
Time Range
Germination
3-10 days
Sprouting
7-14 days
Flowering
35-50 days
Fruit Development
50-70 days
Optimal Harvesting
55-70 days
Ideal Planting Time
Late spring to early summer
Ensure they have plenty of space to climb by using trellises and supports. ‘Marketmore’ varieties can be harvested in about 55 days, while pickling types like ‘Boston Pickling’ are ready in about 50 days.
Peppers
Peppers, including bell peppers and hot peppers, typically take longer to mature. Here’s their growth timeline:
Stage
Time Range
Germination
7-21 days
Sprouting
14-28 days
Flowering
60-90 days
Fruit Development
60-90 days
Optimal Harvesting
70-90 days
Ideal Planting Time
Late spring after frost
Plant in warm soil and ensure they receive full sunlight. ‘Bell Boy’ bell peppers are ready in about 70 days, while hot peppers like ‘Jalapeño’ might take around 75-80 days.
Beans
Beans are a favorite for many homesteaders, with bush and pole varieties offering different harvest times. Here’s their growth timeline:
Stage
Time Range
Germination
7-10 days
Sprouting
10-14 days
Flowering
30-50 days
Pod Development
50-70 days
Optimal Harvesting
55-70 days
Ideal Planting Time
Late spring to early summer
Bush beans are usually ready in about 50 to 60 days, while pole beans take a bit longer, around 60 to 70 days. Provide support for pole beans and ensure regular watering for best yields. ‘Blue Lake’ bush beans can be harvested in 55 days, whereas ‘Kentucky Wonder’ pole beans take about 65-70 days.
Squash
Squash varieties, such as zucchini and butternut, have different growth periods. Here’s their growth timeline:
Stage
Time Range
Germination
5-10 days
Sprouting
7-14 days
Flowering
35-50 days
Fruit Development
45-55 days (zucchini) / 80-100 days (butternut)
Optimal Harvesting
50-55 days (zucchini) / 85-100 days (butternut)
Ideal Planting Time
Late spring to early summer
Zucchini typically takes about 45 to 55 days from planting to harvest, while butternut squash can take up to 80-100 days. Ensure they have ample space to spread out and receive full sunlight.
Spinach
Spinach is a cool-weather crop that grows quickly. Here’s their growth timeline:
Stage
Time Range
Germination
5-10 days
Sprouting
7-14 days
Leaf Development
20-30 days
Harvest
35-45 days
Optimal Harvesting
35-45 days
Ideal Planting Time
Early spring or late summer
For a continuous supply, plant in successive intervals. Keep the soil cool and consistently moist to extend the growing season.
Broccoli
Broccoli is a cool-season crop that requires careful timing. Here’s its growth timeline:
Stage
Time Range
Germination
5-10 days
Sprouting
10-14 days
Head Formation
60-80 days
Harvest
70-100 days
Optimal Harvesting
70-100 days
Ideal Planting Time
Early spring or late summer
Ensure broccoli receives consistent moisture and full sunlight for optimal growth.
Cauliflower
Cauliflower requires similar conditions to broccoli. Here’s its growth timeline:
Stage
Time Range
Germination
5-10 days
Sprouting
10-14 days
Head Formation
50-70 days
Harvest
60-100 days
Optimal Harvesting
60-100 days
Ideal Planting Time
Early spring or late summer
Keep the soil consistently moist and provide plenty of sunlight.
Radishes
Radishes are one of the quickest vegetables to grow. Here’s their growth timeline:
Stage
Time Range
Germination
3-7 days
Sprouting
5-10 days
Root Development
20-30 days
Harvest
20-30 days
Optimal Harvesting
20-30 days
Ideal Planting Time
Early spring or late summer
Plant in cool weather and ensure consistent moisture for crisp roots.
Beets
Beets are versatile and can be harvested for both roots and greens. Here’s their growth timeline:
Stage
Time Range
Germination
5-10 days
Sprouting
10-14 days
Root Development
50-60 days
Harvest
50-70 days
Optimal Harvesting
50-70 days
Ideal Planting Time
Early spring or late summer
Ensure beets are planted in well-drained soil and receive regular watering.
Onions
Onions can be grown from seeds, sets, or transplants. Here’s their growth timeline:
Stage
Time Range
Germination
7-14 days
Sprouting
10-20 days
Bulb Formation
100-120 days
Harvest
100-150 days
Optimal Harvesting
100-150 days
Ideal Planting Time
Early spring
Plant in well-drained soil and ensure they receive full sunlight.
Garlic
Garlic is typically planted in the fall for a summer harvest. Here’s its growth timeline:
Stage
Time Range
Germination
7-14 days
Sprouting
10-20 days
Bulb Formation
200-240 days
Harvest
210-250 days
Optimal Harvesting
210-250 days
Ideal Planting Time
Fall
Ensure garlic is planted in well-drained soil and receives consistent moisture.
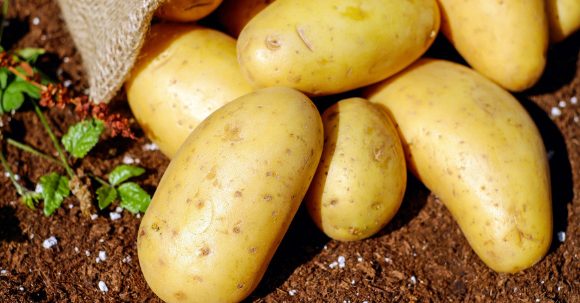
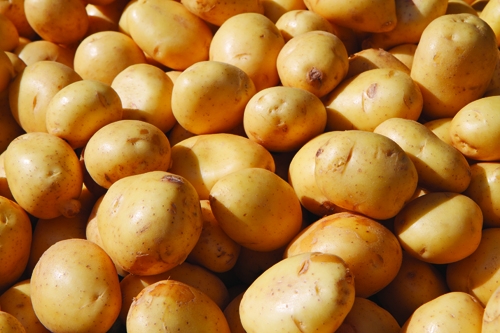
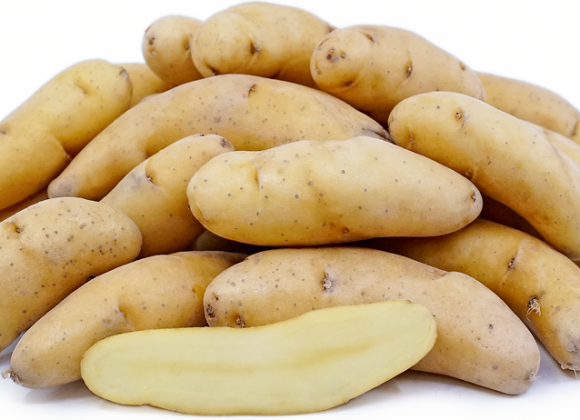
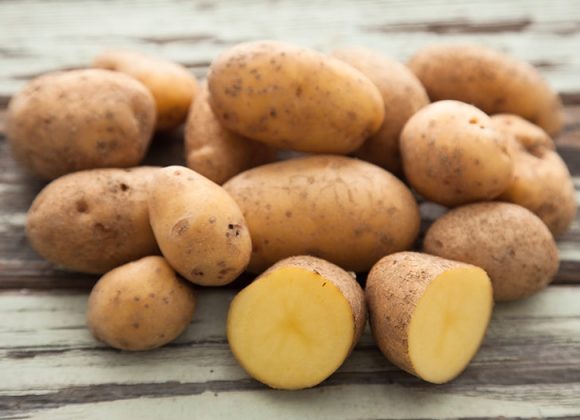
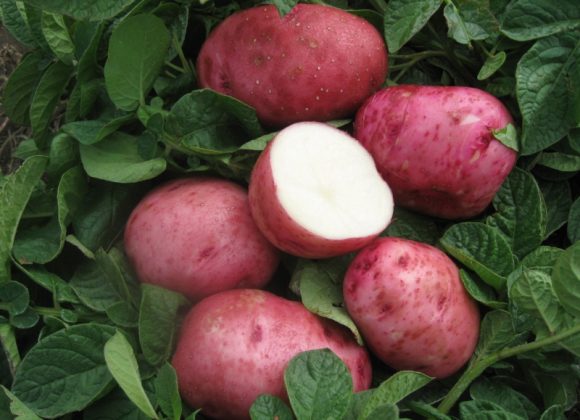
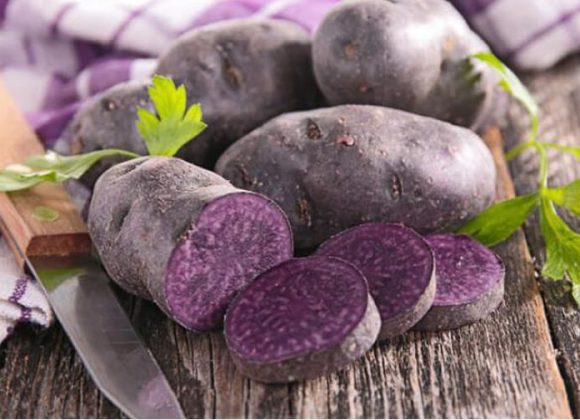
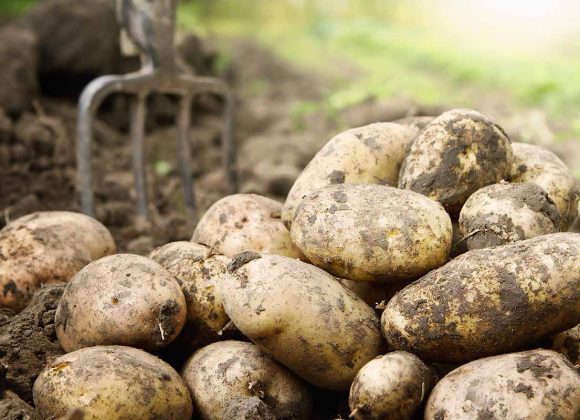
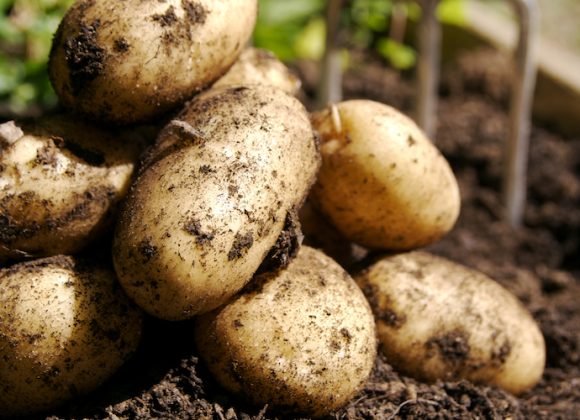
Potatoes
Potatoes are grown from seed potatoes. Here’s their growth timeline:
Stage
Time Range
Sprouting
7-14 days
Plant Development
30-40 days
Tuber Formation
70-90 days
Harvest
90-120 days
Optimal Harvesting
90-120 days
Ideal Planting Time
Early spring
Plant in loose, well-drained soil and ensure they receive consistent watering.
Peas
Peas are a cool-weather crop. Here’s their growth timeline:
Stage
Time Range
Germination
7-14 days
Sprouting
10-20 days
Flowering
30-40 days
Pod Development
50-70 days
Harvest
50-70 days
Optimal Harvesting
50-70 days
Ideal Planting Time
Early spring
Plant in well-drained soil and provide support for climbing varieties.
Cabbage
Cabbage is a hardy, cool-season crop. Here’s its growth timeline:
Stage
Time Range
Germination
7-14 days
Sprouting
10-20 days
Head Formation
60-80 days
Harvest
70-120 days
Optimal Harvesting
70-120 days
Ideal Planting Time
Early spring or late summer
Ensure consistent moisture and full sunlight for best results.
Kale
Kale is a hardy green that thrives in cool weather. Here’s its growth timeline:
Stage
Time Range
Germination
5-10 days
Sprouting
7-14 days
Leaf Development
20-30 days
Harvest
45-60 days
Optimal Harvesting
45-60 days
Ideal Planting Time
Early spring or late summer
Plant in well-drained soil and provide consistent moisture.
Celery
Celery requires a long growing season. Here’s its growth timeline:
Stage
Time Range
Germination
14-21 days
Sprouting
21-30 days
Stalk Development
80-100 days
Harvest
100-120 days
Optimal Harvesting
100-120 days
Ideal Planting Time
Early spring
Plant in rich, well-drained soil and ensure consistent moisture.
Corn
Corn is a warm-season crop. Here’s its growth timeline:
Stage
Time Range
Germination
7-14 days
Sprouting
10-20 days
Tasseling
50-70 days
Ear Development
60-100 days
Harvest
70-100 days
Optimal Harvesting
70-100 days
Ideal Planting Time
Late spring
Plant in well-drained soil and ensure they receive full sunlight.
Sweet Potatoes
Sweet potatoes are grown from slips. Here’s their growth timeline:
Stage
Time Range
Sprouting
7-14 days
Vine Development
30-60 days
Tuber Formation
90-120 days
Harvest
100-150 days
Optimal Harvesting
100-150 days
Ideal Planting Time
Late spring
Plant in loose, well-drained soil and provide consistent watering.
Turnips
Turnips are a versatile root vegetable. Here’s their growth timeline:
Stage
Time Range
Germination
5-10 days
Sprouting
7-14 days
Root Development
30-50 days
Harvest
35-60 days
Optimal Harvesting
35-60 days
Ideal Planting Time
Early spring or late summer
Plant in cool weather and ensure consistent moisture.
Brussels Sprouts
Brussels sprouts require a long growing season. Here’s their growth timeline:
Stage
Time Range
Germination
5-10 days
Sprouting
7-14 days
Sprout Development
70-90 days
Harvest
80-120 days
Optimal Harvesting
80-120 days
Ideal Planting Time
Early spring or late summer
Ensure consistent moisture and provide support for tall plants.
Collard Greens
Collard greens thrive in cooler weather. Here’s their growth timeline:
Stage
Time Range
Germination
5-10 days
Sprouting
7-14 days
Leaf Development
20-30 days
Harvest
40-60 days
Optimal Harvesting
40-60 days
Ideal Planting Time
Early spring or late summer
Plant in well-drained soil and provide consistent moisture.
Swiss Chard
Swiss chard is a versatile green. Here’s its growth timeline:
Stage
Time Range
Germination
7-14 days
Sprouting
10-20 days
Leaf Development
20-30 days
Harvest
50-60 days
Optimal Harvesting
50-60 days
Ideal Planting Time
Early spring or late summer
Plant in well-drained soil and provide consistent moisture.
Leeks
Leeks require a long growing season. Here’s their growth timeline:
Stage
Time Range
Germination
7-14 days
Sprouting
10-20 days
Bulb Development
70-90 days
Harvest
100-120 days
Optimal Harvesting
100-120 days
Ideal Planting Time
Early spring
Plant in rich, well-drained soil and ensure consistent moisture.
Artichokes
Artichokes are perennial plants. Here’s their growth timeline:
Stage
Time Range
Germination
10-20 days
Sprouting
20-30 days
Bud Formation
150-180 days
Harvest
180-200 days
Optimal Harvesting
180-200 days
Ideal Planting Time
Early spring
Ensure they receive full sunlight and consistent moisture.
Okra
Okra thrives in warm weather. Here’s its growth timeline:
Stage
Time Range
Germination
7-14 days
Sprouting
10-20 days
Flowering
40-50 days
Pod Development
50-70 days
Harvest
50-70 days
Optimal Harvesting
50-70 days
Ideal Planting Time
Late spring
Plant in well-drained soil and ensure they receive full sunlight.
Mustard Greens
Mustard greens are fast-growing. Here’s their growth timeline:
Stage
Time Range
Germination
5-10 days
Sprouting
7-14 days
Leaf Development
20-30 days
Harvest
30-40 days
Optimal Harvesting
30-40 days
Ideal Planting Time
Early spring or late summer
Plant in cool weather and provide consistent moisture.
Arugula
Arugula is a fast-growing green. Here’s its growth timeline:
Stage
Time Range
Germination
5-10 days
Sprouting
7-14 days
Leaf Development
20-30 days
Harvest
30-40 days
Optimal Harvesting
30-40 days
Ideal Planting Time
Early spring or late summer
Plant in cool weather and ensure consistent moisture.
Bok Choy
Bok choy is a fast-growing Asian green. Here’s its growth timeline:
Stage
Time Range
Germination
5-10 days
Sprouting
7-14 days
Leaf Development
20-30 days
Harvest
30-45 days
Optimal Harvesting
30-45 days
Ideal Planting Time
Early spring or late summer
Plant in cool weather and provide consistent moisture.
Fennel
Fennel is grown for its bulb and fronds. Here’s its growth timeline:
Stage
Time Range
Germination
7-14 days
Sprouting
10-20 days
Bulb Formation
70-90 days
Harvest
80-100 days
Optimal Harvesting
80-100 days
Ideal Planting Time
Early spring
Plant in well-drained soil and ensure they receive full sunlight.
Parsnips
Parsnips are a long-season root vegetable. Here’s their growth timeline:
Stage
Time Range
Germination
14-21 days
Sprouting
21-30 days
Root Development
100-120 days
Harvest
120-180 days
Optimal Harvesting
120-180 days
Ideal Planting Time
Early spring
Plant in loose, well-drained soil and ensure they receive consistent moisture.
Parsley
Parsley is a versatile herb. Here’s its growth timeline:
Stage
Time Range
Germination
14-21 days
Sprouting
21-30 days
Leaf Development
40-60 days
Harvest
70-90 days
Optimal Harvesting
70-90 days
Ideal Planting Time
Early spring
Plant in well-drained soil and provide consistent moisture.
Cilantro
Cilantro grows quickly. Here’s its growth timeline:
Stage
Time Range
Germination
7-14 days
Sprouting
10-20 days
Leaf Development
30-40 days
Harvest
40-60 days
Optimal Harvesting
40-60 days
Ideal Planting Time
Early spring
Plant in cool weather and ensure consistent moisture.
Dill
Dill is a fast-growing herb. Here’s its growth timeline:
Stage
Time Range
Germination
7-14 days
Sprouting
10-20 days
Leaf Development
30-40 days
Harvest
40-60 days
Optimal Harvesting
40-60 days
Ideal Planting Time
Early spring
Plant in well-drained soil and ensure they receive full sunlight.
Basil
Basil is a warm-season herb. Here’s its growth timeline:
Stage
Time Range
Germination
7-14 days
Sprouting
10-20 days
Leaf Development
30-40 days
Harvest
50-70 days
Optimal Harvesting
50-70 days
Ideal Planting Time
Late spring
Plant in well-drained soil and ensure they receive full sunlight.
Thyme
Thyme is a perennial herb. Here’s its growth timeline:
Stage
Time Range
Germination
14-21 days
Sprouting
21-30 days
Leaf Development
40-60 days
Harvest
70-90 days
Optimal Harvesting
70-90 days
Ideal Planting Time
Early spring
Plant in well-drained soil and ensure they receive full sunlight.
Rosemary
Rosemary is a perennial herb. Here’s its growth timeline:
Stage
Time Range
Germination
14-21 days
Sprouting
21-30 days
Leaf Development
40-60 days
Harvest
80-100 days
Optimal Harvesting
80-100 days
Ideal Planting Time
Early spring
Plant in well-drained soil and ensure they receive full sunlight.
Sage
Sage is a perennial herb. Here’s its growth timeline:
Stage
Time Range
Germination
14-21 days
Sprouting
21-30 days
Leaf Development
40-60 days
Harvest
70-90 days
Optimal Harvesting
70-90 days
Ideal Planting Time
Early spring
Plant in well-drained soil and ensure they receive full sunlight.
Mint
Mint is a perennial herb. Here’s its growth timeline:
Stage
Time Range
Germination
14-21 days
Sprouting
21-30 days
Leaf Development
40-60 days
Harvest
70-90 days
Optimal Harvesting
70-90 days
Ideal Planting Time
Early spring
Plant in well-drained soil and ensure they receive full sunlight.
The Value of Knowing Your Seed Lifespan Times
Knowing the growing times of vegetable seeds offers several benefits for homesteaders, enhancing their ability to manage their gardens effectively and maximize their yields. Here are the key advantages:
1. Optimized Garden Planning
Benefits:
Sequential Planting: Allows homesteaders to plan a succession of crops, ensuring a continuous harvest throughout the growing season.
Space Management: Helps in effectively using garden space by rotating crops and planting new seeds as soon as one crop is harvested.
Seasonal Adaptation: Enables the selection of crops best suited for different times of the year, optimizing growth conditions and yields.
2. Improved Yield and Productivity
Benefits:
Maximized Harvests: By understanding the exact time each crop takes to mature, homesteaders can time their plantings to maximize the number of harvests in a season.
Optimal Resource Utilization: Ensures that water, nutrients, and sunlight are used efficiently, avoiding the wastage of resources on crops planted out of season or at the wrong time.
3. Enhanced Crop Health and Quality
Benefits:
Pest and Disease Management: Timing plantings to avoid peak pest and disease periods can reduce the need for chemical interventions and improve crop health.
Stress Reduction: Crops grown within their ideal time frames experience less stress, leading to better growth and higher quality produce.
4. Financial and Time Savings
Benefits:
Reduced Costs: Efficient use of resources and reduced loss from pest and disease damage lowers the overall cost of growing crops.
Time Efficiency: By knowing exactly when to plant and harvest, homesteaders can better allocate their time and effort, reducing labor and improving efficiency.
5. Sustainability and Self-Sufficiency
Benefits:
Sustainable Practices: Understanding growing times supports sustainable gardening practices by promoting crop rotation and reducing soil depletion.
Increased Self-Sufficiency: A well-planned garden with continuous harvests enhances food security and self-sufficiency, providing a reliable source of fresh produce year-round.
6. Better Climate Adaptation
Benefits:
Climate-Appropriate Crops: Selecting crops based on their growing times allows homesteaders to choose varieties that are best suited for their specific climate conditions.
Weather Resilience: Planning plantings around weather patterns helps protect crops from adverse weather conditions, ensuring better resilience and survival.
Optimal Dried and Dehydrated Food Storage Times
How Temperature Impacts Life Span of Dried and Dehydrated Goods
Assessing the longevity of food storage is complex due to numerous influential factors. These include the initial quality of the food when bought, among other elements.
Temperature: The Primary Factor
The role of temperature is paramount in determining the shelf life of dried foods. The USDA indicates that lowering the temperature by 5.6 degrees Celsius (10.08 degrees Fahrenheit) can double the life span of seeds. While there are practical limits to this guideline, it generally applies from normal room temperatures down to the point of freezing. The opposite is also true: an increase in temperature by the same amount can reduce the lifespan by half. This principle is applicable to various types of seeds as well.
Exploring Temperature Impact on Storage Duration
Here’s a chart showing how different temperatures correlate with varying storage durations:
Temperature (°F)
Estimated Storage Duration (Years)
39.76
40
49.84
30
59.92
20
70.00
10
80.08
5
90.16
2.5
100.24
1.25
Note: This chart is generic and represents the general trend between temperature and storage longevity rather than specifics for any single food item.
Moisture Content: The Importance of Dryness
The USDA’s nutritional data suggests that dry beans, grains, and flours generally contain about 10% moisture. While it’s not feasible or necessary to eliminate all moisture, keeping it as low as possible is critical to prevent spoilage inside storage containers. For prolonged storage, aim to keep moisture content no higher than 10%.
Atmospheric Conditions: Oxygen’s Impact
Oxygen, a catalyst for many chemical reactions, can lead to food spoilage through processes like oxidation and microbial growth. This article explains the methods and benefits of oxygen removal in food storage.
Understanding Oxidation and Its Impact on Stored Food
Oxidation: This is a chemical reaction involving oxygen that can cause the degradation of fats, vitamins, and other nutrients. It also leads to undesirable changes in flavor and color in stored food.
Microbial Growth: Oxygen is essential for the growth of aerobic bacteria and fungi. Removing oxygen inhibits their growth, helping to prevent spoilage and extend the food’s shelf life.
Methods of Removing Oxygen
Vacuum Sealing
How It Works: Vacuum sealers extract air from a package, significantly reducing oxygen levels. This process is effective for both solid foods and liquids.
Benefits:
Prevents Oxidation: By removing most of the air, vacuum sealing minimizes the oxygen available to react with the food.
Flexibility: Works with a wide range of food types and sizes.
Considerations:
Initial Cost: Requires an investment in a vacuum sealing machine and purchasing specialized bags.
Oxygen Absorbers
How It Works: These small packets contain iron powder that reacts with the oxygen in the air inside the container to form iron oxide, thus removing oxygen.
Benefits:
Efficiency: Can reduce oxygen levels to .01% or less, making them extremely effective for stored dry goods.
Ease of Use: Simply place an absorber packet in your storage container for it to function.
Considerations:
Applicability: Best used with low-moisture foods to prevent botulism.
Extended List of Dehydrated Fruits
Fruit
Shelf Life (Months)
Storage Method
Preparing Technique
Dehydration Time (Hours)
Apples
12
Cool, Dry Place
Slice Thinly
12
Bananas
8
Cool, Dry Place
Slice Thinly
8
Cherries
6
Cool, Dry Place
Pit and Slice
24
Strawberries
8
Cool, Dry Place
Hull and Slice
10
Mangoes
10
Cool, Dry Place
Peel and Slice
12
Peaches
12
Cool, Dry Place
Pit and Slice Thinly
8
Pears
10
Cool, Dry Place
Slice Thinly
10
Plums (Prunes)
12
Cool, Dry Place
Pit and Slice
20
Oranges
8
Cool, Dry Place
Peel and Segment
10
Kiwis
8
Cool, Dry Place
Slice Thinly
8
Pineapples
10
Cool, Dry Place
Peel and Slice
12
Apricots
12
Cool, Dry Place
Pit and Slice
12
Grapes
10
Cool, Dry Place
Whole (as raisins)
36
Blueberries
10
Cool, Dry Place
Whole
12
Cranberries
8
Cool, Dry Place
Slice or Whole
10
Figs
12
Cool, Dry Place
Whole or Halved
24
Watermelon
5
Cool, Dry Place
Slice Thinly
8-10
Cantaloupe
8
Cool, Dry Place
Slice Thinly
8-10
Papaya
8
Cool, Dry Place
Slice Thinly
12
Raspberries
8
Cool, Dry Place
Whole
12
Blackberries
8
Cool, Dry Place
Whole
10
Honeydew
6
Cool, Dry Place
Slice Thinly
8-10
Star fruit
8
Cool, Dry Place
Slice Thinly
10
Pomegranate
6
Cool, Dry Place
Seeds
10
Lychee
6
Cool, Dry Place
Peel and Pit
10-12
Persimmon
8
Cool, Dry Place
Slice Thinly
8-10
Dragon Fruit
5
Cool, Dry Place
Slice Thinly
8-10
Jackfruit
6
Cool, Dry Place
Slice Thinly
8-10
Tamarind
12
Cool, Dry Place
Shell and Devein
10-12
Guava
6
Cool, Dry Place
Slice Thinly
8-10
Coconut
12
Cool, Dry Place
Shredded or Chipped
10-12
Dates
18
Cool, Dry Place
Whole or Pitted
24-36
Figs
12
Cool, Dry Place
Whole or Halved
24
Appricots
12
Cool, Dry Place
Pit and Slice
12
Nectarines
10
Cool, Dry Place
Slice Thinly
8-10
Passion Fruit
6
Cool, Dry Place
Halved, Scoop Seeds
8
Quince
12
Cool, Dry Place
Slice Thinly
10-12
Avocado
6
Cool, Dry Place
Slice Thinly
8-10
Acai
6
Cool, Dry Place
Pureed
10
Elderberries
8
Cool, Dry Place
Whole
10-12
Gooseberries
8
Cool, Dry Place
Whole
8-10
Mulberries
6
Cool, Dry Place
Whole
8-10
Currants
8
Cool, Dry Place
Whole
10-12
Loganberries
6
Cool, Dry Place
Whole
10
Boysenberries
6
Cool, Dry Place
Whole
10
Feijoa
6
Cool, Dry Place
Slice Thinly
8-10
Kumquats
6
Cool, Dry Place
Halved
10
Medlar
6
Cool, Dry Place
Halved
12
Salak
6
Cool, Dry Place
Peel and Slice
8-10
Jujube
12
Cool, Dry Place
Whole or Sliced
10-12
Extended List of Dehydrated Vegetables
Vegetable
Shelf Life (Months)
Storage Method
Preparing Technique
Dehydration Time (Hours)
Carrots
10
Cool, Dry Place
Peel and Slice Thinly
6-8
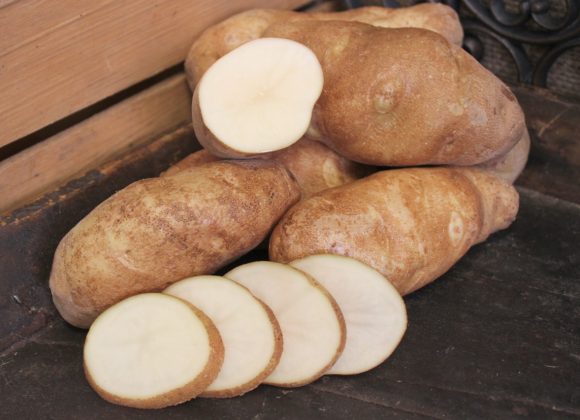
Potatoes
8
Cool, Dry Place
Slice or Dice
8-10
Tomatoes
8
Cool, Dry Place
Slice or Halve
6-12
Zucchini
8
Cool, Dry Place
Slice Thinly
5-7
Bell Peppers
12
Cool, Dry Place
Slice or Dice
5-7
Onions
12
Cool, Dry Place
Slice Thinly
6-10
Garlic
12
Cool, Dry Place
Slice or Mince
6-8
Spinach
8
Cool, Dry Place
Whole Leaves
2-4
Mushrooms
8
Cool, Dry Place
Slice
4-6
Cucumbers
6
Cool, Dry Place
Slice Thinly
4-6
Sweet Corn
12
Cool, Dry Place
Whole Kernels
6-8
Green Beans
10
Cool, Dry Place
Whole or Cut
8-10
Broccoli
10
Cool, Dry Place
Cut into Florets
5-7
Cauliflower
10
Cool, Dry Place
Cut into Florets
5-7
Peas
12
Cool, Dry Place
Whole
5-7
Celery
8
Cool, Dry Place
Slice Thinly
5-7
Asparagus
8
Cool, Dry Place
Whole or Cut
4-6
Kale
10
Cool, Dry Place
Whole Leaves or Chopped
2-4
Beetroot
10
Cool, Dry Place
Slice or Dice
6-10
Parsnips
10
Cool, Dry Place
Slice or Dice
6-8
Squash
8
Cool, Dry Place
Slice or Cube
5-7
Pumpkin
8
Cool, Dry Place
Slice or Cube
5-7
Radishes
6
Cool, Dry Place
Slice Thinly
5-6
Sweet Potatoes
10
Cool, Dry Place
Slice or Cube
6-10
Yams
10
Cool, Dry Place
Slice or Cube
6-10
Turnips
10
Cool, Dry Place
Slice or Cube
6-8
Brussels Sprouts
10
Cool, Dry Place
Halve or Whole
5-7
Leeks
8
Cool, Dry Place
Slice Thinly
5-7
Eggplant
8
Cool, Dry Place
Slice Thinly
6-8
Artichokes
6
Cool, Dry Place
Quartered
6-10
Okra
8
Cool, Dry Place
Whole or Sliced
4-6
Fennel
8
Cool, Dry Place
Slice Thinly
4-6
Swiss Chard
6
Cool, Dry Place
Whole Leaves or Chopped
3-5
Endive
6
Cool, Dry Place
Whole Leaves or Chopped
4-6
Escarole
6
Cool, Dry Place
Whole Leaves or Chopped
4-6
Arugula
6
Cool, Dry Place
Whole Leaves
2-4
Bok Choy
6
Cool, Dry Place
Whole Leaves or Chopped
3-5
Rhubarb
8
Cool, Dry Place
Slice Thinly
4-6
Butternut Squash
8
Cool, Dry Place
Cube
5-7
Acorn Squash
8
Cool, Dry Place
Cube
5-7
Chayote
6
Cool, Dry Place
Slice or Cube
5-7
Rutabaga
8
Cool, Dry Place
Slice or Cube
6-8
Jicama
6
Cool, Dry Place
Slice or Cube
6-8
Kohlrabi
8
Cool, Dry Place
Slice or Cube
5-7
Salsify
6
Cool, Dry Place
Slice Thinly
6-8
Watercress
4
Cool, Dry Place
Whole Leaves
3-4
Collard Greens
8
Cool, Dry Place
Whole Leaves or Chopped
4-6
Container Selection:
Storing dehydrated food efficiently requires suitable containers that can maintain the quality and extend the shelf life of the contents.
Glass Jars
Advantages:
Non-permeable: Glass does not allow gases or odors to penetrate, offering superior protection against oxygen and moisture which can degrade food quality.
Chemically Inert: Glass does not react with the contents inside, ensuring that the food’s flavor and nutritional content remain unchanged over time.
Visibility: The transparency of glass allows for easy identification and monitoring of the stored contents without needing to open the container.
Considerations:
Fragility: Glass is prone to breaking if mishandled, which can be a concern in high-traffic storage areas or during transportation.
Weight: Glass jars are heavier than other options, which might be a drawback for storage shelves with weight limitations or when transporting supplies.
Mylar Bags with Oxygen Absorbers
Advantages:
Barrier Properties: Mylar offers excellent protection from light and oxygen, both of which can deteriorate food stored for long periods.
Scalability: These bags can be used to store small to large quantities of food, making them versatile for different needs.
Space Efficiency: When sealed, Mylar bags are compact and conform to the shape of their contents, maximizing space in storage areas.
Considerations:
Durability: While tough, Mylar can be punctured or tear if not handled carefully, especially when stored alongside sharp or irregularly shaped objects.
Sealing Requirements: Effective use of Mylar bags requires a good quality heat sealer to ensure that they are airtight.
Vacuum-Sealed Bags
Advantages:
Air Removal: Vacuum sealing removes almost all the air from around the food, significantly slowing down deterioration processes such as oxidation.
Compact Storage: Removing air allows for a more compact storage solution, as bags take up less space than rigid containers.
Versatility: These bags can be custom-sized to fit various quantities, accommodating different types of dehydrated foods from fruits to meat.
Considerations:
Sealer Dependence: You need a reliable vacuum sealer, which represents an initial investment and ongoing maintenance.
Material Sensitivity: The plastic used in vacuum-sealed bags may be susceptible to degradation over time or when exposed to extreme temperatures.
Metal Tins with Airtight Lids
Advantages:
Durability: Metal tins are robust and can withstand significant handling and environmental stress without damage.
Light Protection: Metal naturally blocks light, helping preserve the nutrient content and color of food.
Considerations:
Corrosion Risk: Some metals can corrode over time, especially in environments with high humidity or if the contents are slightly acidic.
Weight: Like glass, metal tins are heavier than plastic or Mylar options and may require sturdier shelving.
Food-Grade Plastic Buckets with Gamma Lids
Advantages:
Large Capacity: These buckets are ideal for storing bulk quantities of dehydrated foods, making them a practical choice for large harvests.
Airtight Seals: Gamma lids screw on to create an airtight seal, effectively locking out air and moisture.
Considerations:
Plastic Quality: Ensure the plastic is food-grade and free from BPA or other potential contaminants.
Space Requirements: The larger size of buckets means they require more storage space, which might not be ideal for smaller storage areas.
Evaluating Storage Life Based on Food Types
Different foods have varied storage capabilities, which can be maximized under ideal conditions:
Grains and Seeds
Soft Grains (e.g., barley, oats): Ideally stored in an oxygen-free, hermetically sealed environment, with a shelf life expectation of 8 years at 70 degrees Fahrenheit.
Hard Grains (e.g., wheat, corn, millet): Thanks to their hard shells, these grains can remain viable for 10-12 years under similar conditions.
Legumes and Beans
As beans age, their oil content and hydration ability degrade. Storing them in nitrogen and at cooler temperatures can help maintain their quality for 8-10 years.
Dehydrated Vegetables and Dairy
These products generally maintain their quality well when hermetically sealed and kept free from oxygen, with vegetables lasting 8-10 years and dairy products up to 15 years under stable conditions.
Pasta and Flours
Pasta, due to its dry nature, can last longer than flour if kept in optimal conditions, with a potential shelf life of 8-10 years. Flours should not be stored for more than a year unless sealed hermetically and kept oxygen-free, extending their viability up to five years.
Specific Food Considerations
Dehydrated Fruits and Specialty Seeds: These require special handling to extend their shelf life, with seeds needing particular conditions depending on their use for consumption or sprouting.
Honey, Salt, Sugar, and Powdered Items: These can last indefinitely if kept dry, although additives in products like honey can reduce their shelf life.
How Dandelion can Help Cure Liver Problems
Dandelions (Taraxacum officinale) are more than just a common lawn weed often the scourge of urban lawns – they are a potent medicinal plant, particularly known for their liver-supporting properties. The first documented use of dandelions to treat liver and spleen conditions dates back to the Tang Dynasty in China more than 1500 years ago and is mentioned in medical texts in most cultures. Modern science has begun to validate these uses through rigorous study – and in this article we will explore the phytochemical constituents of dandelions that contribute to their efficacy in supporting liver health and the specific actions they have on liver function.
I remember a few years back when my wife was having a lot of problems with her liver which turned out to be consuming far too much coffee mate in her coffee that was causing her liver to fail – that dandelion tea was a miracle cure for her. Ever since I have been sold on its amazing properties for liver health.
Dandelions are rich in several phytochemicals that are key to promoting liver health:
Sesquiterpene Lactones: Dandelions contain sesquiterpene lactones, including taraxacin, which stimulate bile production. Increased bile helps the liver detoxify more efficiently and aids in the digestion of fats.
Phenolic Compounds: These are powerful antioxidants found abundantly in dandelion roots and leaves. Antioxidants protect liver cells from oxidative stress, which is a precursor to many chronic liver diseases including fatty liver disease and hepatitis.
Polysaccharides: Dandelion roots are rich in inulin, a type of soluble fiber that promotes healthy gut bacteria. A balanced microbiome is crucial for a healthy liver, as it can help reduce the body’s endotoxin load, which the liver has to process.
Mechanisms of Liver Support
Enhancing Detoxification: Dandelions help in detoxification by promoting enzyme activity within the liver. These enzymes break down toxins into less harmful substances that are easier for the body to eliminate.
Anti-inflammatory Action: Chronic inflammation is detrimental to liver cells. The bioactive compounds in dandelions help reduce inflammation in the liver, thereby preventing cellular damage and supporting liver regeneration.
Supporting Bile Production and Flow: As a cholagogue, dandelion facilitates the production and release of bile. Adequate bile flow is essential for not only detoxification but also for the elimination of cholesterol and regeneration of liver tissues.
Scientific Studies and Evidence
Recent studies have shown that dandelion extracts can reduce the levels of excess fat stored in the liver and protect against oxidative stress in animal models. For instance, one study demonstrated that dandelion leaf extract significantly reduced fat accumulation in the liver of mice fed a high-fat diet, suggesting it could be a beneficial supplement for managing fatty liver disease.
How to Use Dandelions for Liver Health
Detoxification and Liver Function
Dandelion roots and leaves are excellent for liver detoxification and health. The root acts as a hepatoprotective agent, which means it helps to protect the liver from damage. It also stimulates liver function by promoting bile production and flow, which helps to remove waste products from the body, and supports fat metabolism.
Practical Applications:
Dandelion Root Tea:
Preparation: To make dandelion root tea, dry, chop, and roast the roots of dandelion. Steep about one teaspoon of this in hot water for 10-15 minutes. Drink this tea once or twice a day to stimulate liver detoxification.
Benefits: Regular consumption of dandelion root tea can help cleanse the liver, reduce inflammation, and aid liver regeneration after exposure to toxins.
Dandelion Root Tincture:
Preparation: Fill a jar with chopped dandelion root, either fresh or dried, and cover it with vodka or another clear spirit. Seal the jar and let it sit in a cool, dark place for 8 weeks, shaking it occasionally. Strain the roots out, and your tincture is ready to use.
Usage: Take a few drops daily, not exceeding 30 drops in water or tea. This tincture serves as a concentrated way to deliver the benefits of dandelion root, supporting liver health and enhancing bile flow.
Supporting Liver Repair and Protection
Dandelion leaves are rich in antioxidants and vitamins, such as vitamin C and vitamin A, which are crucial for liver health and overall immune function. They help protect the liver from oxidative stress and may aid in repairing hepatic tissue.
Practical Applications:
Dandelion Leaf Salad:
Preparation: Young dandelion leaves can be gathered before the plant flowers for a less bitter taste. Wash the leaves thoroughly and mix them in a salad with ingredients like tomatoes, nuts, and your choice of dressing.
Benefits: Consuming dandelion leaves in salads provides a healthy dose of antioxidants and other nutrients that support liver health and help prevent liver disease.
Dandelion Leaf Juice:
Preparation: Juice fresh dandelion leaves with apples, celery, and ginger for a detoxifying drink.
Benefits: This juice is not only nourishing but also supports liver cleansing and helps flush out toxins.
Overall Health Promotion
Beyond liver health, dandelion is beneficial for general well-being. It acts as a diuretic, helping to eliminate toxins through increased urine production. It also supports digestive health, which is closely linked to efficient liver function.
Practical Applications:
Dandelion Coffee Substitute:
Preparation: Roast dandelion root until dark and brittle, then grind it into a powder. Brew it just like coffee grounds.
Benefits: This coffee substitute can help reduce liver strain by offering a caffeine-free alternative to regular coffee, which is beneficial for those looking to lessen liver irritants.
Dandelion Supplements:
Usage: Available in capsule form, these supplements can be an easy way to incorporate dandelion into your diet, especially if fresh dandelions are not available.
Benefits: Regular intake can help maintain liver health, assist in detoxification, and support overall vitality.
A note about those with Gallbladder Conditions and Dandelions…
While dandelions are generally considered safe, they should be used cautiously by individuals with gallbladder disease or bile duct obstructions. Always consult a healthcare provider before starting any new herbal supplement, especially for those with pre-existing liver conditions or those taking medications that can affect liver function.
Dandelions Rich History
Dandelions have a rich history as a medicinal plant, stretching back centuries and spanning various cultures around the world. Their use in traditional medicine is well-documented and diverse, reflecting their global availability and versatile applications.
Historical Use of Dandelions:
Ancient History:
Chinese Medicine: Dandelions have been used in traditional Chinese medicine for over a thousand years, at least since the Tang Dynasty (618-907 AD). They were prescribed to treat digestive disorders, appendicitis, and breast problems, such as inflammation or lack of milk flow.
Arabic Medicine: In traditional Arabic medicine, dandelions have been used since the 10th century. Ibn Sina (Avicenna), who wrote the influential medical text “The Canon of Medicine” around 1025 AD, mentioned dandelions as a treatment for liver and spleen conditions.
European History:
Middle Ages: During the Middle Ages in Europe, dandelions were cultivated in monastic gardens and used by herbalists. They valued it primarily for its diuretic properties, calling it “piss-a-bed” due to its effect of promoting urine production.
16th to 18th Century: Herbalists like John Gerard and Nicholas Culpeper wrote about dandelions in their herbal compendiums. Gerard recommended it for its general tonic effects and to remove skin blemishes, while Culpeper noted its role in helping liver obstructions.
Modern Times:
By the 19th and 20th centuries, dandelions were a common ingredient in many traditional medicine cabinets, especially in rural areas. They were used for a wide range of ailments, from kidney and liver disorders to skin diseases and as a general health tonic.
Global Spread
The dandelion plant is native to Eurasia but has since spread virtually worldwide. Its adaptability to various climates and environments has made it a staple in folk medicine across many different cultures. Each region has developed its own uses for the plant, often influenced by local medicinal practices and the specific ailments prevalent in that area.
The Science Behind Composting
All homesteaders and gardeners know the value of compost in growing food and for cosmetic flower beds etc, but for many, the actual process of composting and the science behind it is a vague concept. When you produce your own compost, having an advanced understanding of the process and methodology behind what maximizes the end result from your compositing efforts can go a long way to your gardening / farming success. In this article, I wanted to explain the science behind compositing so that you can apply the process to your compost pile.
Understanding Composting: The Basics
What is Composting?
In the most simple terms, composting is the natural process that involves the decomposition of organic matter into a rich soil amendment known as compost. It involves the breakdown of kitchen scraps, yard waste, and other organic materials by microorganisms under controlled conditions.
Key Components of Compost
Greens: These are nitrogen-rich materials like vegetable scraps, coffee grounds, and fresh leaves.
Browns: These materials are rich in carbon and include items like dried leaves, branches, and paper.
Moisture: Essential for microbial activity.
Air: Oxygen is crucial for aerobic decomposition.
Lets start with the Green portion of the composting process.
Greens: The Nitrogen Providers
In the composting process, materials classified as “greens” are important for their high nitrogen content. Nitrogen plays a fundamental role, acting as a key nutrient that fuels the compost’s biological activity. This section offers a more in-depth look at nitrogen, its function in compost, and the types of green materials that provide it.
What is Nitrogen?
Nitrogen is a chemical element and on Earth, is essential for all living organisms as it is a major component of amino acids, the building blocks of proteins, and nucleic acids, which form DNA and RNA. In the atmosphere, nitrogen exists as a gas, making up about 78% of the Earth’s air by volume. However, in order for plants and microorganisms to utilize it, nitrogen must be “fixed,” or converted into a more chemically available form like ammonium or nitrate.
Role of Nitrogen in Composting
In composting, nitrogen is crucial because it provides the primary nutrients that feed the microorganisms breaking down the organic matter. Here’s how nitrogen functions in the composting process:
Microbial Growth: Nitrogen-rich materials supply the protein that microbes need to grow and multiply. More microbes mean faster and more efficient breakdown of organic matter.
Heat Production: As these microorganisms work, they generate heat. This heat is beneficial as it speeds up the composting process, helps kill off pathogens and weed seeds, and breaks down tougher plant materials more quickly.
In the composting process, converting nitrogen into forms like ammonium (NH4+) and nitrate (NO3-) that plants can readily use involves a series of steps facilitated by microorganisms. Understanding this transformation helps in managing a compost pile effectively.
Here’s a breakdown of how nitrogen conversion occurs in compost:
1. Ammonification
The process begins with organic nitrogen, which is present in materials such as proteins in food scraps and plant tissues. Microorganisms decompose these proteins to simpler compounds, primarily ammonia (NH3). This stage is carried out by bacteria that specialize in breaking down complex organic molecules into simpler inorganic forms.
2. Nitrification
After ammonia is produced, it undergoes nitrification, a two-step process carried out by two different groups of aerobic bacteria:
First Step: Nitrosomonas bacteria convert ammonia into nitrites (NO2-). This step is sensitive to environmental conditions and requires adequate oxygen to proceed efficiently.
Second Step: Nitrobacter bacteria take the nitrites formed in the first step and convert them into nitrates (NO3-). Nitrates are the form of nitrogen most easily absorbed by plant roots.
3. Immobilization and Mineralization
These processes occur simultaneously in the compost. Immobilization involves microorganisms taking inorganic forms of nitrogen (like ammonia, nitrites, and nitrates) and incorporating them back into their own organic biomass. Conversely, mineralization is the process by which organic nitrogen (from microbial biomass or other organic forms) is again converted back into inorganic forms through decomposition.
4. Denitrification
Under anaerobic (oxygen-poor) conditions, some bacteria can convert nitrates back into nitrogen gas (N2), which is then released into the atmosphere. This step is generally undesirable in composting because it represents a loss of nitrogen, reducing the nutrient value of the compost for plants.
Managing Nitrogen Conversion in Compost
To optimize nitrogen conversion and retention in a compost pile, it’s helpful to:
Maintain Aerobic Conditions: Regularly turn the compost to ensure it has enough oxygen for nitrification.
Monitor Moisture Levels: Keep the compost moist but not waterlogged to support aerobic microbial activity without creating anaerobic zones.
Balance Carbon to Nitrogen Ratio: A balanced C/N ratio helps maintain an environment conducive to efficient microbial activity, minimizing nitrogen loss.
How Microbial Activity Works in Composting
Microbial activity is central to the composting process, where a diverse community of microorganisms breaks down organic matter into more stable forms, releasing nutrients and generating humus. The process is predominantly aerobic, meaning it requires oxygen to be efficient. Here’s a detailed look at how microbial activity functions in composting:
1. The Microbial Community
The compost pile is a dynamic ecosystem of bacteria, fungi, actinomycetes, and protozoa. Each group of organisms plays a specific role:
Bacteria: These are the most numerous and are primarily responsible for the rapid breakdown of easily decomposable materials (sugars, starches, fats). Depending on the stage of composting and temperature, different bacterial groups dominate:
Psychrophilic bacteria operate at lower temperatures (below 20°C) and start the decomposition process.
Mesophilic bacteria thrive at moderate temperatures (20°C to 45°C) and decompose organic matter more aggressively.
Thermophilic bacteria work at high temperatures (45°C to 75°C) and can decompose complex molecules such as proteins and fats quickly.
Fungi: Fungi break down tough plant cell wall components like cellulose and lignin that most bacteria cannot easily digest. They become more prevalent when conditions are less favorable for bacteria, such as lower nitrogen levels or drier, more acidic conditions.
Actinomycetes: These organisms are similar to both bacteria and fungi and are important for breaking down tough debris like woody stems, bark, and newspaper. They contribute to the earthy smell of mature compost.
Protozoa: These are single-celled organisms that feed on bacteria, releasing nutrients like nitrogen back into the compost, which then become available for plant use.
2. Stages of Microbial Decomposition
The composting process can be divided into several phases, each dominated by different microbial groups:
Initial Phase: As fresh organic matter is added to the compost, mesophilic bacteria and fungi begin to break it down. This leads to an increase in pile temperature.
Thermophilic Phase: As the temperature rises above 45°C, thermophilic bacteria take over. This high-temperature phase helps in the rapid breakdown of proteins, fats, and complex carbohydrates while also sanitizing the compost by killing pathogens and weed seeds.
Cooling and Maturation Phase: After the most readily decomposable materials are exhausted, the temperature gradually drops, and actinomycetes along with fungi become more active, further breaking down fibrous materials. This phase is crucial for developing the humus-like properties of the finished compost.
3. Factors Affecting Microbial Activity
Aeration: Microorganisms need oxygen to carry out aerobic respiration. Regular turning of the compost pile ensures an adequate oxygen supply and helps to regulate temperature and moisture levels.
Moisture: Water is essential for microbial life, aiding in the transport of nutrients and enzymes. However, too much moisture can lead to anaerobic conditions, reducing efficiency and potentially causing foul odors.
Nutrient Balance: The carbon to nitrogen ratio (C/N ratio) is a critical factor. Microorganisms use carbon as a source of energy and nitrogen for building cell structure. An optimal C/N ratio is about 30:1; deviations can slow down the process or cause ammonia to be released, which can be toxic to plants.
pH Levels: Most composting microorganisms prefer a neutral to slightly acidic pH (6-7.5). Extremes in pH can inhibit microbial activity and slow down the composting process.
The Role of Carbon in Composting
Carbon plays a fundamental role in the composting process, serving as a source of energy for the microorganisms that break down organic matter. Understanding its functions and management can significantly enhance the efficiency and quality of compost.
1. Carbon as Energy for Microorganisms
In the compost pile, carbon acts primarily as an energy source for the microorganisms that decompose organic matter. These organisms use carbon-rich substances as fuel to grow, reproduce, and carry out the biochemical processes necessary for breaking down organic materials into compost.
Types of Carbon Sources: Carbon in compost can come from a variety of materials, commonly referred to as “browns.” These include leaves, straw, wood chips, sawdust, and paper. These materials are rich in cellulose, hemicellulose, and lignin, which are complex carbohydrates that provide long-lasting energy sources for the composting microbes.
2. Balancing Carbon with Nitrogen
The efficiency of composting is highly dependent on maintaining an optimal balance between carbon and nitrogen (C/N ratio). This balance is crucial because while carbon provides energy, nitrogen is used by microbes for protein synthesis, which is necessary for their growth and reproduction.
Optimal C/N Ratio: The ideal carbon to nitrogen ratio in a compost pile is about 30:1. This ratio ensures that there is enough energy (carbon) for the microbes to process the nitrogen efficiently. If the carbon content is too high, the decomposition process slows down as microbes struggle to find enough nitrogen for their needs. Conversely, if there is too much nitrogen, it can lead to excessive ammonia production, which is harmful to plants and can cause odor problems.
3. Carbon and Compost Stability
As the composting process progresses, the role of carbon also evolves. Initially, easily degradable carbon sources are rapidly consumed by microbes. Over time, more resistant forms of carbon, such as lignin, begin to dominate. This shift plays a critical role in the maturation of compost:
Formation of Humus: The complex carbon compounds that are slower to break down contribute to the formation of humus, a stable, nutrient-rich component of compost that improves soil structure, water retention, and fertility.
Long-Term Soil Health: Humus-rich compost adds to the organic matter content of soil, which is essential for long-term soil health and sustainability. It acts as a slow-release nutrient source for plants and helps buffer soil pH.
4. Regulating Moisture and Aeration
Carbon-rich materials in compost also help regulate physical conditions within the compost pile:
Moisture Retention: Carbonaceous materials like straw and wood chips can help absorb excess moisture, maintaining an ideal moisture level within the compost. This is crucial because too much moisture can lead to anaerobic conditions, while too little can halt microbial activity.
Aeration: Bulky, carbon-rich materials add structure to the compost pile, preventing it from becoming too compacted. This structural support ensures that air can flow freely through the pile, providing the oxygen that aerobic microbes need to thrive.
5. Temperature Control
During the composting process, the breakdown of carbon-rich materials generates heat, which is essential for speeding up decomposition, sanitizing the compost by killing pathogens and seeds, and facilitating the breakdown of more resistant materials like fats and proteins.
Thermal Insulation: Carbon materials often help insulate the compost pile, retaining the heat generated by microbial activity. This insulation is especially important during colder months, as it can keep the composting process active year-round.
Lets now move on to the 3 component of composting and how moisture functions with compost.
A three bin composting system allows for you to move the maturing compost from beginning to end for optimal results.
The Role of Moisture in Composting
Moisture is the 3rd pillar in the composting process, influencing both the rate of decomposition and the quality of the final compost product. Understanding how to manage moisture effectively can significantly enhance composting efficiency and ensure the production of high-quality compost. Here’s a comprehensive look at the role of moisture in composting:
1. Microbial Activity and Moisture
Moisture is crucial for the survival and activity of microorganisms in the compost pile. These microorganisms, including bacteria and fungi, require water to dissolve and transport nutrients, facilitate biochemical reactions, and move through the compost material.
Optimal Moisture Levels: The ideal moisture content for a compost pile is often compared to the wetness of a wrung-out sponge, which is about 40-60% by weight. This level allows microbes to thrive without drowning them or creating anaerobic conditions.
Moisture and Heat: Moisture also helps regulate the temperature within the compost pile by absorbing and retaining heat generated by microbial activity.
2. Moisture and Decomposition Speed
The speed of decomposition in a compost pile is directly impacted by the moisture content. Moisture affects the availability of nutrients and the ease with which microorganisms can break down organic materials.
Too Dry: If the compost is too dry, microbial activity slows down significantly, stalling decomposition because the microbes lack the necessary water to carry out their metabolic processes.
Too Wet: Conversely, an overly wet compost pile can lead to anaerobic conditions where oxygen is limited. This not only slows down the decomposition process but can also lead to the production of foul odors and potentially harmful byproducts like methane.
3. Aeration and Moisture Control
Aeration is closely linked to moisture control in composting. Proper aeration helps maintain the right moisture level by allowing excess water to evaporate and preventing the compost from becoming waterlogged.
Turning the Compost: Regularly turning the compost pile can help distribute moisture evenly, reintroduce oxygen, and break up clumps that may be holding too much water.
Use of Bulky Materials: Incorporating carbon-rich, bulky materials (like straw or wood chips) can improve the structure of the compost, enhancing air flow and moisture retention.
4. Moisture Uniformity
Maintaining uniform moisture distribution throughout the compost pile is important to ensure that all parts of the pile are decomposing at an optimal rate.
Monitoring and Adjustment: Regular checks of moisture levels at different parts of the pile and subsequent adjustments (either by watering or turning) are necessary to manage the moisture uniformly.
5. Environmental Factors
External environmental factors such as climate, weather, and seasonal changes can significantly affect the moisture levels in a compost pile.
Covering the Pile: In wet climates or seasons, covering the compost pile with a tarp or similar material can prevent excessive moisture from rain. In dry climates or seasons, it may be necessary to add water to the pile to maintain adequate moisture levels.
6. Measuring Moisture Levels
To accurately gauge moisture levels, composters can use several methods:
Manual Testing: As a simple method, squeezing a handful of compost can indicate moisture level; it should feel moist but not release excess water.
Moisture Meters: For a more precise measurement, moisture meters can be used to provide a direct reading of moisture content.
The Role of Oxygen in Composting
Oxygen is the final component in the composting process, particularly for promoting aerobic decomposition, which is the most efficient and desirable method of breaking down organic materials. Understanding the role of oxygen and how to manage its presence in a compost pile is essential for successful composting. Here’s an in-depth look at the role of oxygen in composting:
1. Aerobic Decomposition
Oxygen is vital for aerobic decomposition, where microorganisms such as bacteria and fungi use oxygen to break down organic matter. This process is highly efficient, converting organic materials into carbon dioxide, water, and heat, along with a stabilized form of organic matter known as humus.
Efficiency and Speed: Aerobic processes are generally faster and more complete than anaerobic decomposition, largely because aerobic microbes are more efficient at breaking down complex organic compounds.
Heat Production: Aerobic decomposition generates significant amounts of heat, which helps to speed up the composting process by increasing the overall temperature of the pile. This heat is also beneficial for sanitizing the compost by killing pathogens and weed seeds.
2. Avoiding Anaerobic Conditions
Without sufficient oxygen, compost piles can quickly become anaerobic. Anaerobic decomposition is slower and often results in the production of less desirable byproducts such as methane, hydrogen sulfide, and other malodorous compounds.
Odor Prevention: Maintaining an aerobic state helps prevent the development of foul odors commonly associated with anaerobic decomposition.
Byproduct Control: By ensuring adequate oxygen levels, the production of methane—a potent greenhouse gas—is minimized, making aerobic composting a more environmentally friendly option.
3. Oxygen and Microbial Health
Oxygen supports the health and diversity of microbial communities within the compost pile. Aerobic microbes are generally more aggressive decomposers and are crucial for a quick and efficient composting process.
Microbial Activity: Adequate oxygen levels help maintain high levels of microbial activity, as many of the most effective composting microbes, including certain bacteria and fungi, require oxygen for their metabolic processes.
Diversity of Microorganisms: A well-oxygenated compost pile supports a wider range of microorganisms, which contributes to the breakdown of a variety of organic materials and the overall stability of the compost.
4. Methods to Ensure Adequate Oxygen
Managing oxygen levels in a compost pile involves physical interventions to enhance airflow and prevent the pile from becoming too compacted.
Turning the Pile: Regularly turning the compost pile is the most effective way to reintroduce oxygen throughout the material. This prevents the inner sections of the pile from becoming anaerobic and helps distribute moisture and heat evenly.
Pile Structure: Constructing the pile with a mix of material sizes can help maintain air passages. Bulky or coarse materials, such as branches or straw, can be layered with finer materials to improve structure and airflow.
Pile Size: The size of the compost pile can also affect oxygen levels. Too large a pile can restrict oxygen penetration to the center, while too small a pile may not retain sufficient heat. Typically, a pile should be at least three feet high and wide but not much larger than five feet in any dimension to balance these needs.
5. Monitoring Oxygen Levels
While there are no straightforward home methods for measuring oxygen levels directly in compost, indicators such as temperature and the presence of foul odors can provide clues about oxygen status. A sudden drop in temperature or the emergence of bad smells might suggest that the pile is becoming anaerobic and needs turning.
Putting it All to Together – the Optimal Composting Strategy
Green Materials in Compost.
As you now know, green materials are essential for providing nitrogen in the composting process. Each type of green material contributes uniquely to the efficiency and health of the compost pile. Below is a detailed examination of common green materials used in composting, highlighting their individual characteristics and value.
1. Kitchen Scraps
Kitchen scraps are one of the most readily available sources of greens for most composters. They include fruit and vegetable peels, coffee grounds, tea bags, and old spices.
Nutrient-Rich: These materials are high in nitrogen and other nutrients, which help to fuel the microbial activity in the compost pile.
Moisture Content: They also contribute moisture, which is necessary for microbial processes.
Considerations: To avoid attracting pests and to speed up decomposition, it’s best to bury kitchen scraps deep within the compost pile. Also, avoid adding meat, dairy, and oily foods as they can create odors and attract rodents.
2. Fresh Grass Clippings
Fresh grass clippings are an excellent green material due to their high nitrogen content and moisture.
Rapid Decomposition: Grass clippings decompose quickly, generating substantial heat and accelerating the overall composting process.
Usage Tips: If added in thick layers, grass clippings can mat down and create anaerobic patches. It’s best to mix them with browns or spread them thinly.
Balancing Act: Because of their high nitrogen content, balance with carbon-rich materials is crucial to prevent a slimy, smelly pile.
3. Green Plant Materials
This category includes garden trimmings, green leaves, and fresh weeds (before they go to seed).
Diverse Microbial Life: These materials introduce a variety of microorganisms from the garden environment, enhancing microbial diversity in the compost.
Precautions: Avoid composting diseased plants as they might spread pathogens to the compost and eventually to your garden.
4. Animal Manures
Manures from herbivores (e.g., cows, horses, chickens) are extremely valuable in composting due to their high nutrient content, particularly nitrogen.
Compost Activators: Manures can act as a ‘compost activator’, kick-starting the composting process by rapidly introducing large amounts of microorganisms.
Use With Care: Always use well-aged or composted manure to avoid burning plants with excess ammonia or introducing pathogens. Avoid manures from carnivorous animals, as they can contain harmful pathogens and do not decompose well in a compost setting.
5. Coffee Grounds
Coffee grounds are an excellent addition to the compost pile, providing generous amounts of nitrogen.
Acidic Content: While fresh coffee grounds are slightly acidic, once composted, they have a near-neutral pH.
Texture and Density: Their small particle size can help improve the soil texture upon the final decomposition. However, like grass clippings, they should be mixed well with browns to prevent matting.
Green Material
Role in Composting
Additional Notes
Vegetable Scraps
Provide essential nitrogen and moisture to accelerate decomposition.
Avoid cooked vegetables or those with oils and dressings.
Fruit Scraps
Similar to vegetable scraps, they add nitrogen and enhance microbial activity.
Avoid adding citrus peels in large amounts as they are acidic and slow down composting.
Coffee Grounds
Add nitrogen and a slight acidic content beneficial for acid-loving plants.
Rich in nitrogen; can also help neutralize alkaline soils somewhat.
Tea Leaves
Source of nitrogen and improve the texture of the compost.
Remove any tea bags made from non-biodegradable materials.
Grass Clippings
High nitrogen content speeds up the composting process and generates heat.
Mix with browns to prevent clumping and odor.
Chicken Manure
Excellent source of nitrogen, phosphorus, and potassium.
Must be composted before use to avoid burning plants.
Cow Manure
Good source of nitrogen and microbes, helps to heat up the compost pile quickly.
Should be aged or composted to prevent weed seed germination.
Horse Manure
Adds significant amounts of organic matter and nutrients to the compost.
Often contains more weed seeds than other manures, should be hot-composted.
Goat Manure
Provides nutrients and beneficial microbes.
Easier to handle and generally less odorous than other manures.
Egg Shells
Slow-release source of calcium and other minerals, but minimal nitrogen content.
Crush before adding to speed up decomposition.
Green Leaves
Provide moderate amounts of nitrogen and help maintain moisture balance.
Less nitrogenous than grass clippings but beneficial for diversity in compost.
Weeds (pre-seed)
Add green material quickly but must be managed to avoid spreading seeds.
Ensure they haven’t gone to seed to prevent weeds in garden applications.
Fresh Flowers
Add bulk and slight nitrogen to the compost mix.
Ensure no chemical treatments have been used on them.
Alfalfa
Extremely high in nitrogen and also contains important trace minerals.
Often used as a ‘compost activator’ due to its rich nitrogen content.
Blood Meal
High-nitrogen supplement that can accelerate compost microbial activity.
Use sparingly to avoid overwhelming nitrogen levels.
Fish Scraps
High in nitrogen and phosphorus, great for compost but must be buried deep to avoid pests.
Can attract rodents and other pests if not managed carefully.
Seaweed
Adds potassium and trace minerals, helps to speed up composting process.
Rinse salt off if collected fresh; iodine content can benefit soil.
Feathers
Slow to break down but a good source of nitrogen once they do.
Best when mixed thoroughly into the pile to avoid matting.
Hair and Fur
High in nitrogen. Hair from barbershops or pet fur can be composted.
Ensure it is spread thinly to prevent matting and aid in decomposition.
Green Kitchen Waste
General category for all biodegradable kitchen waste that provides nitrogen.
Avoid adding oils, fats, or any processed food leftovers.
Fresh Herbivore Bedding
Bedding materials like straw or hay mixed with animal droppings enhance nutrient content and structure.
Ensure the bedding is free of synthetic chemicals or treated wood products.
Fruit Juicing Pulp
Provides nutrients and moisture to the compost pile.
Can decompose very quickly, aiding in rapid compost maturation.
Pasta (plain)
Can be added occasionally for variety, though minimal nutrient contribution and slow decomposition.
Ensure no oils or sauces; better if added sparingly.
Potato Peels
Good source of starches and minor nitrogen, decompose readily.
Can sprout if not buried deeply in the compost pile.
Rabbit Manure
Exceptionally high in nitrogen and can be used directly without composting.
Considered a ‘cold manure’ so it doesn’t need to age like chicken or cow manure.
Brown Materials in Compost
Brown materials are crucial for providing carbon in the composting process. They serve as the energy source for the microorganisms that decompose organic matter. Here’s a detailed examination of common brown materials used in composting, highlighting their individual characteristics and value.
1. Dry Leaves
Dry leaves are among the most common and accessible brown materials for composting. They are abundant in fall and easy to collect.
Carbon-Rich: Provides the necessary carbon that fuels the microbes responsible for breaking down the greens.
Decomposition Rate: They decompose at a moderate rate, which helps maintain the structure and aeration of the compost pile.
Usage Tips: Shredding the leaves can speed up their decomposition as it increases the surface area for microbes to work on.
2. Straw and Hay
Straw and hay are excellent for bulking up the compost pile and maintaining good air circulation within it.
Structure and Aeration: These materials help prevent the compost from becoming too dense or compacted, which can lead to anaerobic conditions.
Nutrient Levels: While not as nutrient-rich as other materials, they decompose slowly and steadily, providing prolonged energy for microbes.
Considerations: Ensure the straw or hay is free of seeds and pesticide residues to avoid introducing these into your compost and garden.
3. Wood Chips and Sawdust
Wood chips and sawdust can be beneficial in a compost pile but must be used correctly due to their high carbon content.
High Carbon Content: These materials have a very high carbon to nitrogen ratio, which can slow down the decomposition process if not balanced with enough greens.
Slow Decomposition: Their decomposition is much slower, providing a long-term structure and aeration benefits.
Usage Tips: Best used in small amounts unless balanced with a significant amount of nitrogen-rich greens. They are particularly useful in composting systems designed to operate over longer periods.
4. Cardboard and Paper
Cardboard and paper are readily available and can be a good source of carbon when other browns are scarce.
Carbon Source: They provide a quick burst of energy for microorganisms when shredded into smaller pieces.
Ink Considerations: Use only those without glossy finishes or heavy inks, as these can introduce toxins into the compost.
Moisture Management: They can help absorb excess moisture in a wet compost pile.
5. Corn Stalks and Other Crop Residues
These agricultural by-products are excellent for adding bulk and structure to the compost pile.
Structure: Helps maintain aeration and prevents the pile from compacting.
Decomposition Rate: These materials decompose at a moderate to slow rate, depending on their lignin content.
Preparation: Chopping or shredding them can help speed up their breakdown.
Maximizing the Value of Browns in Compost
To optimize the use of brown materials in composting, consider the following practices:
Balanced Mixing: Ensure a good balance between browns and greens. The ideal carbon to nitrogen ratio (C/N ratio) should be about 30:1.
Layering: Layering greens and browns can help maintain an even distribution of materials, aiding microbial access and activity.
Regular Turning: This helps to mix the browns and greens thoroughly, reintroducing oxygen and accelerating the decomposition process.
Size Reduction: Larger pieces of brown material can be broken down to increase surface area for microbial activity.
Brown Material
Role in Composting
Additional Notes
Dry Leaves
Provide bulk and carbon, essential for energy and maintaining structure in the pile.
Shredding them can speed up decomposition.
Straw
Adds structure to maintain aeration and absorb excess moisture.
Ideal for layering in compost to keep materials loose.
Hay
Similar to straw but can contain seeds which might sprout in the pile.
Use aged hay to minimize the risk of growing unwanted plants in your compost.
Sawdust
High carbon content helps balance nitrogen-rich greens.
Must be mixed well with nitrogen sources to avoid nitrogen depletion.
Wood Chips
Provide a long-lasting structure and aeration, very high in carbon.
Decompose very slowly; best used in larger or slower composting setups.
Pine Needles
Add bulk and slight acidity, slow to decompose.
Use sparingly as they can acidify the compost more than other browns.
Cardboard
Carbon-rich and good for absorbing excess moisture.
Remove any tape or glossy prints before composting.
Newspaper
Easy to decompose carbon source; inks today are mostly soy-based and safe for compost.
Shred to prevent matting and improve breakdown.
Corn Stalks
High in carbon and help to aerate the pile due to their bulky nature.
Chop or shred to accelerate decomposition.
Cotton and Wool Rags
Provide slow-releasing carbon.
Ensure they are 100% natural fibers without synthetic blends.
Dryer Lint
Can be composted if primarily from natural fibers.
Be cautious as synthetic fibers are not suitable for composting.
Peat Moss
Used to balance moisture and carbon content.
Use sparingly and responsibly due to environmental concerns with peat harvesting.
Leaves and Stems of Crops
Good source of carbon after harvest.
Make sure they are disease-free to avoid spreading issues to the compost.
Hard Shells from Nuts
Provide carbon and help maintain aeration in the pile.
Crush or break down to speed up decomposition.
Paper Egg Cartons
Excellent source of carbon and structure.
Shred into small pieces for better integration and faster breakdown.
Paper Towels
Good carbon source, especially if used for cleaning up organic materials like water and vegetable juices.
Avoid using if they contain chemical cleaners.
Burlap Sacks
Add bulk and carbon to the compost.
Ensure they are untreated and free of synthetic materials.
Tea Bags
Good for adding slight nitrogen and carbon; tea leaves are green, but the bag is brown if paper.
Remove any staples or non-compostable parts of the tea bag.
Natural Fiber Threads
Slow to break down but contribute carbon over time.
Ensure they are free from dyes and synthetic materials.
Autumn Leaves
Rich in carbon and essential minerals, break down relatively quickly.
Mix well with nitrogen-rich materials to balance the compost.
Peanut Shells
Good source of carbon and help with aeration.
Might be salty; rinse before adding to avoid salt buildup in the compost.
Cereal Boxes (Non-glossy)
Offer a carbon source for microbial energy.
Remove any plastic or glossy linings before adding to the compost pile.
Toilet and Paper Towel Rolls
Serve as a carbon source and break down easily.
Ideal for adding bulk and structure to the pile.
Coconut Coir
An excellent carbon-rich addition that also helps retain moisture.
An alternative to peat moss with a more sustainable footprint.
Used Potting Soil
Adds structure and diverse microorganisms to the pile.
Ensure it is free of synthetic chemicals and disease.
Wheat Straw
Excellent for aeration and adding bulk while providing carbon.
Preferably use straw that is free from herbicide residues.
The Roll of Ash in Your Garden and Composting
Using ash in composting can be beneficial, but it requires careful consideration and moderation due to its chemical properties and effects on compost balance and soil pH. Here’s a detailed look at using ash in composting, including the types of ash suitable for composting, their benefits, and important precautions.
Types of Ash Suitable for Composting
Wood Ash: This is the most common type of ash used in composting. It comes from burning untreated, natural wood. Wood ash contains potassium, calcium, and other trace minerals that can benefit soil health.
Paper Ash: Ash from burned untreated paper can also be used in compost but in very limited quantities because it’s mostly devoid of nutrients.
Benefits of Using Ash in Composting
Mineral Supply: Wood ash provides essential minerals like potassium and calcium, which are beneficial for plant growth.
pH Adjustment: Ash is alkaline and can be used to raise the pH of acidic soils when used directly or when added to compost.
Precautions and Considerations
Avoid Ash from Treated Materials: Never use ash from treated wood, colored paper, cardboard, or other materials that might have been treated with chemicals or inks. These can release harmful substances into your compost and ultimately into your garden.
Heavy Metal Content: Be cautious about using ash from unknown sources, as it may contain heavy metals or other contaminants.
Alkalinity: Since ash is highly alkaline, adding too much can raise the pH of your compost more than desired. This can hinder the composting process and potentially harm beneficial microbes.
Application Rate: If you choose to add ash to your compost, use it sparingly. A general guideline is to add no more than a cup of ash per square yard of compost pile material. It should be thoroughly mixed into the compost to avoid concentrated areas that could inhibit microbial activity.
Salt Content: Wood ash can contain salts that, in high concentrations, might be harmful to plants. This is another reason to use it sparingly, especially in areas where soil salinity is already a concern.
Alternatives to Direct Addition
Given the potential risks associated with using ash directly in compost, there are alternative ways to utilize ash safely in gardening:
Direct Soil Amendment: Instead of adding ash to your compost pile, you might consider using it directly on the soil, especially if your soil is acidic. This method allows the ash to be diluted by natural soil processes more gradually and reduces the risk of harming the microbial life in your compost.
Testing: If you plan to use ash either in your compost or directly in the garden, it’s wise to test your soil’s pH first to ensure you’re not making it too alkaline.
As part of our ongoing series on composting this season, we will be digging deeper into the various aspects of composting including bin location, size requirements and how specific foods and trimmings impact the quality of the compost itself.
Building an Ice House for Year Round Refrigeration
In the pursuit of self-sufficiency, one traditional method that has seen a resurgence among modern homesteaders and off-grid enthusiasts is the use of an ice house. An ice house, once a staple before the advent of electric refrigeration, offers a reliable solution for long-term cold storage, especially in remote areas where electricity is either unavailable or unreliable. This age old technology allows for the preservation of perishables over extended periods which allows for a steady supply of food throughout the year.
It was common back pre 1970 that ice houses were commercial businesses and typically would see the owner use a chain saw to cut blocks of ice out of a frozen lake and then pull them back to the ice house by horse and sled. This ice would be backed in many inches of sawdust and would last in a quality insulated house until the next winter.
For those living off the grid or preparing for scenarios where modern conveniences might not be available, building an ice house is not just about embracing historical practices—it’s about ensuring food security and independence. The revival of ice houses on contemporary homesteads isn’t just a nod to the past; it’s a practical, sustainable choice that aligns with the values of reducing reliance on modern utilities and enhancing one’s ability to survive and thrive in any situation.
The ice house holds a venerable place in the annals of human history, dating back to ancient times when Persians stored ice and snow in desert climates using subterranean structures. In Europe and North America, during the 19th century, before the widespread availability of refrigeration technology, ice houses were commonplace on farms and large estates. These structures were not only practical but essential for preserving food and providing ice throughout the year.
Whether your interest lies in the ecological benefits of using natural cooling systems or in the prepping perspective of being ready for any emergency, an ice house can be a valuable addition to your homestead. This guide will walk you through the why and how of building your own ice house, covering everything from the initial planning stages to the construction details and maintenance.
Why Build an Ice House?
Practical Benefits for Homesteaders and Preppers
For homesteaders, the practical benefits of an ice house are manifold:
Energy Independence: Ice houses require no electricity, which is ideal for off-grid living situations. They provide a way to keep food cold without ongoing energy costs, reducing your homestead’s carbon footprint.
Food Preservation: They are perfect for storing seasonal harvests, dairy products, and meat over the winter months when other preservation methods might fail due to power outages or other disruptions.
Emergency Preparedness: In emergency situations where power might be lost for an extended period, having an ice house can mean the difference between preserving your food supply and facing spoilage.
As communities increasingly look to reduce their dependence on modern supply chains and utility grids, ice houses offer a way to reclaim a piece of forgotten technology that is both effective and environmentally friendly. Building an ice house is not just about preparing for a worst-case scenario; it’s about choosing a lifestyle that values sustainability, preparedness, and historical wisdom.
Planning Your Ice House
Location Selection
Choosing the right location for your ice house is critical to its effectiveness and efficiency. Ideally an ice house dug into or embedded into the earth is your best bet for natural insulation. Alternatively, putting you ice house in your basement or dugout is also a viable option although keep in mind that ice is heavy and you will need to get it into the area.
Here are several factors to consider:
Sun Exposure: Select a site with minimal sun exposure, preferably shaded or on the north side of a building or hill. This reduces the amount of heat absorbed by the structure during the day, keeping the interior as cool as possible.
Drainage: Ensure the area has good drainage to prevent water from entering the ice house. Water ingress can cause the ice to melt faster and can lead to structural damage over time.
Accessibility: The ice house should be conveniently located close to your kitchen or pantry for easy access, but not so close that it could cause issues with humidity or pests.
Size and Scale
Determining the right size for your ice house depends on your storage needs and the size of your homestead:
Household Size: Consider how much food you typically need to store. A larger family or one that harvests a lot of produce might need more space than a single person or a small family.
Usage Frequency: How often will you access the ice house? Frequent access can lead to more warm air entering and may require a larger volume of ice to maintain low temperatures.
Materials Needed
The choice of materials will greatly influence the effectiveness and longevity of your ice house:
Insulation: Traditional materials like sawdust and straw are excellent for insulation and are often readily available on a homestead. Modern alternatives like foam insulation or fiberglass can also be used, especially around the door and roof for enhanced thermal efficiency.
Walls and Flooring: Thick wooden walls are traditional, but stone or concrete can also be used for added durability and better cold retention. The floor should be slightly sloped towards a drain to allow meltwater to exit the structure easily.
Roofing: The roof should be sturdy and well-insulated. Materials like thick wooden beams covered with insulating layers and waterproof membranes can be effective.
Preparing for Winter: Storing Ice
Properly gathering and storing ice is crucial for maintaining your ice house through the warmer months. Here’s how you can effectively harvest and store ice during the winter to ensure your ice house remains functional year-round.
Harvesting Ice
Selecting the Source:
Natural Sources: If you have access to a clean pond, lake, or river that freezes over, these can be excellent sources of ice. Ensure the water is safe and free from pollutants.
Creating Ice Blocks: If natural clean ice is unavailable, you can create large blocks of ice by filling containers with water and leaving them outside to freeze.
Cutting and Extracting Ice:
Tools Required: The most common tool for cutting ice blocks is a chain saw, but you can also use ice saws, chisels, and ice spuds for cutting ice from natural sources. These tools help you control the size and shape of the ice blocks.
Technique: Mark a grid pattern on the ice to create uniform blocks. Cut through the ice along the marked lines, then use an ice spud or chisel to pry the blocks free.
Transporting Ice:
Sleds or Carts: Transport the ice blocks using sleds, skis, or wheeled carts to your ice house. Ensure the path is clear and stable to avoid breaking the ice.
Storing Ice
Stacking Ice Blocks:
Layering: Start by laying a base layer of straw or sawdust on the floor of the ice house. Stack the ice blocks tightly together to reduce air exposure, which minimizes melting.
Insulation Between Layers: Between each layer of ice, add more insulating materials such as sawdust or straw. This insulation prevents the blocks from freezing together and provides additional thermal protection.
Maintenance:
Regular Checks: Throughout the winter and into the warmer months, check the ice house regularly for signs of melting or gaps in insulation. Add more sawdust or straw as needed to areas where the ice appears to be melting faster.
Drainage: Ensure that the drainage system within the ice house is functioning properly to deal with any water from melted ice. Proper drainage is crucial to prevent the bottom layers of ice from sitting in water, which would speed up the melting process.
Maximizing Ice Longevity:
Minimize Opening: Open the ice house as infrequently as possible to prevent warm air from entering and accelerating ice melt.
Optimal Conditions: Maintain the interior of the ice house at just above 0°C (32°F) for optimal ice preservation. Regular temperature checks can help manage the internal climate efficiently.
The duration for which ice can be preserved in an ice house depends on several factors, including the quality of construction, insulation, and external weather conditions. However, with optimal construction and maintenance, ice stored in an ice house can last from the late winter months when it is harvested until the next winter season begins, essentially providing cold storage throughout the warmer months. Here are key factors that affect the longevity of ice and how to optimize them:
Construction Quality
Insulation: Effective insulation is the most critical factor in extending the life of ice. Using materials such as sawdust, straw, or modern insulating foams can greatly reduce the rate of melting. Walls and roofs should be well-insulated to minimize heat ingress.
Seal: Ensure that the structure is well-sealed. Gaps in the door or walls can let in warm air, which accelerates melting. Use weather stripping around the door and seal any visible cracks.
Storage Technique
Packing Ice Tightly: Ice should be cut into large, uniform blocks and packed tightly together to reduce surface area exposure, which decreases melting.
Layering with Insulation: Between layers of ice, add a generous amount of insulating material like sawdust or straw. This not only prevents the blocks from freezing together but also adds an additional barrier against heat.
External Conditions
Shade and Ventilation: Positioning the ice house in a shaded area and ensuring adequate ventilation can help maintain low internal temperatures. Ventilation helps to expel warmer air that rises within the structure without letting in too much warm external air.
Climate: Naturally, the climate plays a significant role. In cooler, northern climates, ice can last longer than in warmer, southern areas. Adjusting insulation thickness and the frequency of ice house access can help compensate for warmer climates.
Maintenance and Monitoring
Regular Checks: Regular inspection of the ice house for signs of structural compromise or excessive melting is important. Repair any damage promptly.
Temperature and Humidity Control: Monitor the internal temperature and humidity levels using simple tools like thermometers and hygrometers. Keeping the internal environment stable is key to prolonging the ice’s lifespan.
As homesteaders and preppers, you understand the importance of maintaining a well-stocked pantry and ensuring long-term food security. Knowing how to properly assess the longevity of your food supplies is crucial. But how do you determine what to keep and what to discard? And how can you ensure that your stock of fresh ingredients remains viable with minimal trips to replenish supplies?
In this article, we take a look at the actual shelf life of products rather than the best before dates that manufacturers place on their products including canned goods, condiments, spices and common over the counter medications.
Optimizing Food Storage for Homesteaders and Preppers: Understanding Shelf Life and Dating
Decoding Food Product Dating
Firstly, it’s important to demystify the dates found on food packaging. Contrary to popular belief, these are not expiration dates. The U.S. Department of Agriculture points out that except for baby food, food product dating is not mandatory and does not indicate food safety. These dates primarily serve as the manufacturer’s estimate for when the product may no longer be at its peak quality—this could mean a decline in flavor, texture, or nutritional value.
For homesteaders and preppers, who often deal with a broader range of storage conditions and extended storage times, this understanding is key. Manufacturers set these dates assuming that consumers do not always maintain ideal storage conditions—like a perfectly dark, cool pantry or an efficiently managed refrigerator – not to mention they know that by using scare tactics modern consumers will throw out a product much sooner if they make the best before date much shorter and there by increase more sales of that product annually. This tactic has resulted in an estimated 46% increase in what is called pantry turn over for food manufactures. The simple premise is that if a bottle of salad dressing once had a two year shelf life label, the consumer would keep it for that long. By changing that label to 6 months – keeping in mind this is completely up to the food maker and is not regulated – they can in theory have that same consumer purchase that the product four times in a two year span rather than once.
Long-Term Storage Insights
When planning your food storage strategy, consider these guidelines tailored to the homesteading and prepping lifestyle:
Dry Goods (Grains, Beans, Spices): These staples can last far beyond their “best by” dates if stored in airtight containers in a cool, dark place. Grains and dried beans are particularly durable, with proper storage extending their usability for years. Spices lose potency over time, but they do not become unsafe to use; they simply become less effective as flavor agents.
Canned Goods: The integrity of canned goods can be maintained for years if the cans remain undamaged and are kept in cool, dry conditions. High-acid foods (like tomatoes and fruits) generally last for 12-18 months, while low-acid foods (like meats and vegetables) can last for 2 to 5 years.
Perishables (Eggs, Dairy, Produce): Effective rotation and storage can significantly extend the life of perishable goods. Eggs, for example, can last 3-5 weeks in the refrigerator. Fresh produce longevity varies widely, but proper storage in the crisper or a root cellar can maximize shelf life. For dairy, sniff tests and visible inspection for mold are more reliable than printed dates.
Practical Storage Tips
Efficient Pantry Management: Adopt a “first-in, first-out” approach to ensure you use older items before newer ones. Regularly check your stock for signs of spoilage or pest intrusion.
Optimize Your Refrigeration: Organize your fridge and freezer to minimize the time the doors are open. Contemplate what you need before opening the door to maintain an optimal internal temperature.
Invest in Preservation: For those looking to extend the viability of fresh produce, consider techniques like canning, smoking, and dehydrating, which can significantly prolong the edibility and nutritional value of fresh foods.
Shelf Life, Best Before, and Estimated Unsafe Consumption Dates of Unopened Common Condiments
This updated table includes general shelf life under ideal storage conditions, typical best-before dates provided by manufacturers, and the estimated dates beyond which unopened condiments should no longer be considered safe to consume.
Table of Common Condiments with Comprehensive Date Information (Unopened)
Condiment
Shelf Life Under Ideal Conditions
Typical Best Before Date from Production
Estimated Unsafe Date Beyond (Unopened)
Ketchup
1-2 years
1 year
3 years
Mustard
2-3 years
2 years
4 years
Mayonnaise
6-9 months
1 year
1-1.5 years
Barbecue Sauce
1 year
1 year
2 years
Soy Sauce
2-3 years
2 years
4 years
Hot Sauce
2-3 years
2 years
4 years
Salad Dressing
1-2 years
1-1.5 years
2-3 years
Horseradish
1 year
1 year
2 years
Vinegar
Indefinite
Indefinite
Indefinite
Olive Oil
2 years
18-24 months
3 years
Worcestershire Sauce
2 years
2 years
3 years
Pickles
1-2 years
1 year
3 years
Relish
1 year
1 year
2 years
Tartar Sauce
6 months
6 months
1 year
Fish Sauce
2 years
2 years
3 years
Peanut Butter (Natural)
6-9 months
1 year
1-1.5 years
Jelly and Jam
1 year
1 year
2 years
Honey
Indefinite
Indefinite
Indefinite
Maple Syrup
Indefinite
Indefinite
Indefinite
Sriracha
2 years
2 years
3 years
Key Points to Consider
Shelf Life After Best Before: The “Estimated Unsafe Date Beyond (Unopened)” is a conservative estimate based on typical degradation patterns of the product when unopened and stored properly. It is intended to provide guidance on safety margins beyond the manufacturer’s best before date.
Storage Conditions: The longevity of these products can be significantly influenced by their storage conditions. Keeping condiments in a cool, dark, and dry place can help extend their shelf life.
Product Quality: Even if a product is within its estimated safe period, always check for signs of spoilage such as off odors, colors, or textures. If the product shows any signs of deterioration, it should not be consumed.
Shelf Life, Best Before, and Estimated Unsafe Consumption Dates of Unopened Canned Goods
This table includes comprehensive date information for 30 popular canned food items, showing their general shelf life under ideal storage conditions, typical best-before dates provided by manufacturers, and the estimated dates beyond which the unopened products should no longer be considered safe to consume.
Table of Common Canned Foods with Comprehensive Date Information (Unopened)
Canned Food Item
Shelf Life Under Ideal Conditions
Typical Best Before Date from Canning
Estimated Unsafe Date Beyond (Unopened)
Applesauce
18-24 months
2 years
3 years
Baked Beans
2-5 years
2-3 years
5-6 years
Beef Stew
3-5 years
3-5 years
5-6 years
Black Beans
2-5 years
2-3 years
5-6 years
Carrots
3-5 years
3-4 years
5-6 years
Chicken (canned)
2-5 years
3-5 years
5-6 years
Chili
3-5 years
3-5 years
5-6 years
Coconut Milk
1-2 years
2 years
3 years
Corn
1-2 years
1-2 years
3 years
Cranberry Sauce
1-2 years
2 years
3 years
Diced Tomatoes
18-24 months
18-24 months
3 years
Green Beans
3-5 years
3-4 years
5-6 years
Kidney Beans
2-5 years
2-3 years
5-6 years
Lentils
2-5 years
2-3 years
5-6 years
Mushroom Soup
3-5 years
2-3 years
5-6 years
Olives
1-2 years
2 years
3 years
Peaches
1-2 years
1-2 years
3 years
Peanut Butter
2 years
2 years
3 years
Peas
3-5 years
3-4 years
5-6 years
Pineapple
1-2 years
1-2 years
3 years
Pinto Beans
2-5 years
2-3 years
5-6 years
Pumpkin
2-5 years
2-3 years
5-6 years
Salmon
3-5 years
3-5 years
5-6 years
Sardines
2-5 years
2-4 years
5-6 years
Spaghetti Sauce
18-24 months
2 years
3 years
Spinach
3-5 years
3-4 years
5-6 years
Sweet Potatoes
2-5 years
2-3 years
5-6 years
Tomato Soup
18-24 months
2 years
3 years
Tuna
3-5 years
3-4 years
5-6 years
Vegetable Soup
3-5 years
3-4 years
5-6 years
Key Points to Consider
Storage Conditions: The shelf life and safety of canned goods can be extended by storing them in a cool, dry place away from direct sunlight.
Inspection Before Use: Always inspect cans before use; look for signs of damage such as dents, rust, or bulging. Any can showing these signs should be discarded regardless of its age.
Use of Dates: The “Estimated Unsafe Date Beyond (Unopened)” is a conservative estimate based on degradation patterns under ideal storage conditions. It is a safety guideline meant to minimize risks associated with aged canned goods.
Shelf Life, Best Before, and Estimated Unsafe Consumption Dates of Unopened Cooking Oils
Cooking oils are essential in culinary practices worldwide, but they can degrade over time due to factors like oxidation and exposure to light and heat. Understanding their shelf life and safety limits is crucial for maintaining food quality and health standards.
Table of Common Cooking Oils with Comprehensive Date Information (Unopened)
Cooking Oil
Shelf Life Under Ideal Conditions
Typical Best Before Date from Production
Estimated Unsafe Date Beyond (Unopened)
Olive Oil
18-24 months
2 years
2-3 years
Canola Oil
1 year
1-2 years
2 years
Vegetable Oil
1 year
1-2 years
2 years
Coconut Oil
2 years
2 years
3 years
Sesame Oil
6 months (refined)
1 year
1-1.5 years
Sunflower Oil
6-12 months
1 year
1.5 years
Peanut Oil
1-2 years
2 years
2-3 years
Avocado Oil
9-12 months
1 year
1-2 years
Corn Oil
1 year
1-2 years
2 years
Walnut Oil
6-12 months
1 year
1-1.5 years
Grapeseed Oil
6-12 months
1 year
1.5 years
Flaxseed Oil
6 months
6 months
9 months
Key Points to Consider
Storage Conditions: Cooking oils should be stored in a cool, dark place to maximize their shelf life. Exposure to heat, light, and air can accelerate the degradation process.
Quality Check: Always check the oil before use, regardless of its age. Signs of spoilage include cloudiness, off odors, or a rancid taste.
Handling Tips: To extend the shelf life of oils, consider storing them in the refrigerator, especially those that are prone to rapid oxidation, such as flaxseed oil and walnut oil.
Understanding Oil Degradation
Cooking oils degrade primarily due to oxidation, a chemical reaction that occurs when oil is exposed to oxygen, leading to the formation of peroxides and free radicals. This can cause the oil to become rancid, affecting its flavor and nutritional quality, and potentially posing health risks if consumed.
Safety and Consumption
The “Estimated Unsafe Date Beyond (Unopened)” provides a conservative estimate of when an oil may start to become harmful if consumed. It is important to understand that while oils may not become unsafe immediately after their best-before dates, their quality, flavor, and nutritional value will degrade over time.
Shelf Life, Best Before, and Estimated Degradation Dates of Unopened Spices
This table offers a guideline for the storage of common unopened spices, highlighting how long they can be expected to retain optimal quality and when they might begin to lose their potency.
Table of Common Spices with Comprehensive Date Information (Unopened)
Spice
Shelf Life Under Ideal Conditions
Typical Best Before Date from Production
Estimated Degradation Date Beyond (Unopened)
Black Pepper
3-4 years
4 years
5 years
Cinnamon
3-4 years
4 years
5 years
Cumin
3-4 years
4 years
5 years
Paprika
2-3 years
3 years
4 years
Turmeric
3-4 years
4 years
5 years
Nutmeg
4-5 years
5 years
6 years
Ground Ginger
2 years
3 years
4 years
Cloves
4-5 years
5 years
6 years
Chili Powder
2-3 years
3 years
4 years
Oregano
2-3 years
3 years
4 years
Key Points to Consider
Storage Conditions: Spices should be stored in a cool, dry place to maximize their shelf life. Exposure to heat, light, and humidity can accelerate the loss of flavor and aroma.
Quality Check: Spices don’t generally become unsafe, but they do lose potency. It’s important to check if the spice still emits its characteristic aroma and provides flavor when used in cooking.
Handling Tips: To preserve freshness and extend the life of spices, consider transferring them to airtight containers if they aren’t already in one. Avoid using spices directly over steaming pots to prevent moisture from entering the container.
Understanding Spice Degradation
While spices do not spoil in the way that fresh produce or dairy does, they do degrade chemically. Over time, essential oils and volatile compounds that provide aroma and flavor dissipate, even under ideal storage conditions. The “Estimated Degradation Date Beyond” is a guideline for when a spice is likely no longer effective for culinary uses, not a safety hazard.
Shelf Life, Best Before, and Estimated Unsafe Consumption Dates of Unopened Over-The-Counter Medications
This table provides a guideline for the storage and safety of common unopened OTC medications, illustrating how long they can be expected to retain effectiveness and when they might become unsafe to use.
Table of Common Over-The-Counter Medications with Comprehensive Date Information (Unopened)
Medication
Shelf Life Under Ideal Conditions
Typical Best Before Date from Production
Estimated Unsafe Date Beyond (Unopened)
Acetaminophen (Tylenol)
4-5 years
5 years
6-7 years
Ibuprofen (Advil)
4-5 years
5 years
6-7 years
Aspirin
4-5 years
5 years
5-6 years after best before date
Loratadine (Claritin)
3-4 years
4 years
4-5 years
Diphenhydramine (Benadryl)
3-4 years
4 years
4-5 years
Cough Syrup
2-3 years
3 years
4 years
Antacid (Tums)
2-3 years
3 years
4 years
Hydrocortisone Cream
2-3 years
3 years
3-4 years
Nasal Spray
2-3 years
3 years
3-4 years
Omeprazole (Prilosec)
2-3 years
3 years
3-4 years
Key Points to Consider
Storage Conditions: Medications should be stored in a cool, dry place, away from sunlight and moisture to maximize their shelf life. Storing medications in bathrooms or kitchens where humidity and temperature fluctuate can accelerate degradation.
Quality Check: While many medications are safe to use after the expiration date, they may lose potency. It is crucial to consult with a pharmacist or healthcare provider regarding the safety and effectiveness of using expired medications.
Handling Tips: Always keep medications in their original packaging until use, and adhere to the storage instructions provided by the manufacturer. This helps maintain their efficacy and safety.
Safety Considerations: The “Estimated Unsafe Date Beyond” is particularly important for medications because using degraded products can lead to ineffective treatment or harm, especially in critical conditions.
Understanding Medication Degradation
Medications can degrade chemically over time, which might not only lead to reduced efficacy but also potentially harmful breakdown products. The dates provided are guidelines based on typical stability under ideal conditions, but it’s generally advisable to replace any critical medication that has passed its best before date to ensure maximum effectiveness and safety.
Consumer Fears and Expiration Dates: A Marketing Tactic to Boost Food Sales
In the landscape of modern grocery shopping, one of the most pervasive influences on consumer behavior is the fear of food spoilage and the associated health risks. Food manufacturers, aware of these consumer concerns, often use expiration dates as a marketing tool to accelerate the turnover of products on supermarket shelves and in consumers’ homes. This practice, while legal and largely accepted, raises ethical questions about the manipulation of consumer fears and the resulting increase in food waste.
The Role of Expiration Dates
Food product dating in the United States is not federally regulated, except for infant formula. Manufacturers use “sell by,” “best by,” and “use by” dates to suggest the period during which a product is at its peak quality. However, these dates are often conservative estimates, calculated to encourage consumers to consume products while they are fresh and to dispose of them the moment they pass these arbitrary thresholds.
Exploiting Consumer Fears
Many consumers misinterpret these dates as hard safety guidelines, which leads to significant food wastage. A study by the Natural Resources Defense Council (NRDC) suggests that up to 40% of the food in the United States goes uneaten, partly due to consumers discarding items that are past their labeled date but still safe to consume. This misunderstanding benefits food manufacturers and retailers by driving more frequent purchases. Consumers, fearing that their food might make them sick, prefer to err on the side of caution and thus buy more.
Marketing Strategies
Manufacturers and marketers do little to correct these misconceptions. On the contrary, they leverage them through advertising and in-store promotions that emphasize freshness and safety linked to consumption before the printed dates. This strategy taps directly into the zeitgeist of health and safety concerns, particularly powerful in driving consumer behavior.
Environmental and Economic Impact
The environmental impact of this practice is significant. Food production is resource-intensive, and when food is wasted, the water, labor, and energy invested in producing, transporting, and storing these goods are also wasted. Economically, consumers spend money on replacing food they might have otherwise consumed. At a time when many households are tightening their budgets, understanding the true meaning of expiration dates could lead to substantial savings and a reduction in unnecessary consumption.
The Medical Wonders of the Wild Plantain Plant
Often mistaken for a problematic weed, the plantain plant (Plantago major) has a fascinating history of medicinal properties ranging from a powerful antiseptic to treating high blood pressure and as a gentle digestive aid for those suffering from everything from IBS to heartburn. Where most people know the healing aspects of the Aloe Vera plant, plantain far exceeds it for the amount of medicinal uses and is far more readily available to find wild across all parts of North America.
The humble plantain is far from the tropical fruit that shares its name. This unassuming botanical, which can be found in nearly every corner of the globe, is hardy and grows prolifically in compacted soils often found in paths and along roadways—places where few other plants dare to thrive. Its ability to grow in such conditions speaks volumes about its tenacity and adaptability, traits that are mirrored in its healing capabilities and plays an important role in keeping soil from compacting too tightly.
What makes the plantain plant particularly appealing to those who lead a self-sufficient lifestyle is not only its medicinal properties but also its accessibility. It requires no cultivation and can be found in urban yards, rural fields, and everything in between. This ease of access makes it a first choice for natural care, providing relief without the need for commercial pharmaceuticals as well as should be a staple in your notes and knowledge in the case of a SHFT situation where commercial medicines may be impossible to find.
Plantain in your yard and fields can grow at a very low profile escaping the swath of a lawnmower blade.
Traditionally, plantain has been a go-to remedy for European, Native American, and Asian communities, among others. These cultures recognized the plant’s value early on and incorporated it into their folk medicine. The leaves were—and still are—used to create powerful poultices to soothe insect bites and stings, to heal wounds, and to halt infections. The seeds, less commonly used, are known for their use as a laxative or a soothing agent for ailments such as bronchitis.
The science behind these traditional uses is increasingly supported by modern research, which highlights the presence of active compounds such as aucubin and allantoin in the plant. These compounds are responsible for the plant’s anti-inflammatory, antimicrobial, and analgesic properties. Plantain’s ability to promote healing in the skin and tissues makes it an essential component of the natural healer’s toolkit, proving that sometimes the best remedies are those that nature readily supplies.
Genomic Traits of the Plantain Plant
Plantain’s genome is characterized by its compactness and efficiency, traits that are typical of many plants that thrive in disturbed habitats. The genetic makeup of plantain enables rapid growth and reproduction, critical traits for a plant that often grows in areas with high human activity, such as paths, fields, and roadsides.
The plant’s DNA contains genes that confer resistance to various stressors, including soil compaction, drought, and trampling. These genes regulate processes like root development, seed dispersal, and leaf structure, ensuring the plant can recover from or withstand environmental challenges.
Natural Adaptability to Multiple Environments
Research into plantain’s gene expression offers insights into its remarkable adaptability. The plant exhibits a flexible response to environmental changes, adjusting its metabolic pathways to optimize growth under different conditions. This includes altering levels of photosynthetic activity, root growth, and leaf structure to maximize energy absorption and minimize damage.
Plantain is a hardy plant that not only can grow in unforgiving places but actually seems to thrive in them as seen in this crack of sidewalk cement. Note the step and the large amount of seeds maturing which are excellent for using as an aid to indigestion.
Plantains Survival and Spread Mechanisms
One of the most interesting aspects of plantain’s genetic composition is its mechanisms for survival and spread:
Root System: Plantain has a fibrous root system that can quickly absorb water and nutrients from the soil, supporting rapid growth even in poor conditions.
Seed Production: The plant is a prolific seed producer, with each plant capable of producing up to 20,000 seeds annually. These seeds have a hardy outer shell, allowing them to remain viable in the soil for extended periods until conditions are favorable for germination.
Phenotypic Plasticity: Plantain exhibits a high degree of phenotypic plasticity, meaning it can alter its physical form in response to environmental factors. This plasticity is genetically regulated and allows plantain to optimize its growth strategy depending on the location and climate conditions.
The genetic traits of plantain not only benefit its survival but also have ecological implications. As a pioneer species, plantain can quickly colonize disturbed soils, preventing soil erosion and supporting the ecosystem’s recovery after disturbances. Its presence in diverse ecosystems underscores its role in ecological stability and as a keystone species in some regions.
Plantain is like a Pharmacy of Natural Healing Ingredients
The plantain plant has fascinated researchers, herbalists and natural medicine practitioners with its rich and truly diverse medicinal components that contribute to its health benefits.
Here’s a list of the key bioactive compounds found in plantain and their medicinal properties:
Allantoin
Medicinal Uses: Allantoin is a potent healing agent that promotes cellular growth and repair, which accelerates wound healing. It also soothes and protects the skin, making it beneficial for treating sunburns, minor cuts, and other skin irritations.
Aucubin
Medicinal Uses: This iridoid glycoside is noted for its strong anti-inflammatory and antimicrobial properties. Aucubin has been shown to protect against liver damage, reduce the risk of viral infections, and prevent oxidative stress within cells.
Mucilage
Medicinal Uses: The mucilage present in plantain acts as a demulcent, forming a protective layer over mucous membranes. This soothing action helps relieve irritation in the digestive system, making it effective against gastritis, heartburn, and indigestion. It also calms the respiratory tract, aiding in the treatment of coughs and sore throats.
Tannins
Medicinal Uses: Tannins have astringent properties that help tighten and constrict tissues, reducing swelling and stopping bleeding. They are particularly useful in managing diarrhea, healing wounds, and treating hemorrhoids.
Flavonoids (such as apigenin, baicalein, scutellarein, and luteolin)
Medicinal Uses: Flavonoids are powerful antioxidants that combat inflammation and oxidative stress. Their cardiovascular benefits include enhancing heart health by reducing hypertension and improving arterial health. They also have potential anti-cancer properties.
Polysaccharides
Medicinal Uses: These complex sugars enhance immune function and have significant anti-inflammatory effects, particularly in the gastrointestinal and respiratory systems, making them useful in managing conditions like IBS and asthma.
Iridoid Glycosides (including aucubin and catalpol)
Medicinal Uses: These compounds are known for their antioxidant properties, which help reduce inflammation and pain. They also support liver health and may have neuroprotective effects.
Coumarins
Medicinal Uses: Coumarins have anticoagulant properties that help improve blood flow and reduce the risk of forming harmful blood clots, potentially lowering the risk of strokes and heart attacks.
Oleanolic Acid
Medicinal Uses: This acid is effective against a variety of viruses and bacteria, supporting the body’s infection defense. It also has anti-inflammatory properties and has been studied for its potential in managing blood sugar levels.
Ursolic Acid
Medicinal Uses: Ursolic acid helps in wound healing and reducing inflammation. It is also being researched for its anticancer properties and its ability to help in weight management and muscle strength enhancement.
Practical Applications: Using Plantain for Medicinal Purposes
The plantain plant is versatile and can be used in various forms to address a range of health issues. Here are some of the most effective ways to prepare and use plantain for its medicinal benefits:
1. Making Poultices for Skin Irritations and Wounds
Preparation: To create a poultice, you’ll need fresh plantain leaves. Wash the leaves thoroughly, then crush them either by chewing them (traditional method) or using a mortar and pestle to release their juices. ( stone grinding tool in a small stone bowl )
Use: Apply the crushed leaves directly to the affected area—be it a cut, scrape, insect bite, or a rash. Cover with a clean cloth or bandage and let sit for several hours or overnight. This application can reduce inflammation, promote healing, and act as an antimicrobial agent.
2. Preparing Plantain Leaf Tea for Digestive and Respiratory Health
Preparation: Dry the plantain leaves, then crumble them into a tea infuser. Pour boiling water over about 1-2 teaspoons of the dried leaves per cup and steep for 10-15 minutes.
Use: Drink the tea up to three times a day to soothe mucous membranes in the digestive tract, relieve indigestion, or calm a sore throat and cough. The mucilage in the leaves helps coat and protect irritated tissues, providing relief.
3. Creating Salves for Anti-inflammatory and Healing Effects
Preparation: Infuse dried plantain leaves in a carrier oil (like olive oil or coconut oil) over low heat for several hours. Strain the leaves from the oil and mix the infused oil with beeswax to thicken it into a salve.
Use: Apply the salve to areas affected by skin irritations, psoriasis, or eczema. The salve can also be used on chapped lips or dry skin to moisturize and protect.
4. Crafting Tinctures for General Well-being and Immune Support
Preparation: Chop fresh or dried plantain leaves and place them in a jar. Cover the leaves with a high-proof alcohol (like vodka or brandy), ensuring they are completely submerged. Seal the jar and let it sit in a cool, dark place for about 4-6 weeks, shaking it periodically.
Use: Use a dropper to administer the tincture. It can be taken orally, typically 1-2 ml, three times daily. Tinctures are especially useful for their convenience and long shelf life. They can enhance immune function and provide systemic anti-inflammatory benefits.
5. Using Plantain as a Wash or Rinse
Preparation: Steep plantain leaves in hot water, similar to making tea, but in larger quantities.
Use: Once cooled, the infusion can be used as a wash for treating sunburns, cleaning wounds, or as a soothing soak for hemorrhoids. It can also be used as a hair rinse to promote scalp health and relieve itchiness.
Safety Considerations and Allergy Precautions
While plantain is generally considered safe for most people, it’s important to start with small doses to ensure there is no allergic reaction, especially when using it for the first time. Pregnant or breastfeeding women, or individuals on medication, should consult a healthcare provider before starting any new herbal treatment.
Cultivating and Growing Plantain from Seed
Choosing a Location
Plantain is not particularly picky about its growing environment. It thrives in full sun to partial shade and is adaptable to a wide range of soil types, though it prefers slightly moist, well-drained soil. Choose a spot in your garden that meets these conditions. If you’re limited on space or prefer container gardening, plantain also grows well in pots.
Soil Preparation
Although plantain can tolerate poor soil, it benefits from a little preparation. If your garden soil is heavy clay or sand, amend it with compost or aged manure to improve soil structure and nutrient content. This will encourage healthier growth and more prolific leaf production.
Sowing the Seeds
Plantain seeds are tiny, so they should be sown on the surface of the soil rather than buried. Follow these steps for sowing:
Timing: Plantain seeds can be sown in early spring as soon as the soil can be worked. In warmer climates, seeds can also be sown in the fall.
Method: Sprinkle the seeds lightly over the prepared soil. Press them gently into the surface without covering them with soil, as they need light to germinate.
Watering: Keep the soil evenly moist but not waterlogged. A light mist or sprinkle is ideal to avoid displacing the small seeds.
Germination
Plantain seeds typically germinate within two weeks, provided the soil temperatures are around 60-70°F (15-21°C). Keep the soil moist during the germination period.
Care and Maintenance
Once seedlings emerge and grow to a few inches tall, thin them to about 6 inches apart to allow ample room for growth. This spacing helps prevent overcrowding and promotes better air circulation, reducing the risk of fungal diseases.
Watering
Water the plants regularly, especially during dry spells, to keep the soil moist. Plantain does not require a lot of water, but consistent moisture will support healthy leaf production.
Weeding
Keep the area around the plantain free of weeds. Weeds compete for nutrients and water, so regular weeding will help your plantain thrive.
Fertilizing
Plantain generally does not require much fertilization, especially if grown in well-amended soil. However, an application of a balanced, slow-release organic fertilizer in the spring can encourage vigorous growth.
Harvesting
You can begin harvesting leaves as soon as they are large enough to use. Pick leaves from the outside of the rosette, allowing younger leaves in the center to continue growing. Plantain is a perennial, so with proper care, your plants will continue to produce for several years.
Winter Care
In colder climates, plantain plants will die back to the ground in winter but return in the spring. You can mulch around the plants with straw or leaves to protect the roots during severe cold.
The plantain plant is one of the most widespread medicinal herbs in the world. Its ability to adapt to various environments has enabled it to thrive across multiple continents.
Origin and Spread
Originally native to Europe and parts of Asia, plantain has spread extensively and is now found on every continent except Antarctica. It is particularly prevalent in temperate zones but adapts well to a range of climates, including tropical and subtropical regions.
North America
In North America, plantain was introduced by European settlers and quickly naturalized across the continent. It is commonly found in the United States and Canada, growing in every province and state. In these regions, plantain often appears in disturbed soils such as lawns, gardens, roadsides, and paths.
Europe
As a native species, plantain is ubiquitous across Europe, thriving from the Mediterranean climates of the south to the colder northern countries. It is often seen in meadows, fields, and urban areas where its resilience to foot traffic and compacted soils is highly beneficial.
Asia
In Asia, plantain is widespread across the continent, particularly in temperate and subtropical zones. It grows from the steppes of Russia to the temperate forests of Japan and South Korea, and southward to the warmer regions of India and Southeast Asia.
Australia and New Zealand
Plantain is also common in Australia and New Zealand, where it has adapted well to both countries’ varied climates. In New Zealand, it is considered a valuable species for pasture improvement and soil stabilization.
Africa
In Africa, plantain is found mainly in the northern and southern temperate zones. It grows in both wild settings and cultivated lands, used both as a medicinal herb and as a soil stabilizer.
South America
In South America, plantain grows in many areas, particularly in temperate Argentina and Chile. It is also found in the Andean regions, where it is used by indigenous peoples for its medicinal properties.
Adaptability and Resilience
One of the reasons for plantain’s widespread distribution is its remarkable adaptability. It can grow in a variety of soil types, though it prefers moderately fertile, moist soils. Plantain’s ability to withstand trampling makes it common in urban areas and along trails and roadsides, where it often forms dense mats.
Not just for Healing – the Plantain Plant has many other uses.
The plantain plant offers a range of values beyond its well-known medicinal uses. These include ecological benefits, nutritional content, and even applications in various cultural practices. Here’s an overview of some of these important values:
Ecological Benefits
Soil Stabilization: Plantain has a robust root system which helps prevent soil erosion. This trait makes it valuable for stabilizing soils in vulnerable areas such as slopes and riverbanks.
Biodiversity Support: Plantain serves as a food source and habitat for various wildlife, including insects and birds. The flowers attract pollinators like bees, while the seeds are eaten by some bird species.
Indicator Species: The presence of plantain often indicates compacted soil, making it a useful indicator species for soil health. Its ability to thrive in disturbed soils also helps in the early stages of ecological succession, preparing the ground for other plants to colonize.
Nutritional Value
Edible Uses: Plantain leaves are edible and can be used in salads, soups, and teas. They are rich in vitamins A and C, and are a good source of calcium.
Dietary Fiber: The seeds of the plantain are particularly high in fiber, which can aid digestion. They are similar to psyllium, a common fiber supplement, and can be used in a similar fashion to regulate bowel movements.
Cultural and Practical Uses
Culinary Practices: In various cultures, plantain leaves are used in cooking for wrapping food, imparting a subtle flavor while retaining moisture during cooking.
Natural Dye: The plant can be used to produce a green dye for textiles, which is valued in traditional crafts and sustainable fashion practices.
Traditional Crafts: In some cultures, plantain fibers are used to make thread or twine, which in turn is used for weaving or crafting small items.
Folklore and Symbolism: Plantain has a rich history in folklore, where it is often associated with healing and protection. In some traditions, carrying a plantain leaf is believed to ward off snakes.
Animal Feed: Plantain is also valuable as a forage plant for livestock. Its leaves are nutritious and palatable to many animals, making it a favored plant in natural grazing systems.
Environmental Monitoring
Phytoremediation: Plantain shows potential in phytoremediation, the use of plants to remove or neutralize contaminants like heavy metals from the soil. This makes it useful in reclaiming and restoring polluted sites.
These diverse uses highlight the versatility of the plantain plant, making it a valuable resource not only for its medicinal properties but also for its ecological, nutritional, and cultural contributions. Its widespread availability and ease of cultivation further enhance its utility in a variety of contexts.
El Niño’s Historical Impact on the Coming Garden Season.
Preparing for El Niño 2024:
A Comprehensive Guide for Homestead Gardeners in North America
As El Niño fades away in 2024, understanding its impact on specific North American growing regions is worth considering for homestead gardeners. El Niño characterized by the warming of ocean waters in the equatorial Pacific, influences weather patterns globally, especially in North America. This article provides a detailed overview of expected conditions in various regions and offers tailored advice for gardeners.
El Niño’s Post Impact on North American Weather Patterns
El Niño generally results in altered weather patterns across North America in the year following its occurrence :
Western Canada and the Pacific Northwest: Typically, these areas experience drier and warmer winters during El Niño. Gardeners should prepare for reduced snowpack and potential drought conditions, impacting water availability for spring and summer.
California and the Southwest U.S.: Increased precipitation is a common effect, which could lead to early spring planting opportunities but also raises concerns about flooding and soil erosion.
Midwest and Central U.S.: The region may see a mix of impacts, from warmer temperatures to increased moisture. This variability requires gardeners to be flexible in planting dates and crop choices.
Northeastern U.S. and Eastern Canada: These areas might experience milder winters, potentially extending the growing season but also increasing the likelihood of pests and diseases due to warmer temperatures.
Southeastern U.S.: Expect cooler and wetter conditions, which could benefit spring crops but also challenge pest management and disease control.
Regional Gardening Predictions for 2024
For each region, specific gardening strategies can optimize productivity during El Niño:
Western Canada and the Pacific Northwest:
Invest in water conservation measures such as rainwater harvesting and drip irrigation.
Consider drought-resistant plant varieties and adjust planting schedules to capitalize on warmer winter temperatures.
California and the Southwest U.S.:
Prepare for excessive rainfall with proper soil drainage strategies to prevent erosion.
Start seedlings indoors to avoid external weather impacts before transplanting.
Midwest and Central U.S.:
Utilize cover crops to manage increased soil moisture and prevent nutrient leaching.
Be ready to adjust planting times based on the onset of warmer spring temperatures.
Northeastern U.S. and Eastern Canada:
Extend the growing season by using cold frames and hoop houses to protect against unexpected late cold snaps.
Increase monitoring and control measures for pests that thrive in milder winters.
Southeastern U.S.:
Focus on crops that benefit from cooler, wetter conditions, such as leafy greens and brassicas.
Employ raised beds and row covers to manage excessive moisture and protect against cooler snaps.
Historical Patterns of First and Last Frost for Post El Niño Years
Incorporating detailed information on the impact of El Niño on last and first frost dates across various North American regions will help gardeners in planning and protecting their crops more effectively. Here’s how El Niño could influence these important gardening dates:
Western Canada and the Pacific Northwest
Historically, El Niño brings milder winters to this region. Gardeners can expect a later first frost in the fall and an earlier last frost in the spring, extending the growing season. However, the reduced precipitation might require adjustments in water management strategies.
California and the Southwest U.S.
El Niño typically results in wetter conditions for these areas, which might lead to delayed last frost dates in the spring. The increase in cloud cover and precipitation could keep temperatures moderate longer, affecting when the first frost occurs in the fall.
Midwest and Central U.S.
In the Midwest, El Niño is associated with warmer winter temperatures, potentially leading to an earlier end to frost periods in the spring. This could allow for earlier planting and extended growing seasons. However, variability is a key factor, and specific local conditions can differ.
Northeastern U.S. and Eastern Canada
This region might experience milder winters during an El Niño year, leading to an earlier spring thaw and later onset of frost in the fall. This could benefit gardeners by providing a longer period for planting and harvesting.
Southeastern U.S.
The Southeastern U.S. tends to see cooler and wetter conditions, which might delay the warming of soil in spring, potentially extending the frost dates later than usual. Gardeners should be prepared for a shorter growing season in spring but might enjoy an extended fall growing season if the first frost is delayed.
Understanding What Causes El Niño
El Niño is a complex weather phenomenon that arises from interactions between the ocean and the atmosphere in the tropical Pacific. It involves several key components:
1. Ocean Temperature Changes
El Niño is primarily characterized by unusually warm ocean temperatures in the central and eastern equatorial Pacific Ocean. Normally, trade winds blow from east to west across the tropical Pacific, pushing warm surface water toward Asia. During El Niño, these winds weaken, and sometimes reverse, allowing warm water to flow back toward the east, toward the coast of South America.
2. Atmospheric Changes
As the warm water shifts eastward, it affects atmospheric pressures. The typical high pressure over the eastern Pacific and low pressure over the western Pacific weaken or reverse. This shift disrupts the normal patterns of tropical precipitation and atmospheric circulation, causing weather changes not only in the Pacific region but globally. This is part of a larger oscillation known as the Southern Oscillation.
3. Thermocline Variations
The thermocline, which is the layer of water in the ocean that separates warmer surface water from cooler deep water, also plays a role. During El Niño, the thermocline in the eastern Pacific becomes shallower than normal, contributing to the warming of surface waters because less cool, deep water rises to the surface.
4. Feedback Loops
El Niño involves feedback loops between the ocean and atmosphere. For example, as the ocean warms, it can cause the air above it to warm as well; warm air holds more moisture, which can alter atmospheric pressures and wind patterns further, enhancing the initial warming.
5. Global Impact
The redistribution of warm water and changes in the atmosphere affect global climate patterns. These can include increased rainfall in parts of the Americas, drought in the western Pacific, and varied impacts such as storms and temperature anomalies in other parts of the world.
Triggering Factors
The exact triggers of El Niño are still a subject of research. It’s believed to start from small temperature fluctuations in the Pacific Ocean, which are amplified by the interactions between the ocean and the atmosphere. Changes in wind patterns might also initiate the onset of an El Niño event.
El Niño events typically occur every 2 to 7 years and can vary in intensity. The complex interplay of these factors makes predicting the onset and impacts of El Niño events challenging but crucial for preparing for its wide-ranging effects on weather, agriculture, and ecosystems worldwide.
For more detailed information, the National Oceanic and Atmospheric Administration (NOAA) provides extensive resources and updates on El Niño and its impacts. You can visit their website to learn more about current conditions and research.
Historical El Niño Occurrences
El Niño events have been observed and recorded over many years, showing a pattern of occurrence roughly every two to seven years. These events can last from nine months up to two years.
Year
Intensity
Status
1900
Weak
Ended
1902
Weak
Ended
1905
Weak
Ended
1908
Moderate
Ended
1911
Weak
Ended
1914
Weak
Ended
1918
Strong
Ended
1923
Weak
Ended
1925
Strong
Ended
1929
Weak
Ended
1932
Moderate
Ended
1939
Moderate
Ended
1941
Strong
Ended
1946
Moderate
Ended
1951
Moderate
Ended
1953
Weak
Ended
1957
Strong
Ended
1965
Moderate
Ended
1969
Weak
Ended
1972
Strong
Ended
1976
Weak
Ended
1982
Very Strong
Ended
1986
Moderate
Ended
1991
Strong
Ended
1994
Weak
Ended
1997
Very Strong
Ended
2002
Moderate
Ended
2004
Weak
Ended
2006
Weak
Ended
2009
Weak
Ended
2014
Strong
Ended
2016
Moderate
Ended
2023
Strong
Peaked, Weakening
This table captures each El Niño event by year, intensity, and its current status, with the latest event in 2023 described as having peaked and now weakening.
Additionally, historical records from sources like Golden Gate Weather Services offer a detailed listing of El Niño and La Niña years based on the Oceanic Niño Index, which is widely used by NOAA for classifying these events. This list is regularly updated and includes detailed annotations about the intensity of each event.
For those interested in a more visual representation, NOAA’s PMEL website provides graphics showing the sea surface temperature along the equator in the Pacific Ocean, indicating the deviations from normal temperatures that characterize El Niño and La Niña events.
To explore these resources further, you can visit the following links:
These sources will give you a comprehensive view of the historical patterns of El Niño and La Niña, enhancing your understanding of these significant climatic events.
Current El Niño Status
The latest data indicates that the El Niño event that started in 2023 peaked during November 2023 to January 2024 and is currently in the process of weakening. Although it was expected to persist at least until April 2024, the probability of El Niño conditions continuing is now diminishing. By mid-April 2024, there’s a high likelihood (65%) that conditions will transition to ENSO-neutral, and this is expected to persist into mid-2024. Furthermore, there is a forecast indicating a potential shift towards La Niña conditions starting around June to August 2024, with increasing probabilities later in the year (iri.columbia) (World Meteorological Organization) (World Meteorological Organization).
Optimizing Your Soil for this Years Beet Harvest
To maximize the yield and quality of your beet harvest, paying close attention to the scientific aspects of soil conditions is essential. Here’s a deeper dive into the factors that influence optimal soil conditions for growing beets:
Soil Texture and Structure
Beets prefer loamy soil, which is a balanced mixture of sand, silt, and clay. This type of soil supports healthy root development due to its ability to retain moisture and nutrients while still providing adequate drainage. Heavy clay soils can be amended with organic matter such as compost or rotted leaves to improve drainage and aeration. If the soil is too sandy, adding organic material can help increase its water-holding capacity and nutrient retention.
pH Level and Nutrient Availability
The ideal soil pH for beets ranges from 6.0 to 7.5. A pH within this range ensures that nutrients are readily available for uptake by the plants. Beets are particularly sensitive to boron deficiency, which is common in alkaline soils. Symptoms of boron deficiency include blackened heart tissue and stunted root growth. Soil testing is recommended to accurately assess the pH and nutrient levels, including boron, before planting. If necessary, pH can be adjusted using lime (to raise pH) or sulfur (to lower pH) (You Should Grow).
Organic Matter and Fertility
Incorporating organic matter into the soil not only improves its texture and fertility but also enhances its microbial activity, which is beneficial for beet growth. Organic matter, such as compost, provides a slow-release source of nutrients, which is ideal for beets that prefer not to be over-fertilized with nitrogen. Excessive nitrogen can lead to lush foliage at the expense of root development. Additionally, organic matter increases the soil’s cation exchange capacity (CEC), which improves its ability to hold onto essential nutrients like potassium and magnesium, crucial for the healthy development of beet roots (How To Grow Everything) (The Garden Magazine).
Moisture Management
Beets require consistently moist soil to develop well-formed roots. The soil should be moist but not waterlogged, as excessive water can lead to root rot. The use of organic mulches can help maintain soil moisture and regulate soil temperature, reducing the stress on beet plants during hot weather. Mulching also helps prevent the crusting of the soil surface, which can hinder the emergence of young beet seedlings (The Garden Magazine).
The Ultimate Guide to Potato Varieties
From Kennebec to Burbank Russet, a look at 10 types of potatoes, their characteristics and how they fit into your planting strategy for your homestead.
The Ultimate Guide to Selecting and Growing Potato Varieties
Potatoes are more than just a staple food; they are a culinary delight that varies significantly in flavor, texture, and color. This guide to ten popular potato varieties will help you choose the right type for your cooking needs but also provide essential tips for growing them in your garden.
Whether you’re a seasoned gardener looking to expand your crop diversity or a home chef eager to explore different flavors, this article offers valuable insights into each variety’s characteristics, culinary uses, and optimal growing conditions. Explore the versatile Kennebec, the creamy Yukon Gold, and the striking Purple Peruvian, among others, and learn how to nurture and harvest these beloved tubers to perfection.
1. Kennebec: A Versatile Favorite
Description and Best Use
Kennebec potatoes are celebrated for their smooth skin and creamy texture, making them versatile for frying, baking, and mashing.
Origin & Trivia
Originating from Maine, named after the Kennebec River, this variety was introduced in the 1940s and is loved for its adaptability to various climates and soil types.
Kennebec Potato Growing Tips
Plant in well-drained soil and water regularly, especially during tuber formation, to ensure optimal growth.
Harvesting and Storage
Kennebec potatoes mature in about 80-100 days and store excellently through winter if kept in cool, dry conditions.
Planting and Growing Zones
Ideal for USDA zones 3-9, plant these in early spring once the frost has passed.
2. Yukon Gold: The Golden Standard
Description and Best Use
With its fine-grained, buttery yellow flesh, Yukon Gold is great for boiling, baking, and making creamy mashed potatoes.
Origin & Trivia
Developed in Canada in the 1960s, these potatoes are named for their golden color and the Yukon River.
Yukon Gold Potato Growing Tips
These prefer slightly acidic, well-drained soil. Keep the soil consistently moist with regular watering.
Harvesting and Storage
They are ready for harvest in about 90-100 days and have a moderate storage life.
Planting and Growing Zones
Thrives in zones 1-9, plant in early spring for a full growing season.
3. Russian Banana Fingerling: Perfect for Gourmet Dishes
Description and Best Use
Known for its waxy, yellow flesh, this banana-shaped potato is excellent for boiling and roasting.
Origin & Trivia
This variety comes from the Baltic region of Northeast Europe and is named for its elongated shape.
Banana Russian Fingerling Growing Tips
It thrives in sandy loam soils and requires consistent moisture without overwatering.
Harvesting and Storage
Ready to harvest in about 90 days, it stores well under proper conditions.
Planting and Growing Zones
Plant these after the last frost in zones 3-8.
4. Magic Molly: Visually Stunning
Description and Best Use
Magic Molly potatoes retain their deep purple color when cooked, making them ideal for vibrant dishes.
Origin & Trivia
Originated in Alaska and named after the breeder’s daughter, Molly.
Magic Molly Potato Growing Tips
Requires fertile, well-drained soil rich in organic matter.
Harvesting and Storage
Takes about 100 days to mature, with fair storage durability.
Planting and Growing Zones
Plant in spring when the soil temperature reaches at least 45°F, suitable for zones 3-9.
5. German Butterball: A Flavorful Heirloom
Description and Best Use
This potato has rich, golden, buttery flesh, making it superb for roasting and mashing.
Origin & Trivia
An old-world variety likely from Germany, prized for its flavor.
Growing Tips
Plant in deep, loose soil and hill as plants grow to ensure healthy tubers.
Harvesting and Storage
Matures in 90-120 days, known for its excellent storage life.
Planting and Growing Zones
Ideal for early spring planting in zones 3-9.
6. Red Pontiac: The Versatile Choice
Description and Best Use
Red Pontiacs have red skin and waxy white flesh, perfect for boiling and baking.
Origin & Trivia
Developed in Florida in the 1940s and named after the Pontiac tribe.
Growing Tips
Best grown in full sun and well-drained soil with moderate watering.
Harvesting and Storage
Ready in about 80-90 days, suitable for medium-term storage.
Planting and Growing Zones
Plant in spring to maximize growth, suitable for zones 3-10.
7. Purple Peruvian: The Nutty Heirloom
Description and Best Use
With deep purple skin and flesh, it adds a unique twist to traditional dishes.
Origin & Trivia
Direct descendant of Andean potatoes cultivated by the Incas.
Growing Tips
Prefers cooler climates and well-drained, fertile soil.
Harvesting and Storage
Usually matures in 70-90 days, best used soon after harvest.
Planting and Growing Zones
Best in zones 3-8, plant after frost risk has passed.
8. Elba: The Disease-Resistant Stalwart
Description and Best Use
Known for its disease resistance and excellent storage qualities, great for boiling and mashing.
Origin & Trivia
Named after Elba, New York, where it was developed.
Growing Tips
Requires rich, well-drained soil and frequent watering during dry spells.
Harvesting and Storage
Matures in about 80-100 days, one of the best for long-term storage.
Planting and Growing Zones
Plant early in spring as soon as the soil is workable, suitable for zones 3-9.
9. Lehigh: The High-Yield Variety
A small pile of potatoes freshly dug from the ground.
Description and Best Use
Offers high yields and storability, with light yellow flesh suitable for mashing and general cooking.
Origin & Trivia
Developed at Penn State University, named after Lehigh County in Pennsylvania.
Growing Tips
Requires full sun and moist, well-drained soil.
Harvesting and Storage
Ready in about 90 days, maintains quality for several months.
Planting and Growing Zones
Plant in early spring, zones 3-9.
10. Burbank Russet: The Fast Food Favorite
Description and Best Use
A classic choice for fluffy mashed potatoes and French fries due to its fluffy texture.
Origin & Trivia
Developed by Luther Burbank in the early 20th century, it’s a staple in the fast-food industry.
Growing Tips
Needs loose, well-aerated soil and regular feeding to prevent waterlogging.
Harvesting and Storage
About 90-100 days to harvest with excellent long-term storage capabilities.
Planting and Growing Zones
Best planted in early spring, thrives in zones 4-9.